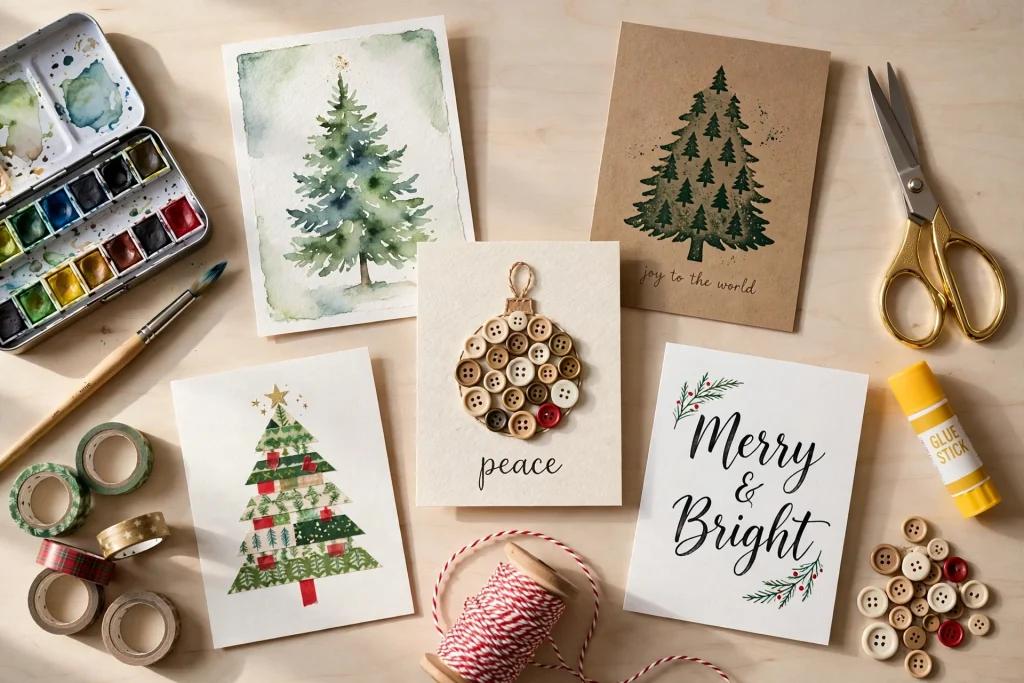
What's Inside This Guide
ToggleThe Card My Mother Kept on the Mantel for Three Years
The first Christmas card I ever made was not good. I was nine, the paper was thin, the green marker had bled through to the back, and the tree I drew leaned so far to the left it looked like it was trying to walk off the card. My mother put it on the mantel anyway, right next to the store bought cards from relatives, and it stayed there all season. The next year, when she took the decorations down, she put my card in a drawer instead of the bin. Two years later I found it again, still in that drawer, the marker a little faded but the tree still leaning.
That is the thing about christmas cards handmade at home. Nobody keeps them because they are perfect. They keep them because someone sat down and made them. A store bought card says you remembered. A handmade card says you stopped what you were doing and thought about that person for twenty minutes. People can feel the difference, even if they never say it out loud.
I have been making my own cards ever since, and christmas card making has taught me a few things the hard way. The first is that simple beats fancy every single time. A single watercolor tree on a white card looks better than a card with glitter, ribbon, three stickers, and a poem crammed into the corner. The second is that making cards in a batch is the only sane way to do it. Pick two or three designs, set up an assembly line, and do all the painting first, then all the gluing, then all the writing. The third is that the inside matters more than the front. One honest sentence, something that actually happened this year, is worth more than any design on the cover.
This list is the result of years of trial and error at my kitchen table. Every idea here is one I have made myself or watched someone make with their own hands. Nothing needs a machine, nothing needs a degree in art, and most of them cost less than a dollar a card. Some take three minutes. The longest takes about half an hour, and only once you have done it a couple of times. Pick the ones that fit your time and your list, and start with the easy ones. Your mantel will thank you.
Table of Contents
- The 3 Things That Make a Handmade Card Look Good
- Painted Cards (Ideas 1 to 5)
- Paper and Tape (Ideas 6 to 9)
- Stamps and Lettering (Ideas 10 to 13)
- Texture and Nature (Ideas 14 to 18)
- Pop-Ups, Photos, and Fun (Ideas 19 to 22)
- The 1-2-3 Card Method
- At a Glance
- Do This Not That
- Your Christmas Card Weekend
- Take It Further
- Designer’s Cheat Sheet
- Questions People Ask
The 3 Things That Make a Handmade Card Look Good
Before you buy a single sheet of cardstock, it helps to know what you are actually aiming for. After years of making cards that looked great and cards that looked like a craft store exploded on them, I have landed on three things. Every one of the christmas card ideas in this list comes back to these three things. If a card has all three, it looks good. If it is missing one, no amount of glitter will save it.
One focal point, and room around it
Every good card has one thing to look at. One tree, one wreath, one word, one snowflake. Everything else is space. When you put three or four decorations on a small card, the eye does not know where to rest and the whole thing looks busy. When you put one beautiful thing in the middle with clean space around it, the card looks intentional, like you meant every bit of it. This is the single biggest difference between a card that looks handmade in a good way and a card that looks messy. Pick your one thing, place it with care, and stop there.
Good paper, cut clean
The paper is half the card. Cheap thin paper bends, bleeds, and makes even a lovely painting look like a school project. Cardstock between 200 and 300 gsm (about 80 to 110 lb) stands up on a mantel, takes watercolor without buckling, and feels like something worth keeping when you hold it. White is the safest choice because every color looks clean on it. Cream is warmer and suits calligraphy and pressed greenery. Kraft is rustic and perfect for fingerprint cards and twine. Buy blank card blanks with envelopes already matched, or cut your own from full sheets and buy the envelopes first so you know the size fits. A clean cut matters too. Use a paper trimmer or a sharp craft knife with a ruler, not scissors, for the edges. A straight edge makes the whole card look more professional before you have drawn a single line.
One real sentence inside
The front of the card gets all the attention, and then people freeze at the blank inside. Here is what works: one specific sentence about the actual year. Not “hope you have a great holiday.” Something real. “I still think about that snowstorm dinner at your place in February.” “Thank you for the soup when I was sick in March.” “I am so proud of what your daughter did this year.” That one sentence is what makes the card a keepsake instead of a decoration. Write it before you decorate the inside, so you know how much room you need, and write it by hand. Your handwriting is part of the gift.
Painted Cards
Paint is the most forgiving way to start. Watercolor especially is kind to beginners, because the soft edges and the way colors bleed into each other look intentional even when you are not sure what you are doing. These five watercolor christmas cards need nothing more than a basic set, a medium brush, and a cup of water.
1. Watercolor Wash Christmas Tree
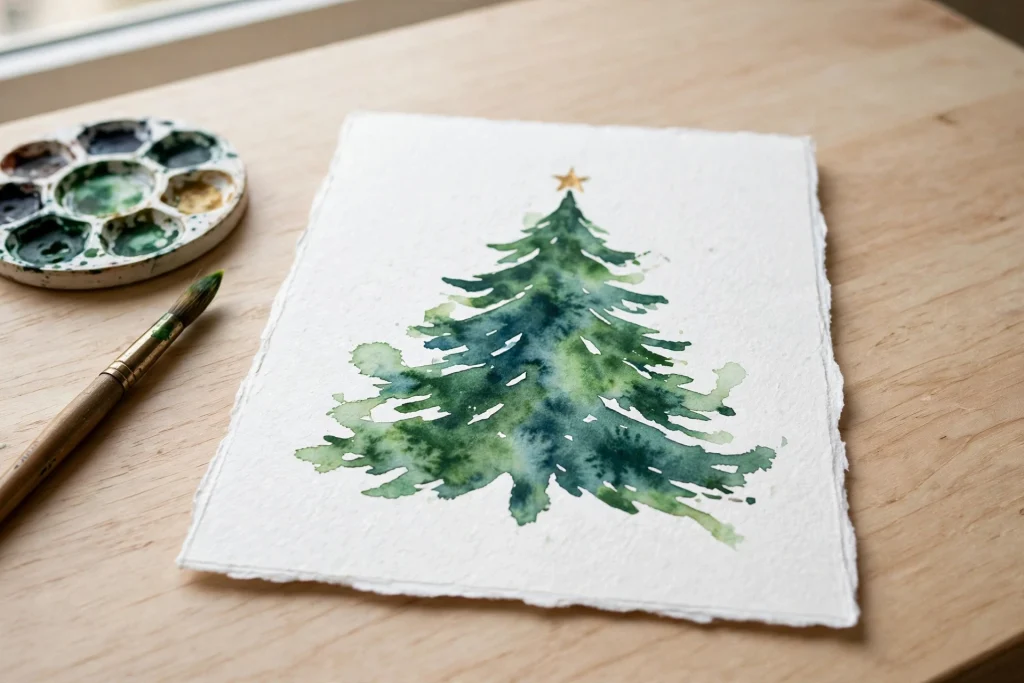
This is the card I make when I want something beautiful with almost no supplies. I paint a loose triangle of green watercolor on white cardstock, no outline, no perfection, just a few brushstrokes that suggest a tree, and I let it dry completely before I add a tiny gold star at the top. The wash does the work. The edges bleed a little, the green is darker at the bottom and lighter at the top, and it looks like a real painting because it is one.
You need white cardstock, a basic watercolor set, a medium round brush, and a gold star sticker or a dot of gold paint. Wet the brush, load it with green, and paint a triangle in three or four strokes, wider at the bottom, narrower at the top. Leave a little white space between the strokes so the paper shows through. Let it dry flat for about ten minutes. Then add the star. That is the whole card. Five minutes per card once you have done one, and each one comes out slightly different, which is exactly why people love them.
Best for: anyone who has never painted before. Time: about 5 minutes per card. Cost: under a dollar.
You may also like: 21 Cozy Christmas Living Room Decor Ideas That Make Your Home Feel Magical
2. Watercolor Night Sky with a Silhouette Tree
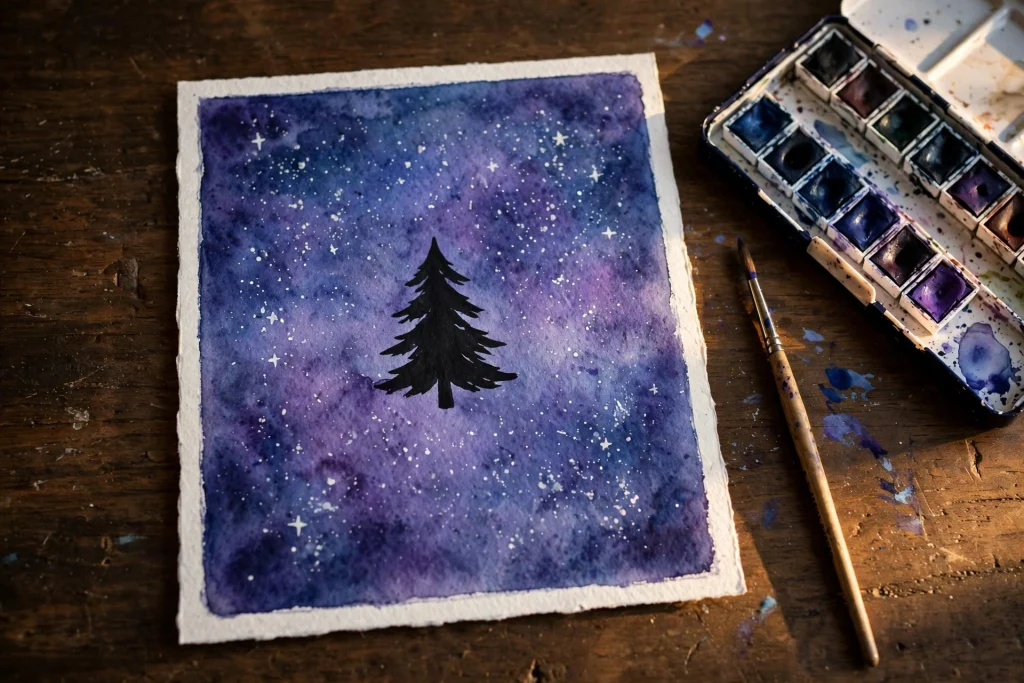
This one looks far harder than it is, and it is the card that gets the most compliments on my mantel every year. You paint a wash of deep blue or purple across the whole card for a night sky, let it dry, then paint a simple black silhouette over it. A tree, a row of houses with lit windows, a reindeer, a star. The contrast does everything. The dark sky makes the black shape look sharp, and the whole thing reads as art.
You need white or cream cardstock, watercolors in deep blue and purple, a medium brush, black paint or a black marker, and a fine brush or a gold pen for the windows. Paint the sky first, wet on wet, and let the blue and purple bleed into each other. Add a sprinkle of white paint flicked from the brush for stars while the wash is still damp. Wait until it is fully dry, about fifteen minutes, then paint your silhouette in black. Keep the shape simple. A triangle tree with a round ornament or two, or three little houses in a row. Add tiny gold dots for windows. Ten minutes of painting, fifteen minutes of drying, and you have a card that looks like it came from a shop.
Best for: someone who wants a card that looks impressive but takes little skill. Time: about 10 minutes per card plus drying. Cost: under a dollar.
You may also like: Living Room Decor Ideas That Feel Cozy and Clean
3. Gold Watercolor Ornament Cards
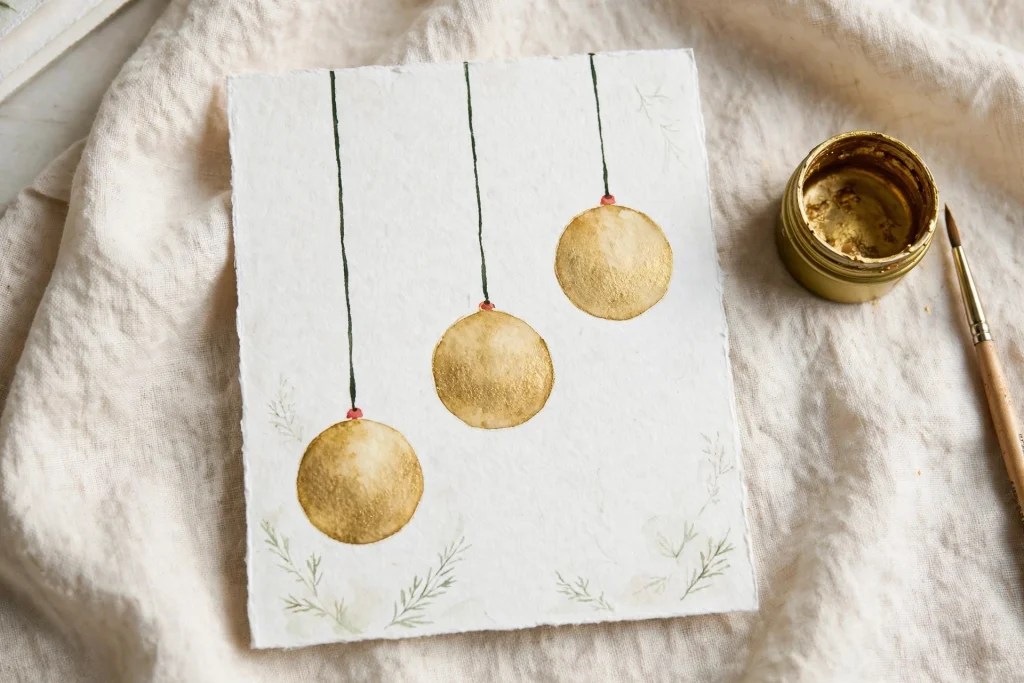
This is the simplest card on the list and one of the prettiest. You paint a few round ornaments in gold watercolor on a white card, hang them from thin lines drawn in a fine marker, and add a tiny bow or a dot of red at the top of each one. The gold paint catches the light when the card moves, and the whole design feels calm and expensive. I make these for the people on my list who like things simple and elegant.
You need white cardstock, gold watercolor or metallic gold paint, a fine black or dark green marker, and a small brush. Draw three or four thin vertical lines down from the top of the card, at different lengths. Paint a circle at the bottom of each line, about the size of a coin. Let the gold dry, then add a tiny red dot or a small bow where the line meets the circle. That is it. The trick is spacing. Leave more white space than you think you need. The emptiness is what makes the gold look special.
Best for: elegant, minimal cards for colleagues or older relatives. Time: about 5 minutes per card. Cost: under a dollar.
You may also like: Wall Decor Ideas That Look Clean and Modern
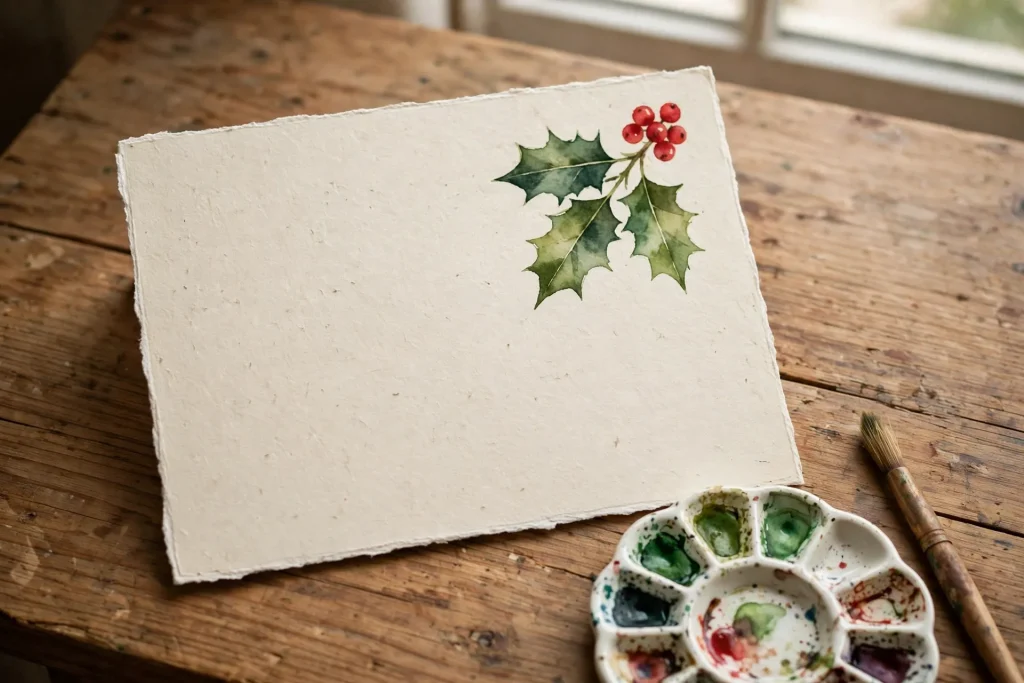
4. Watercolor Holly and Berries
Holly is one of those shapes that is hard to get wrong. The leaves are spiky and uneven in real life, so a slightly wobbly painted leaf looks right. This card is a sprig of holly across one corner of the card, painted in two greens with a cluster of red berries, and nothing else. It suits people who like traditional Christmas colors without a big busy design.
You need white or cream cardstock, watercolors in two greens and a red, and a medium brush. Paint three or four holly leaves fanning out from one corner, using a darker green on one side of each leaf and a lighter green on the other. The leaves are pointed ovals with little spikes, and you do not need to be neat about the spikes. Add a cluster of three red berries where the leaves meet. Let it dry flat. If you want, write “Merry Christmas” in a fine marker underneath, or leave it blank and let the holly speak. Eight minutes per card, and the design is forgiving enough that your fifth card will look better than your first, which is half the fun.
Best for: traditional tastes, and anyone who likes botanical designs. Time: about 8 minutes per card. Cost: under a dollar.
You may also like: 7 Entryway Ideas That Make Your Home Feel Put Together Instantly
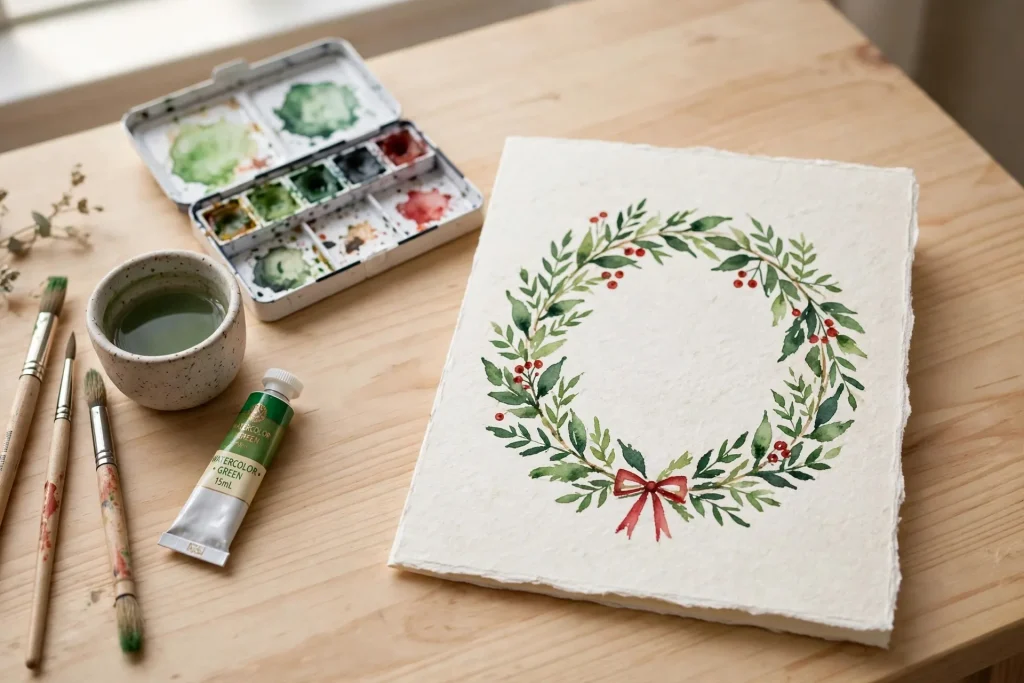
5. Loose Watercolor Wreath
A wreath is just a circle of leaves, and when you paint it loosely it looks soft and alive. This card has a green watercolor wreath in the middle, painted as a ring of small brushstrokes, with a few red berries tucked in and a small bow at the bottom. It is the most forgiving of the watercolor christmas cards here because a wreath is supposed to look a little wild. No two will match, and that is the point.
You need white cardstock, green watercolor in two shades, red watercolor or a red pen for the berries, and a medium brush. Lightly draw a circle in pencil as a guide, then paint short leaf strokes around the circle, overlapping a little, alternating the two greens. Add five or six red dots for berries, spaced unevenly. Erase the pencil line once dry, or leave it, it will not show through the paint. Tie a tiny bow from red ribbon or draw one in the same red, and glue or draw it at the bottom of the wreath. Ten minutes per card, and you can make a whole set in an evening while a film plays in the background.
Best for: a relaxed evening of card making with friends. Time: about 10 minutes per card. Cost: under a dollar.
You may also like: Mirror Wall Decor Ideas That Make Your Living Room Feel Bigger and Better
Paper and Tape
If paint is not your thing, paper is. These christmas card ideas need scissors, glue, and a steady hand, not a brush. They are fast, they are cheap, and they are the ones children can help with, which makes them twice as fun to make.
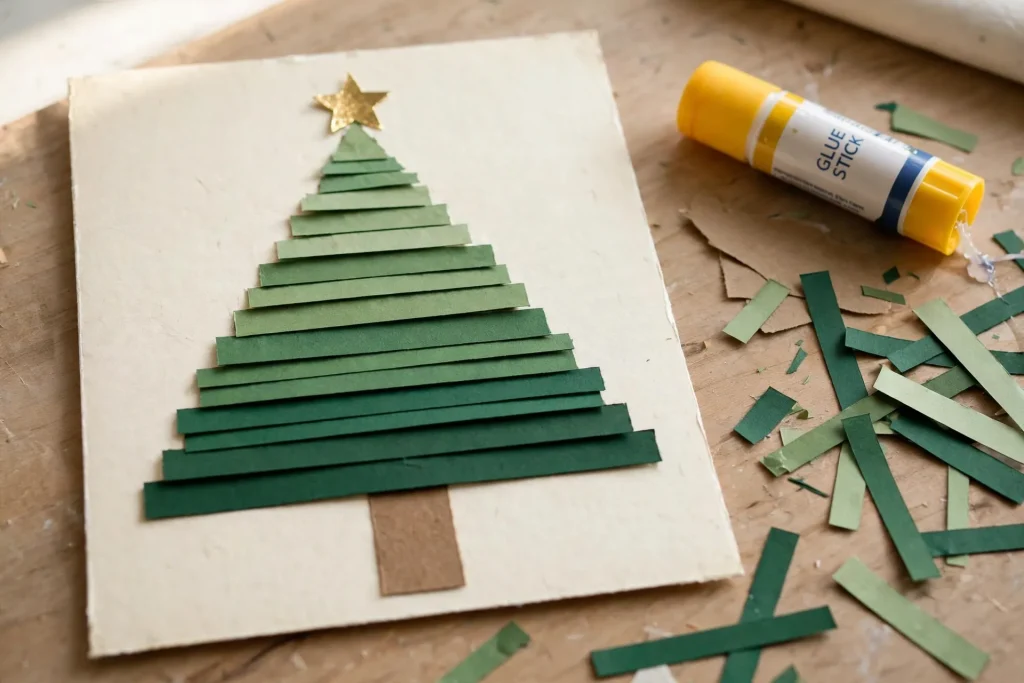
6. Paper Strip Christmas Tree
Cut green paper into strips that get shorter as you go, then glue them across the card from the longest at the bottom to the shortest at the top. That is the whole design, and it looks wonderful. The strips give the tree texture and depth, and the white gaps between them read as snow. Add a star at the top and a small brown rectangle as the trunk, and you are done.
You need white cardstock, green paper in two or three shades, a paper trimmer or ruler and craft knife, glue, and a star sticker. Cut six or seven strips, each one a little shorter than the last. Glue them horizontally across the card front, longest at the bottom, leaving a small gap between each strip. Add the star and the trunk. The whole card takes about eight minutes, and it is a good one to make in a batch because you can cut all the strips for ten cards at once and then assemble them like a production line.
Best for: making a lot of cards fast, and for crafting with children. Time: about 8 minutes per card. Cost: under a dollar.
You may also like: Cozy Studio Apartment Ideas That Make Small Spaces Feel Bigger and Warmer
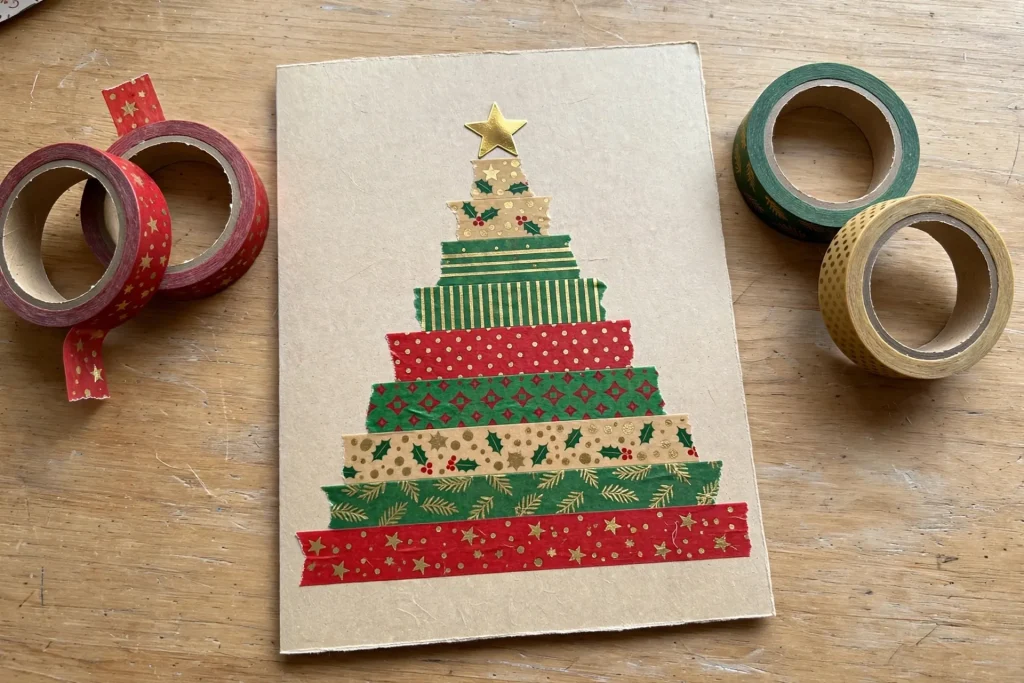
7. Washi Tape Christmas Tree
Washi tape is the lazy crafter’s best friend, and a washi tape tree is the fastest genuinely cute card on this list. You tear or cut strips of patterned washi tape in decreasing lengths and lay them horizontally on the card front to form a tree shape, finishing with a star sticker at the top and a small rectangle of brown tape as the trunk. It takes three minutes, it mails flat with a regular stamp, and it looks cheerful and modern.
You need white or kraft cardstock, two or three rolls of patterned washi tape in Christmas colors, and a star sticker. Lay the longest strip at the bottom, then shorter and shorter strips above it, leaving a small gap between each. Press the tape down firmly, especially at the edges, so it does not lift in the envelope. Add the star and the trunk. If your tape is very patterned, keep the rest of the card plain. One greeting on the front is enough. This is the card to make when you have twenty people on your list and one evening to do them all.
Best for: a big list and a short evening. Time: about 3 minutes per card. Cost: under a dollar.
You may also like: 7 Easy Desserts Anyone Can Make at Home (No Fancy Skills Needed)
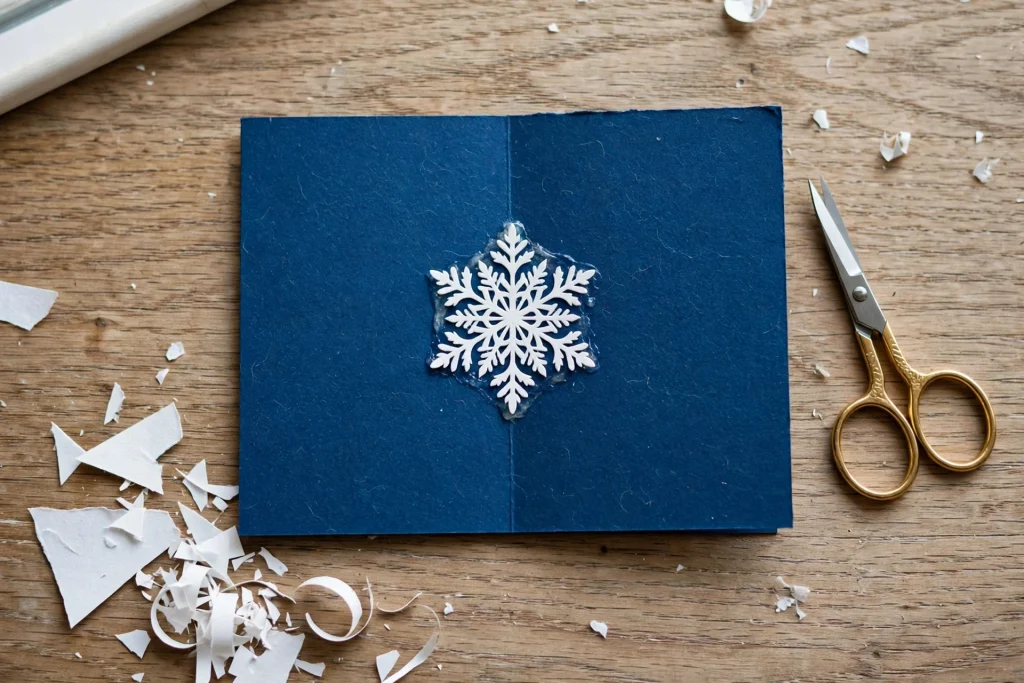
8. Layered Paper Cut Snowflake
A snowflake cut from white paper and layered onto a colored card is one of the oldest christmas card designs, and it still works because it is so clean. You fold a square of white paper, cut small triangles and curves into the folded edges, open it up, and you have a snowflake that no one else has. Glue it onto a deep blue or dark green card, and the white against the dark color looks crisp and wintry.
You need colored cardstock in dark blue or green, white paper, scissors, and glue. Fold the white square in half, then in half again, then into a triangle. Cut small shapes out of the folded edges, a few triangles, a few small curves, and be careful not to cut all the way across or the snowflake falls apart. Open it slowly and press it flat under a book for a minute. Glue it to the center of the card. Add a tiny silver dot in the middle if you like. Ten minutes per card, and every snowflake is different, which is a nice thing to tell the person who receives it.
Best for: a quiet, pretty card for anyone. Time: about 10 minutes per card. Cost: under a dollar.
You may also like: How to Style a Boho Apartment: A Complete Guide to a Warm and Relaxed Space
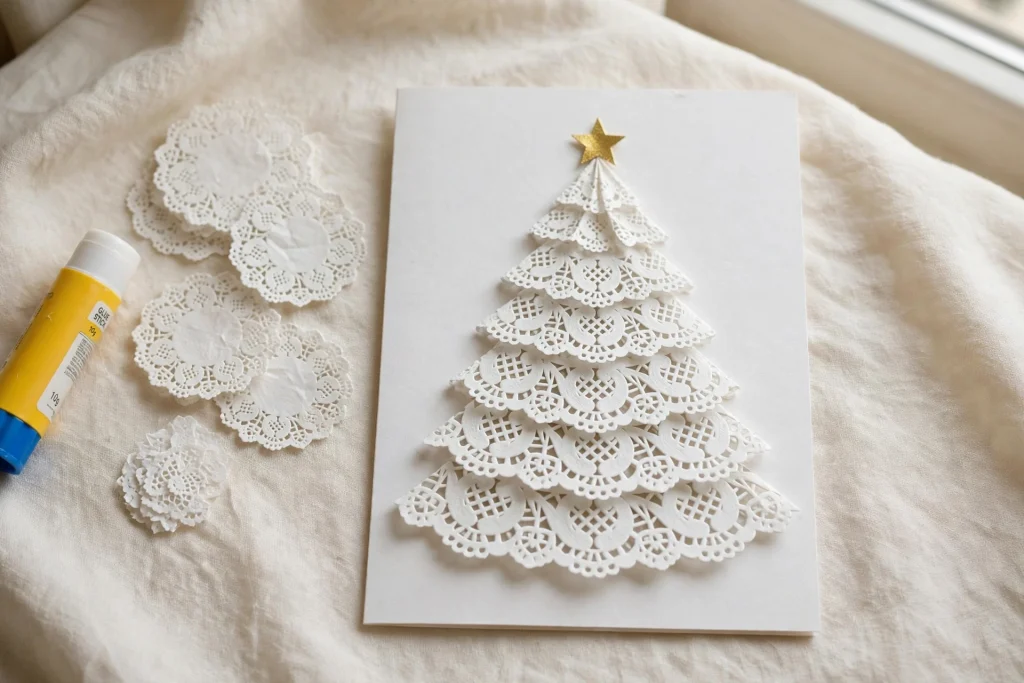
9. Paper Doily Christmas Tree
A paper doily makes a surprisingly lovely Christmas tree. You fold a round white doily in half, then in half again, and the pointed shape becomes a tree. Layer two or three folded doilies on top of each other, smallest at the top, and you have a lacy, delicate tree that looks far more expensive than it is. A tiny gold star on top and a few small red dots for ornaments finish it.
You need white cardstock, two or three small white paper doilies, glue, a gold star sticker, and a red pen. Fold each doily into a cone shape and glue them to the card front, one above the other, so they overlap slightly and form a tree. Add the star at the top and dot a few red ornaments onto the doily with the pen. The lace pattern of the doily gives the tree texture without any extra work. This is a lovely card for grandmothers and for anyone who likes delicate, vintage things.
Best for: a delicate, vintage feel. Time: about 8 minutes per card. Cost: under a dollar.
You may also like: Living Room Decor Ideas That Feel Cozy and Clean
Stamps and Lettering
Stamping is genuinely one of the most satisfying crafts, and it makes beautiful, consistent cards incredibly quickly. Once you have a good set of stamps and some ink pads, you can make dozens of cards in an evening. These four christmas card ideas use stamps and lettering, and they are the best choice when your list is long.
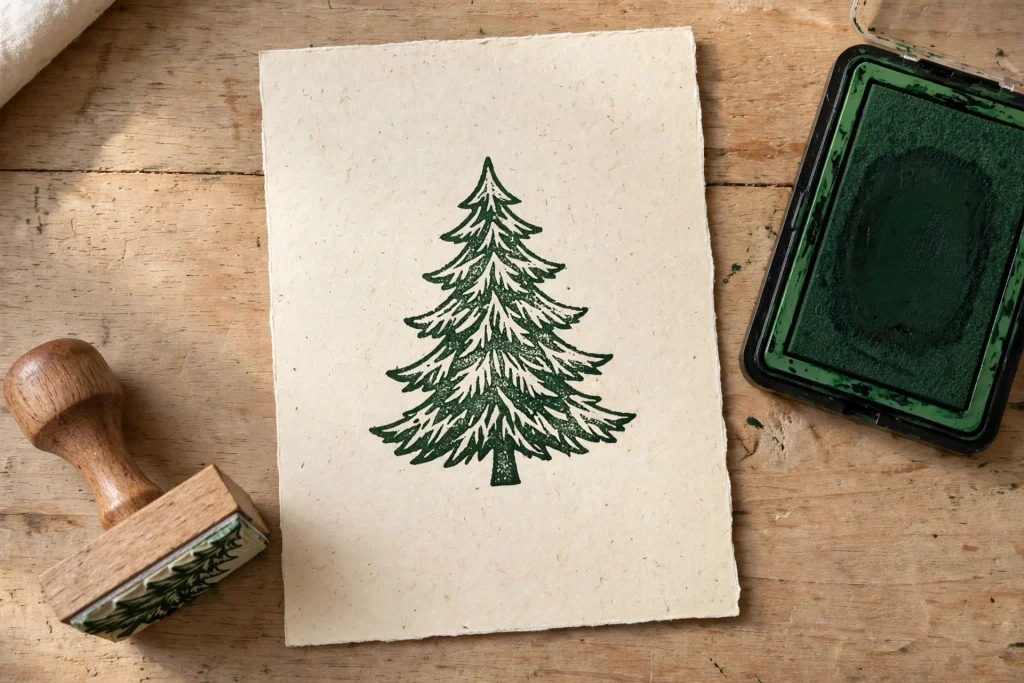
10. Single Statement Stamp Tree
One large, beautiful stamp centered on the card. A detailed Christmas tree, an ornate snowflake, a wreath. Simple and elegant. The stamp does the drawing for you, so the card looks polished even if you have never drawn anything in your life. The trick is placement. Stamp it once, in the middle, with good ink, and leave the rest of the card alone.
You need white or cream cardstock, one large Christmas stamp, and a dark green or black ink pad. Practice on scrap paper first, two or three times, so you know how much pressure to use. Then stamp the card front once, firmly and evenly, and lift the stamp straight up. Let the ink dry for a minute before you touch it. Add a greeting underneath in a fine marker or a small sentiment stamp, or leave it blank. Two minutes per card, and the consistency is the point. Every card looks the same, and every card looks good.
Best for: a long list where consistency matters. Time: about 2 minutes per card. Cost: under a dollar after the stamp.
You may also like: 21 Cozy Christmas Living Room Decor Ideas That Make Your Home Feel Magical
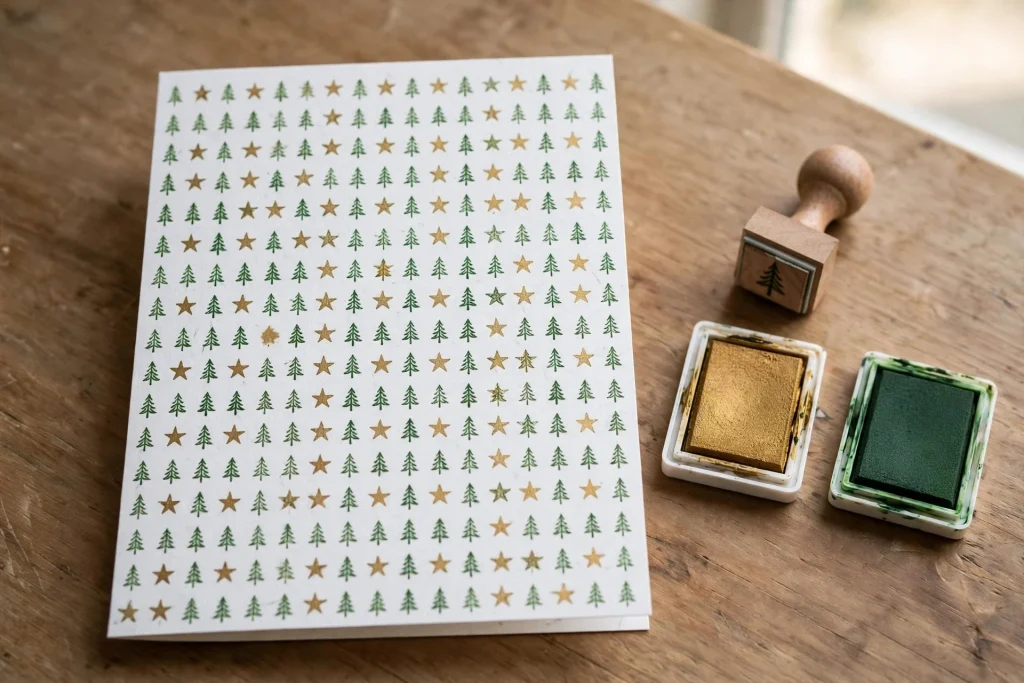
11. Repeat Pattern Stamp Card
Repeat a small stamp across the front of the card in a grid or a scattered pattern. A tiny star, a simple tree, a snowflake. The repetition turns a plain stamp into a pattern, and a pattern looks designed. This is the card to make when you want something that looks like wrapping paper, cheerful and full of Christmas spirit.
You need white cardstock, one small stamp, and one or two ink pads in Christmas colors. Stamp the small shape in rows across the card, or scatter it at random, leaving even gaps. Alternate colors if you have two pads, or keep it to one color for a cleaner look. The key is even pressure on every stamp so the pattern stays consistent. Let it dry, then add a greeting in the middle or at the bottom. Five minutes per card, and the pattern does all the visual work.
Best for: cheerful, modern cards. Time: about 5 minutes per card. Cost: under a dollar after the stamp.
You may also like: Wall Decor Ideas That Look Clean and Modern
12. Hand-Lettered Calligraphy Card
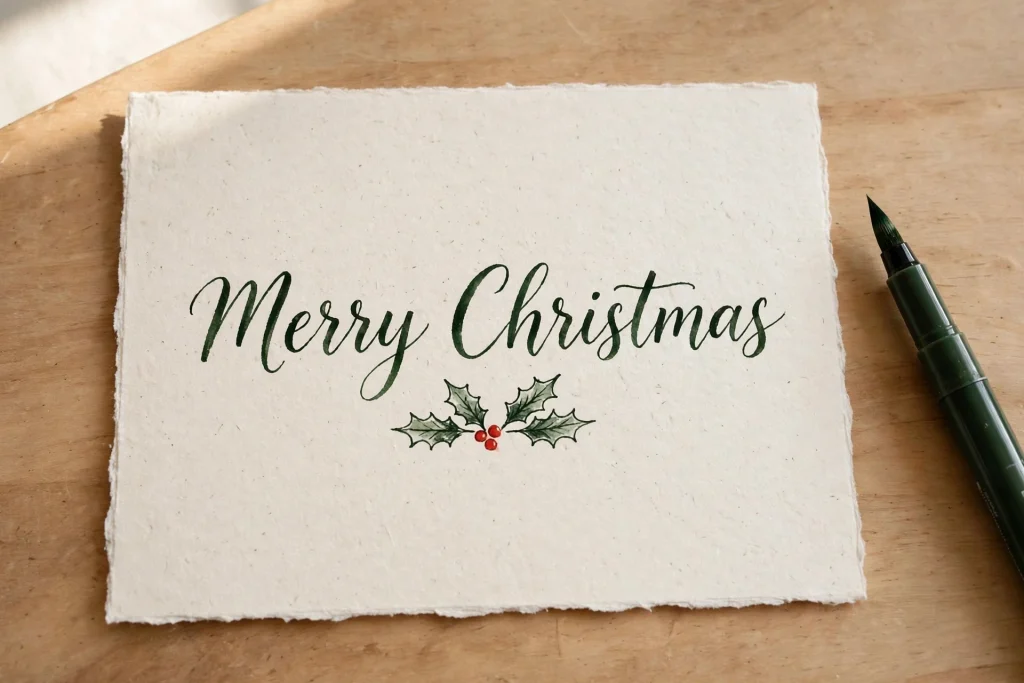
Write “Merry Christmas” or the recipient’s name in brush lettering with a brush pen on cream cardstock, then add a tiny sprig of holly or a simple border in the same pen. The handwriting is the design. It does not need to be perfect calligraphy. Slightly uneven letters look human and warm, which is exactly what a handmade card should feel like.
You need cream cardstock, a brush pen in dark green or black, and a pencil for a light guide line. Practice the greeting on scrap paper three or four times until the letters feel comfortable. Then write it on the card, slowly, one word at a time. Add a small holly sprig or a thin border underneath. Let the ink dry before you close the card or put it in an envelope, because brush pen ink smudges easily when it is fresh. Eight minutes per card, and each one is unique because your handwriting changes slightly every time.
Best for: close friends and family, where the personal touch matters most. Time: about 8 minutes per card. Cost: under a dollar.
You may also like: 7 Entryway Ideas That Make Your Home Feel Put Together Instantly
13. Sentiment Stamp Card
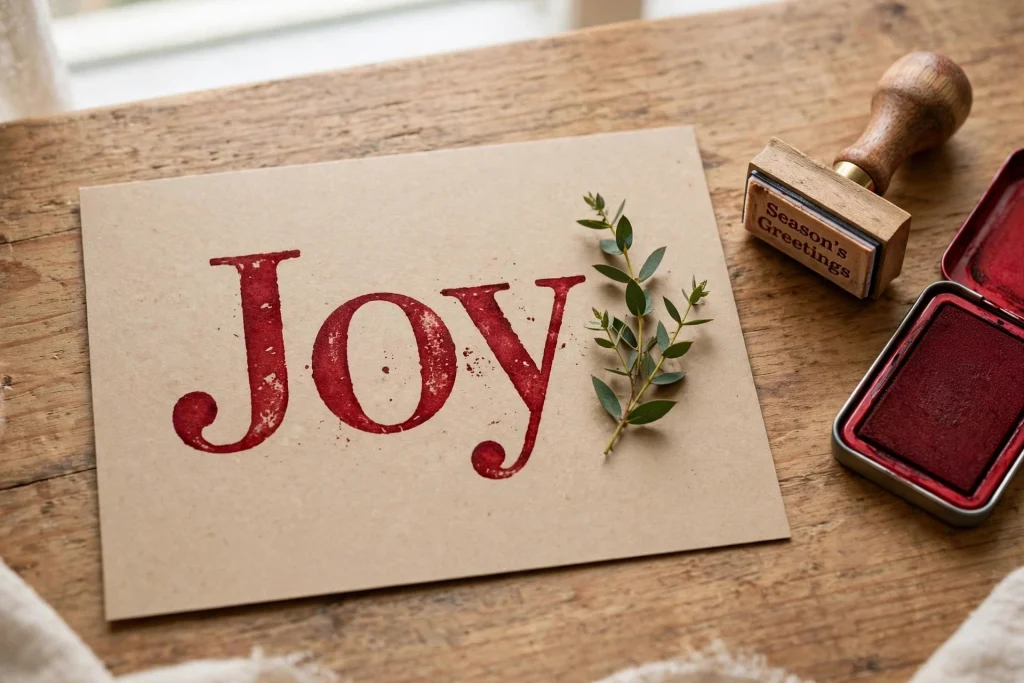
Use a word or phrase stamp as your main design. “Joy,” “Merry,” “Let It Snow,” “Peace.” One big word, stamped in a beautiful font, with a small decoration beside it. The word is the card. This is the fastest of the stamp cards and the one that feels most like a proper greeting card, because the message is right there on the front.
You need white or kraft cardstock, a large sentiment stamp, an ink pad in red or dark green, and a small decoration like a sprig of greenery or a star sticker. Stamp the word in the center of the card, firmly and evenly. Add the small decoration to one side, or a thin border around the edge. That is it. The font of the stamp does the work, so choose a stamp you love. Two minutes per card, and you can make a whole set in one sitting.
Best for: anyone who wants a card that says something clear and warm. Time: about 2 minutes per card. Cost: under a dollar after the stamp.
You may also like: Cozy Studio Apartment Ideas That Make Small Spaces Feel Bigger and Warmer
Texture and Nature
Some cards feel as good as they look. Buttons, felt, twine, and pressed leaves give a card texture, and texture makes people pick it up and look at it twice. These five christmas card ideas use materials you probably already have in a drawer somewhere, and they are the ones children love helping with.
14. Pressed Greenery Card
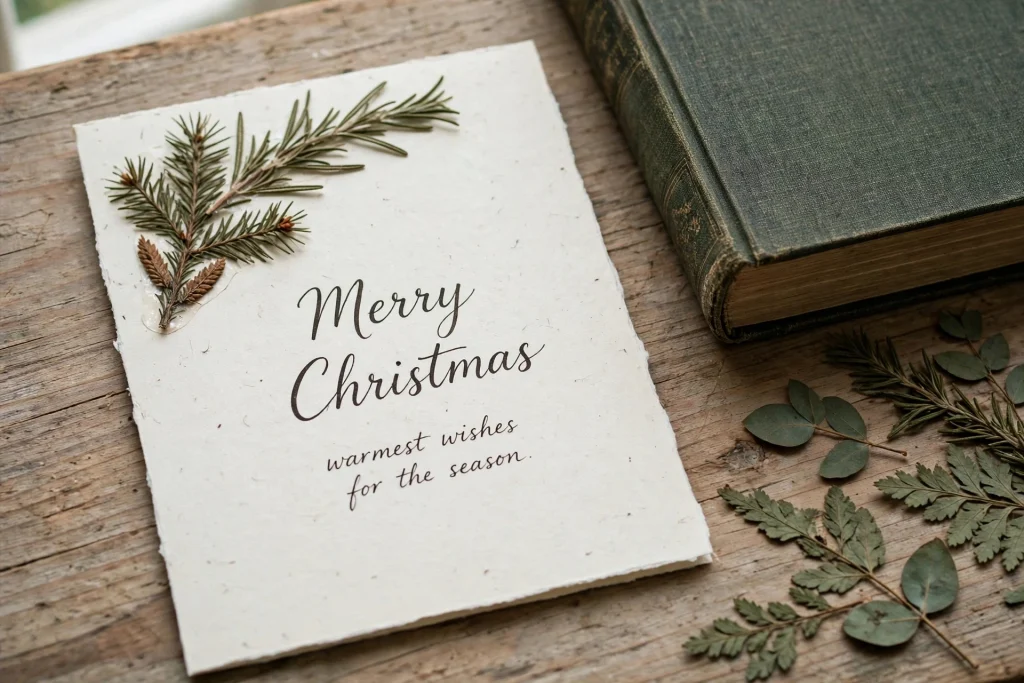
Press sprigs of rosemary, holly leaves, or small pine needles flat in a heavy book for a week, then glue them to a card. The real greenery smells faintly of Christmas when you open the envelope, and the flat green shapes against white cardstock look simple and beautiful. This is the card that feels the most like a gift from nature, because it is one.
You need white or cream cardstock, fresh greenery sprigs, a heavy book, and craft glue. Press the greenery between sheets of plain paper inside the book for at least five days, until it is fully flat and dry. Arrange one or two sprigs on the card front, a small branch in one corner or a single sprig down the middle, and glue them down gently. Add a thin ribbon or a hand written greeting if you like, but do not cover the greenery. It is the star. The pressing takes a week, but the card itself takes five minutes to assemble, so press a big batch in November and you will have greenery ready all December.
Best for: nature lovers, and anyone who wants a card that smells like Christmas. Time: about 5 minutes per card after pressing. Cost: under a dollar.
You may also like: Mirror Wall Decor Ideas That Make Your Living Room Feel Bigger and Better
15. Button Ornament Card
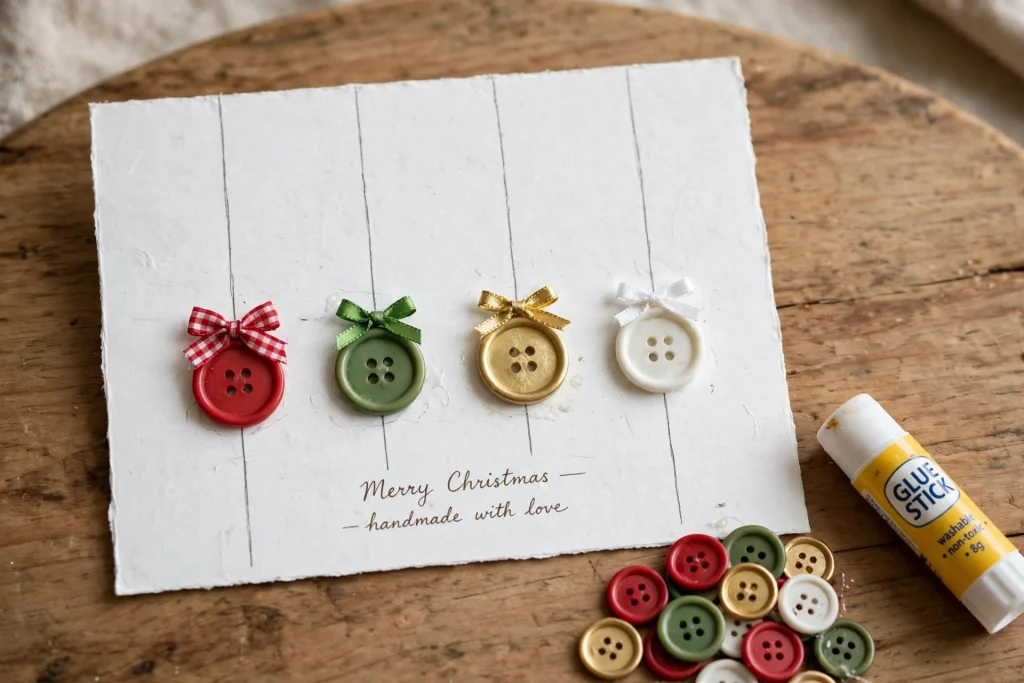
Glue a few round buttons in Christmas colors onto a card in the shape of ornaments, with a thin line drawn above each one as the string and a tiny bow at the top. Buttons have a lovely weight and shine, and a card covered in buttons feels playful and warm. Children love this one, and so do the grandparents who receive it.
You need white cardstock, round buttons in red, green, gold, and white, a fine marker, glue, and a small piece of ribbon. Draw three or four thin vertical lines down from the top of the card. Glue a button at the bottom of each line, choosing different colors and sizes. Add a tiny bow of ribbon where the line meets the button, or draw one with the marker. The buttons should be different sizes, because real ornaments are. Eight minutes per card, and you can use up the odd buttons from the bottom of the sewing box, which is satisfying in its own way.
Best for: using up craft supplies, and for cards made with children. Time: about 8 minutes per card. Cost: under a dollar.
You may also like: 7 Easy Desserts Anyone Can Make at Home (No Fancy Skills Needed)
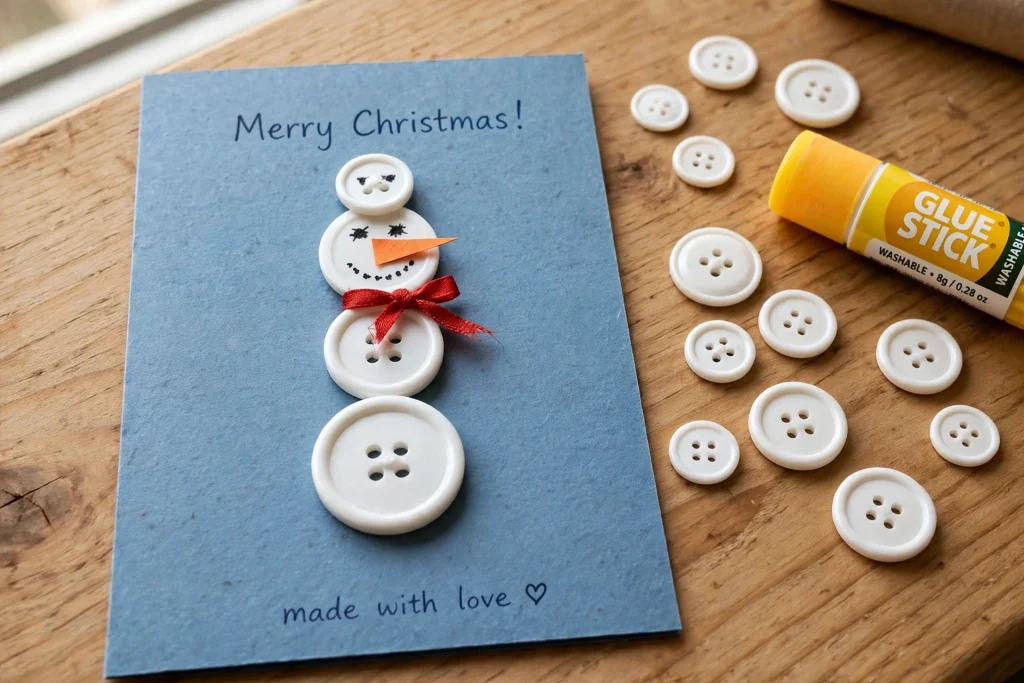
16. Button Snowman Card
Stack four white buttons on top of each other on a blue card, add a tiny orange triangle nose, two black dots for eyes, and a small scarf from a scrap of ribbon, and you have a snowman. It is the cutest card on this list, and it takes about five minutes. The buttons give the snowman a round, real shape that a drawing never quite manages.
You need blue cardstock, four white buttons in decreasing sizes, craft glue, a small orange paper triangle, a black fine marker, and a scrap of red ribbon. Glue the largest button at the bottom, then the next two in decreasing size above it, and the smallest one on top. Draw the eyes and a smile on the second button from the top with the marker, glue the orange triangle on as a nose, and tie the ribbon around the snowman’s neck below the face button. Add a few white dots around the card for falling snow if you like. Five minutes per card, and it is impossible to make a bad one.
Best for: children, grandchildren, and anyone who likes a card that makes them smile. Time: about 5 minutes per card. Cost: under a dollar.
You may also like: Living Room Decor Ideas That Feel Cozy and Clean
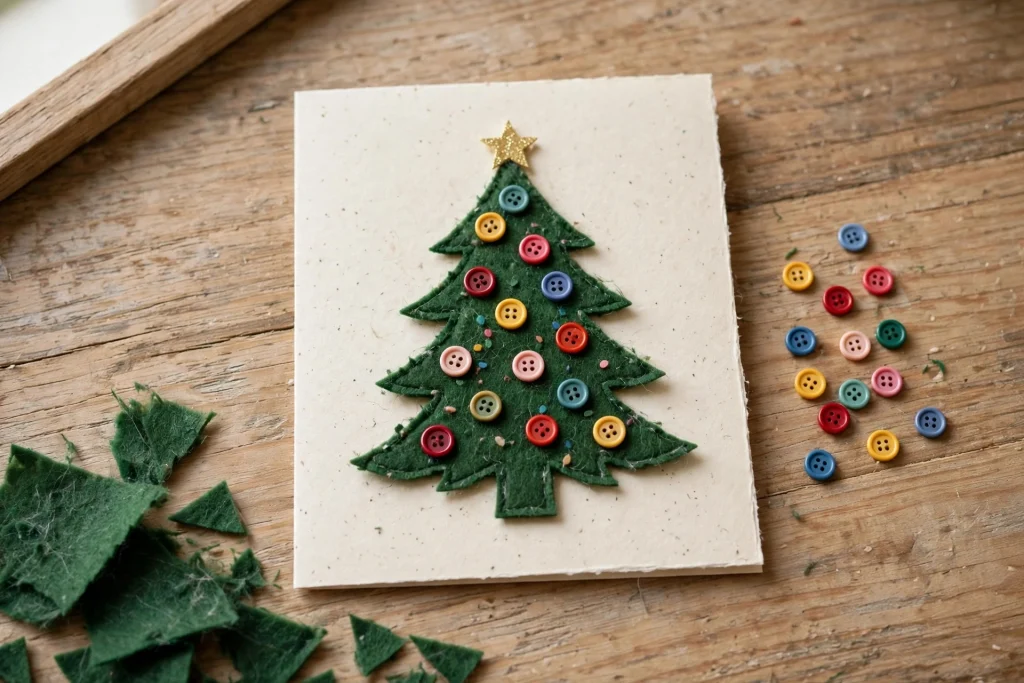
17. Felt Tree Card
Cut a Christmas tree shape from green felt, glue it to a card, and add tiny buttons or beads as ornaments. Felt has a soft, warm texture that photographs beautifully and feels lovely in the hand. The tree does not need to be perfect. A slightly wobbly felt tree looks handmade in the best way, and the ornaments cover any uneven edges.
You need white or cream cardstock, green felt, scissors, craft glue, and tiny buttons or beads in Christmas colors. Cut a simple triangle tree shape from the felt, with a small trunk at the bottom. Glue it to the center of the card. Glue five or six tiny buttons onto the felt as ornaments, spaced unevenly. Add a small star on top, either a button or a piece of gold felt. Press the whole thing flat under a book for a few minutes so the glue sets properly. Ten minutes per card, and the felt gives the card a softness that paper alone cannot match.
Best for: a soft, cozy card that feels warm to hold. Time: about 10 minutes per card. Cost: about a dollar.
You may also like: How to Style a Boho Apartment: A Complete Guide to a Warm and Relaxed Space
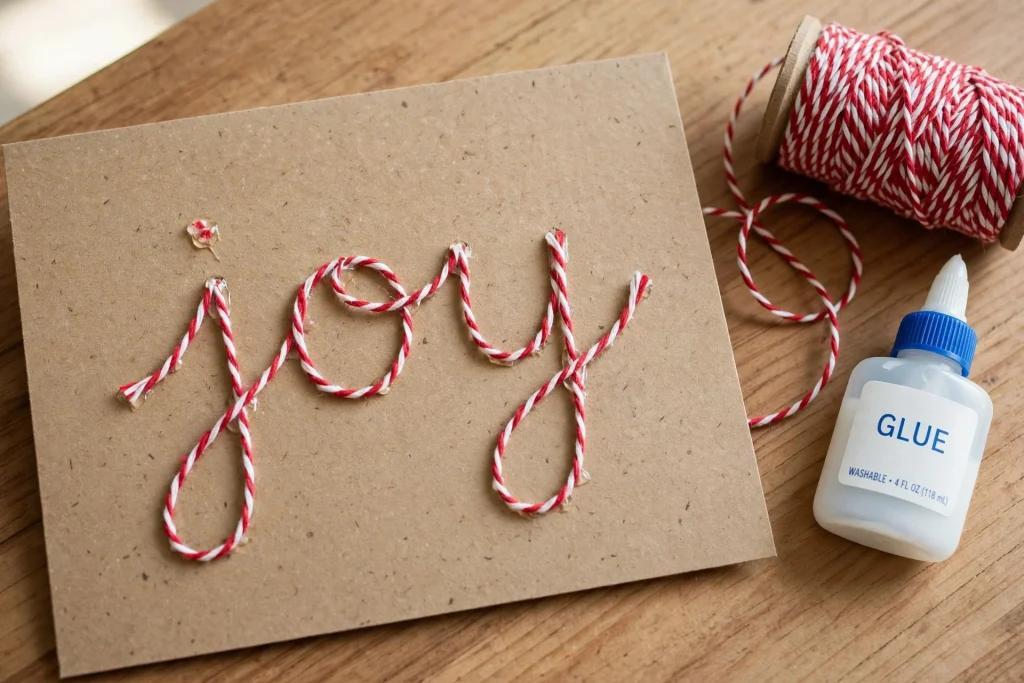
18. Baker’s Twine Word Card
Wrap baker’s twine around a card to spell out a word, or glue the twine in the shape of a tree, a star, or a simple wreath. The red and white twisted string looks like Christmas all on its own, and the raised texture of the twine makes the card interesting to touch. This is one of the simplest christmas card designs here, and one of the most charming, because the twine does all the work.
You need kraft or white cardstock, red and white baker’s twine, craft glue, and a pencil. Lightly draw your word or shape in pencil first. Then follow the line with a thin trail of glue and press the twine into it, a little at a time, holding it in place for a few seconds at each bend. Trim the ends neatly and tuck them under. A word like “joy” or “Noel” takes about ten minutes. A twine tree takes a little longer, but the shape is simple enough that you can do it freehand. Let the glue dry completely before you put the card in an envelope, or the twine will shift.
Best for: rustic, simple cards with a handmade feel. Time: about 10 minutes per card. Cost: under a dollar.
You may also like: Cozy Studio Apartment Ideas That Make Small Spaces Feel Bigger and Warmer
Pop-Ups, Photos, and Fun
These last four christmas card ideas are the ones people keep on the mantel the longest. They move, they open, they have a photo in them, or they were made with small fingers. They take a little more time, but they are the cards that get talked about.
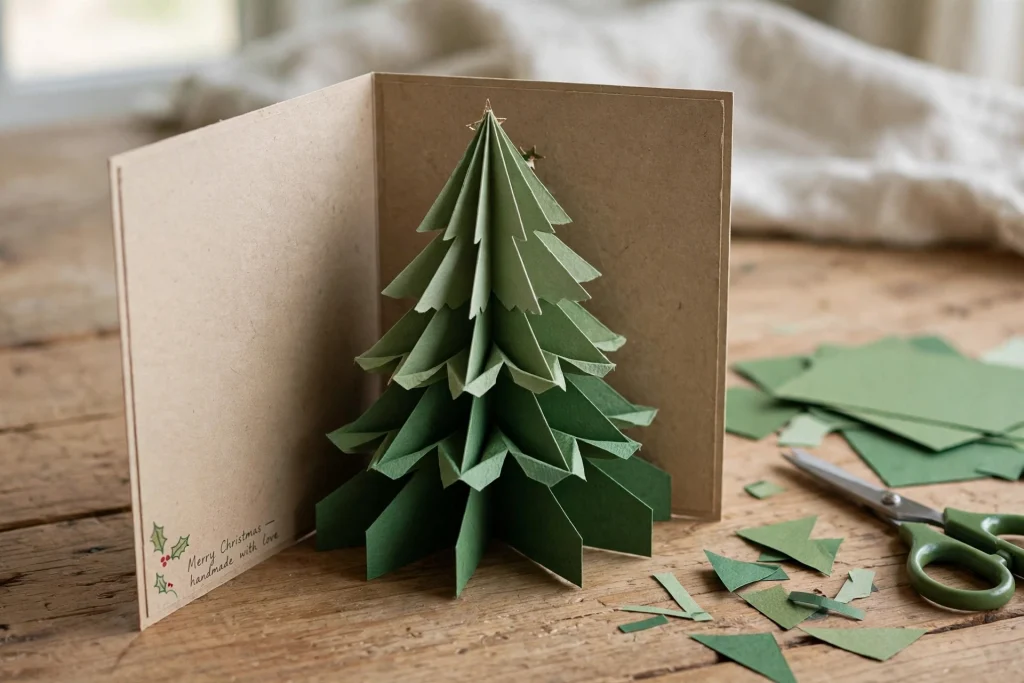
19. Pop-Up Christmas Tree Card
A pop-up card hides a small shape that stands up when the card opens. The tree version is easier than it looks. You cut a green cardstock tree in three graduated layers, fold each layer in the middle, and glue the folded edges to the inside of the card so the tree springs up when the card opens. The first time you open it and the tree pops up, you will understand why this card is worth the extra ten minutes.
You need two sheets of cardstock, one for the card and one green for the tree, scissors, a ruler, and a glue stick. Cut three tree layers, each one smaller than the last, and fold each in half. Glue the folded edges to the inside fold of the card, one above the other, so they stack into a tree shape when the card opens. Test it twice before you glue the last layer, because the layers need to sit flat when the card closes or the envelope will bulge. Add a tiny star to the top layer. Twenty minutes per card, and it is the one card on this list that people open more than once.
Best for: close family, and anyone you want to impress. Time: about 20 minutes per card. Cost: under a dollar.
You may also like: 21 Cozy Christmas Living Room Decor Ideas That Make Your Home Feel Magical
20. Photo Window Card
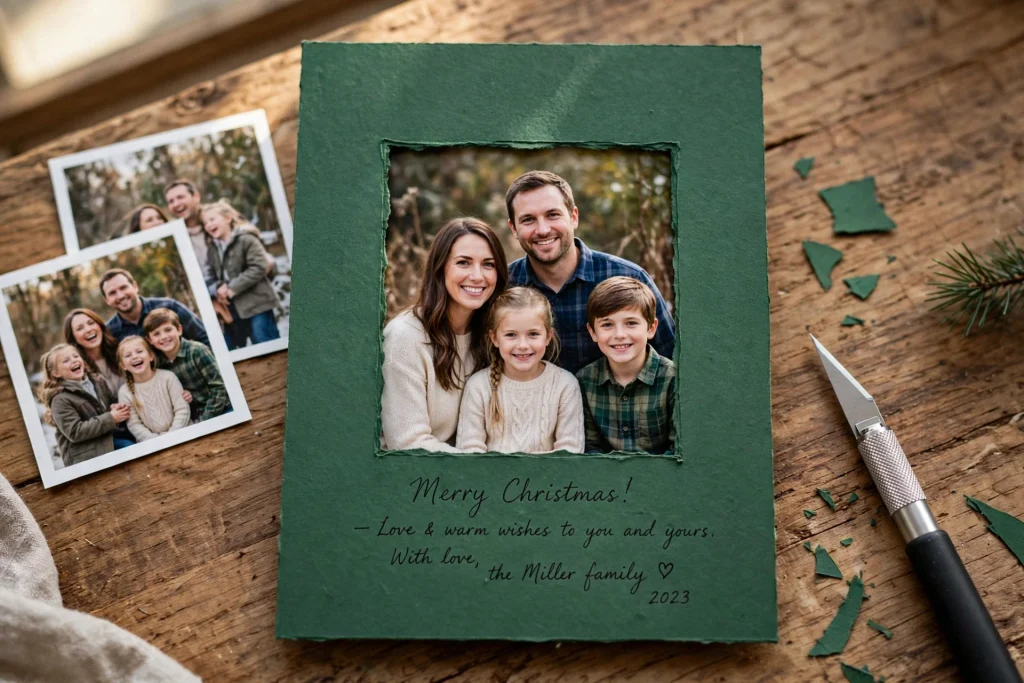
Print a 4 by 5 photo, mount it on a 5 by 7 card with a border, and hand-letter the greeting underneath. The photo is the card. It can be a family photo from the year, a picture of the house with snow on it, or a favorite shot of the kids. The window frame around it, cut from a second piece of cardstock, makes it feel like a picture on the wall rather than a photo glued to a card.
You need a printed photo, white or cream cardstock, a second colored cardstock for the frame, a craft knife and ruler, glue, and a fine marker. Cut a window in the colored cardstock, slightly smaller than your photo, and glue the photo behind it so it shows through. Then glue the whole frame onto the card front. Write the greeting underneath in your own handwriting. The frame is what makes it look designed instead of stuck on, so take your time cutting it straight. Fifteen minutes per card once the photos are printed, and it is the card people keep in a drawer for years.
Best for: family cards and anyone far away who wants to see your faces. Time: about 15 minutes per card after printing. Cost: about a dollar.
You may also like: 7 Entryway Ideas That Make Your Home Feel Put Together Instantly
21. Fingerprint Reindeer Card
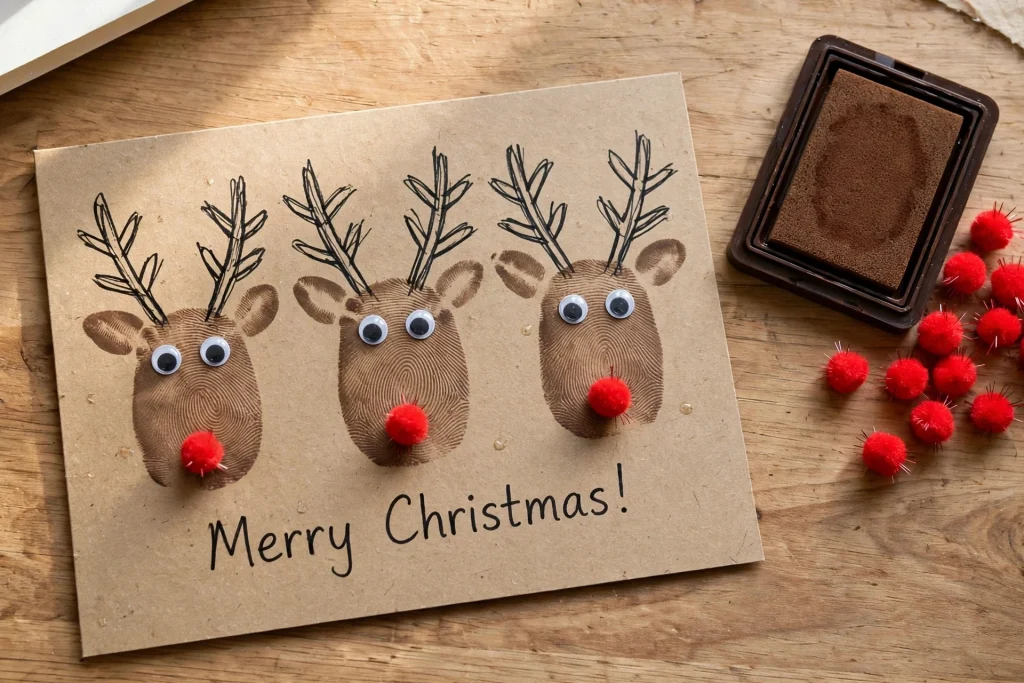
Fingerprint reindeer are the card I make with my kids every year, and they are the ones grandparents fight over. Each reindeer is a brown thumbprint for the face, with antlers drawn on in a fine-tip marker, googly eyes, and a red pom-pom nose glued on for Rudolph. They take two minutes each, they are impossible to mess up, and no two reindeer ever look the same.
You need white or kraft cardstock, a brown ink pad or brown paint, a fine black marker, googly eyes, and red pom-poms. Press a thumb into the ink pad and then onto the card, one thumbprint per reindeer. Let the prints dry for a minute, then draw antlers above each print, glue on the eyes, and glue a red pom-pom on as the nose. Add a few small white dots for snow. That is the whole card. Make a whole herd across the front, or one big reindeer in the middle. Either way, it is the card that gets kept, because a child’s thumbprint at Christmas is a memory, not just a design.
Best for: making with children, and for grandparents. Time: about 2 minutes per card plus drying. Cost: under a dollar.
You may also like: 7 Easy Desserts Anyone Can Make at Home (No Fancy Skills Needed)
22. Wax Seal and Ribbon Card
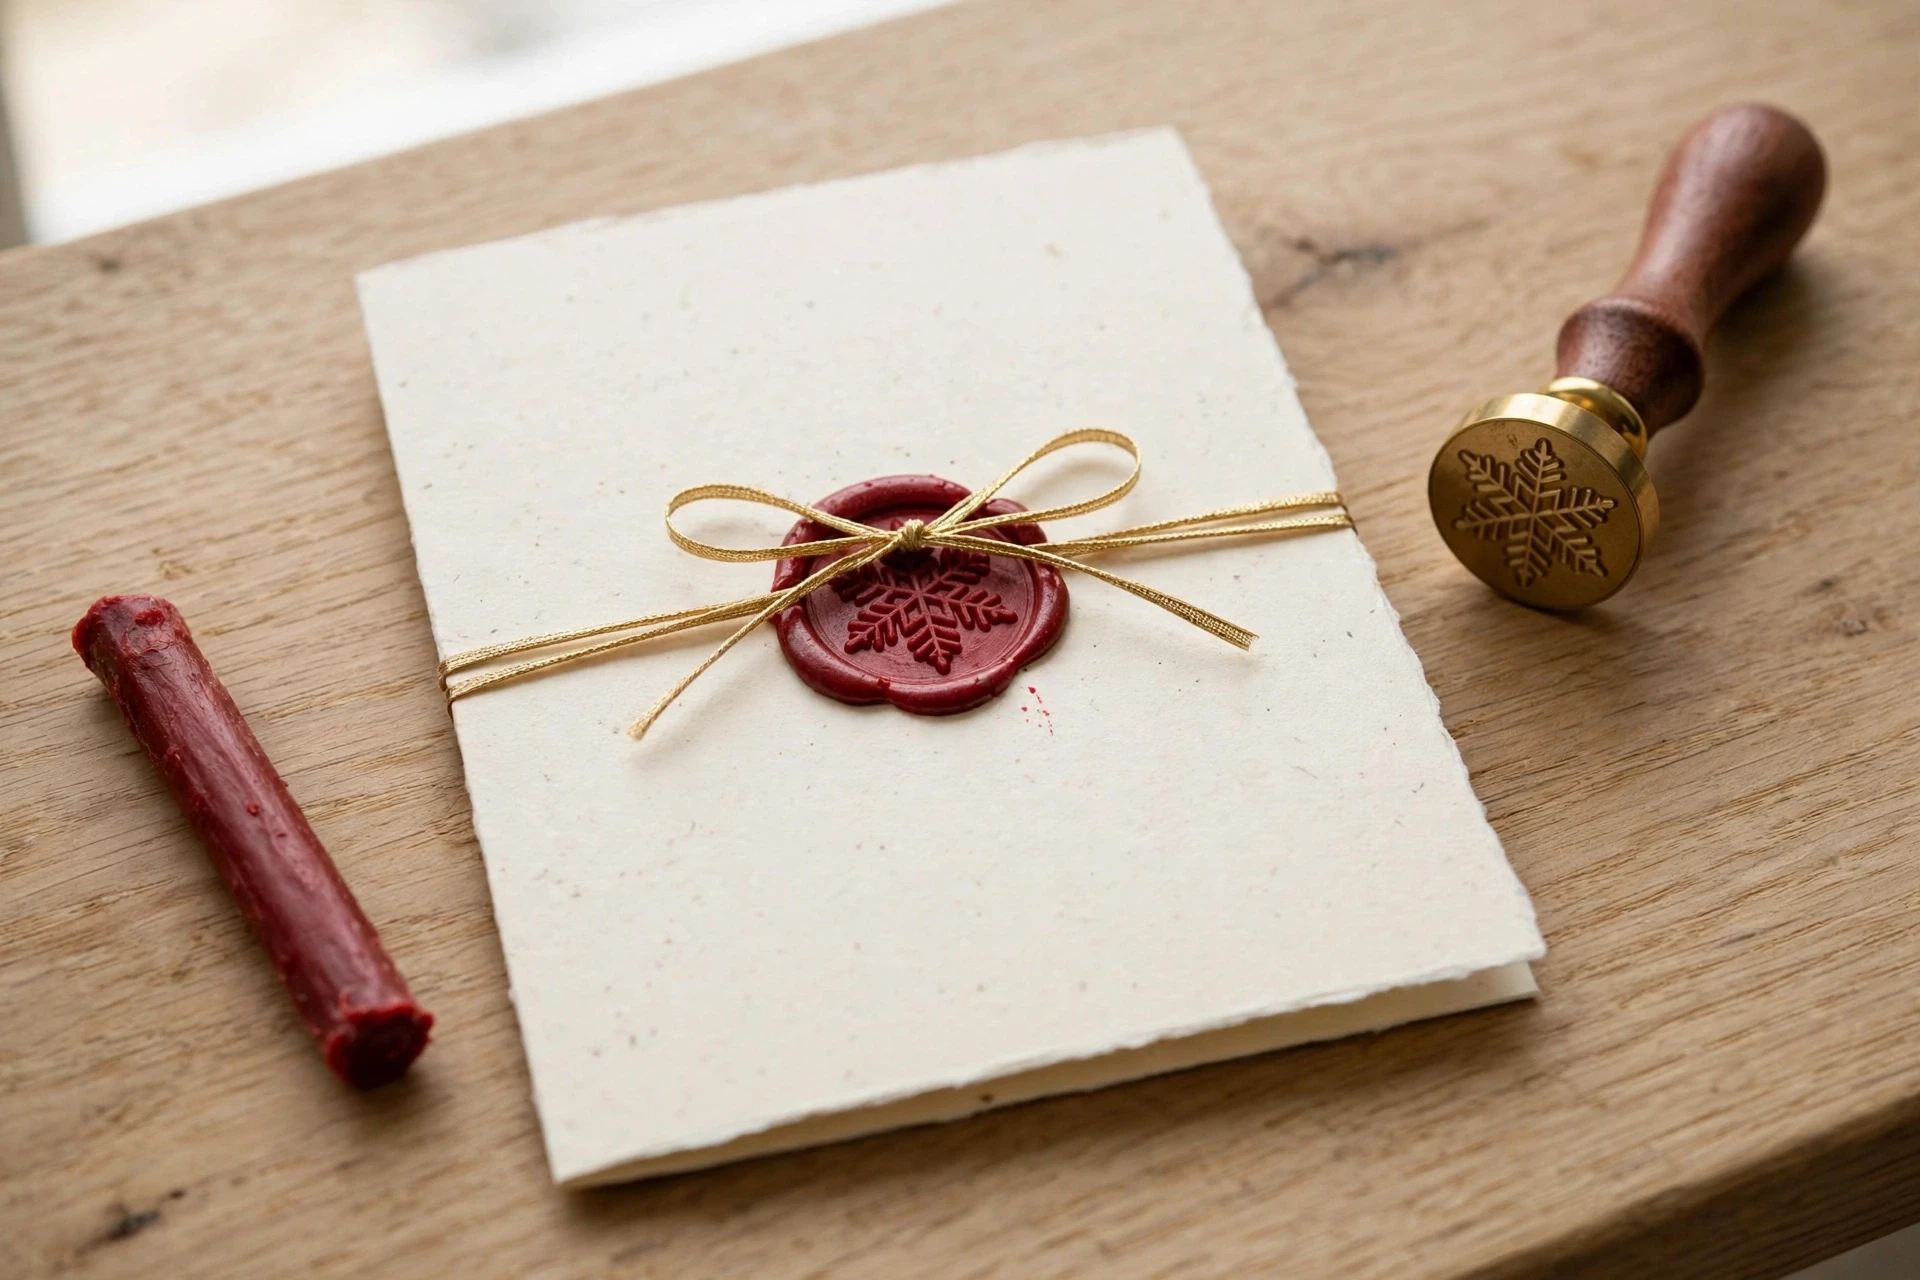
A wax seal makes any card feel like it came from another century, in the best way. You melt a small amount of sealing wax, press a stamp into it, and let it cool into a round seal on the envelope flap or on the card itself. Add a thin ribbon tied around the card, and you have the most elegant card on this list. It takes a little practice, but after two or three seals you will have the feel of it.
You need white or cream cardstock, sealing wax in deep red or gold, a wax seal stamp, a thin ribbon, and a lighter or a wax melting spoon. Tie the ribbon around the card first, in a simple knot or a small bow. Then melt a coin sized amount of wax onto the ribbon knot, press the stamp into it firmly, hold it still for ten seconds, and lift it straight up. Let the seal cool completely before you touch it or put the card in an envelope. If a seal comes out messy, peel it off and try again. The wax is forgiving that way. Fifteen minutes per card, and it is the card for the one person on your list who deserves something extra special.
Best for: the most special person on your list, and for cards that feel like a keepsake. Time: about 15 minutes per card. Cost: about a dollar after the seal.
You may also like: Wall Decor Ideas That Look Clean and Modern
The 1-2-3 Card Method
If you take nothing else from this guide, take this. Every card that turns out well follows the same three steps, and they work for any of the christmas card designs above. It works for christmas cards handmade with paint, paper, stamps, or twine, because the method is about the card, not the materials.
1 card, 1 focal point, 1 sentence. One card at a time, one thing to look at on the front, and one real sentence inside. That is the whole method. When a card looks wrong, it is almost always because one of these three got crowded. Two focal points instead of one. Three sentences instead of one. A card made in a rush alongside four others, so none of them got full attention.
Here is how it works in practice. Before you start, choose your design and your recipient. One card, one person. Then put one thing on the front, a tree, a word, a snowflake, and leave the rest of the card alone. Then write one sentence inside, something that actually happened this year, and sign your name. That is the card. Everything else in this guide, the supplies, the techniques, the timings, is just detail around those three steps.
The before and after is easy to see. Before, my cards had glitter, ribbon, three stickers, and a long message copied from the internet. They looked busy, and I dreaded making them. After, my cards have one tree, one star, and one sentence about something real. They look calm, they take ten minutes, and I actually enjoy making them. The method is the difference.
At a Glance
| Card idea | Time per card | Difficulty |
|---|---|---|
| 1. Watercolor Wash Christmas Tree | 5 min | Easy |
| 2. Watercolor Night Sky with a Silhouette Tree | 10 min | Easy |
| 3. Gold Watercolor Ornament Cards | 5 min | Easy |
| 4. Watercolor Holly and Berries | 8 min | Easy |
| 5. Loose Watercolor Wreath | 10 min | Easy |
| 6. Paper Strip Christmas Tree | 8 min | Easy |
| 7. Washi Tape Christmas Tree | 3 min | Very easy |
| 8. Layered Paper Cut Snowflake | 10 min | Easy |
| 9. Paper Doily Christmas Tree | 8 min | Easy |
| 10. Single Statement Stamp Tree | 2 min | Very easy |
| 11. Repeat Pattern Stamp Card | 5 min | Easy |
| 12. Hand-Lettered Calligraphy Card | 8 min | Medium |
| 13. Sentiment Stamp Card | 2 min | Very easy |
| 14. Pressed Greenery Card | 5 min | Easy |
| 15. Button Ornament Card | 8 min | Easy |
| 16. Button Snowman Card | 5 min | Very easy |
| 17. Felt Tree Card | 10 min | Easy |
| 18. Baker’s Twine Word Card | 10 min | Medium |
| 19. Pop-Up Christmas Tree Card | 20 min | Medium |
| 20. Photo Window Card | 15 min | Medium |
| 21. Fingerprint Reindeer Card | 2 min | Very easy |
| 22. Wax Seal and Ribbon Card | 15 min | Medium |
Do This Not That
| Do this | Not that |
|---|---|
| Pick one focal point and give it space | Crowd the front with glitter, ribbon, and five stickers |
| Use cardstock between 200 and 300 gsm | Use thin printer paper that bends and bleeds |
| Buy the envelopes before you cut the cards | Cut the cards first and hope an envelope fits |
| Make cards in a batch, one step at a time | Make one card start to finish, then start the next |
| Write one real sentence inside by hand | Copy a long generic message from the internet |
| Let paint and glue dry fully before mailing | Seal a damp card in an envelope and hope for the best |
| Keep the design flat enough to mail with a regular stamp | Add bulky layers that need extra postage and a padded envelope |
| Test a stamp or a new technique on scrap paper first | Stamp straight onto your last good card blank |
Your Christmas Card Weekend
You do not need a whole month. You need one weekend, and a clear plan. Here is the one I use every year for christmas card making, and it works whether you are making ten cards or fifty.
Friday evening, about an hour. Decide your list. Write down every name, and next to each one, write which design they get. Pick two or three designs from this list, not ten. One easy one for the long list, one pretty one for close friends, and one special one for the two or three people who matter most. Gather your supplies and put them on the table. Cut all your card bases and buy or check your envelopes now, not on Sunday.
Saturday morning, two to three hours. Make the cards. Work in a batch. Do all the painting first, or all the stamping, or all the gluing, then move to the next step. Let each batch dry flat while you start the next one. Put on music, make a pot of tea, and treat it like a quiet morning rather than a chore. By lunch, the cards should be finished and drying.
Saturday afternoon, one hour. Write the insides. One real sentence in each card, plus your names and the year. Do this while the cards are fully dry, sitting at the table, not in a rush. Address the envelopes now too, while you have the list in front of you. Stamp them, and put them in a pile by the door.
Sunday morning, fifteen minutes. Check every card once. Is the glue dry? Is the ink dry? Does the envelope close flat? Then mail them. Cards mailed the first weekend of December arrive in plenty of time, and you get your table back for the rest of the month.
Take It Further
If you liked this guide, these are the next ones to read. They build on the same ideas, room by room, and they will help you get the house ready for the people you love.
- 7 Easy Desserts Anyone Can Make at Home (No Fancy Skills Needed)
- Living Room Decor Ideas That Feel Cozy and Clean
- Cozy Studio Apartment Ideas That Make Small Spaces Feel Bigger and Warmer
- 7 Entryway Ideas That Make Your Home Feel Put Together Instantly
- 21 Cozy Christmas Living Room Decor Ideas That Make Your Home Feel Magical
- How to Style a Boho Apartment: A Complete Guide to a Warm and Relaxed Space
- Wall Decor Ideas That Look Clean and Modern
- Mirror Wall Decor Ideas That Make Your Living Room Feel Bigger and Better
Designer’s Cheat Sheet
- One focal point. One tree, one word, one snowflake. Everything else is space.
- Good paper. Cardstock between 200 and 300 gsm. White is safest, cream is warmest, kraft is most rustic.
- Envelopes first. Buy them before you cut anything, and check the size fits.
- Batch it. Pick two or three christmas card designs, not ten. Do one step across all the cards, then the next step.
- Dry time is real time. Watercolor needs fifteen minutes. Glue needs ten. Ink needs a minute. Never seal a damp card.
- Flat mails cheap. Keep layers thin so the card goes with a regular stamp. Anything thicker than a quarter inch needs extra postage.
- One real sentence. The inside matters more than the front. Write something that actually happened this year.
- One weekend is enough. A full year of christmas card making fits into one weekend if you batch the work and pick two or three designs.
- Start with watercolor. Watercolor christmas cards are the most forgiving first project, because soft edges and bleeding colors look intentional.
- Handmade beats perfect. Christmas cards handmade at home are kept because someone made them, not because they are flawless.
- Start early. Make your cards the first weekend of December and mail them by the second week.
- Keep it simple. The cards people keep are the simple ones. The busy ones get thrown away.
Questions People Ask
The most common size is 5 by 7 inches, and it uses a standard A7 envelope, which you can find in any stationery shop. The smaller A2 size, 4.25 by 5.5 inches, is also popular and costs less to mail. If you are cutting your own cards, 5 by 7 is the safest choice because the envelopes are everywhere and it fits a photo comfortably.
Mail them by the first week of December so they arrive at least two weeks before Christmas, which is the timing etiquette experts recommend. For cards going overseas, mail them in late November. The US Postal Service recommends sending First-Class Mail by December 17, 2026 for delivery before Christmas, but that is the last safe day, not the target. Aim a week earlier and you will not have to worry.
Use cardstock between 65 and 110 lb, which is about 200 to 300 gsm. That weight stands up on a mantel, takes watercolor without buckling, and feels substantial in the hand. Lighter paper bends and bleeds, and it makes even a lovely design look cheap. White cardstock is the most versatile choice, and cream suits calligraphy and pressed greenery.
Keep it short and warm, and add one sentence that is specific to the person and the year. Something like “I still think about that dinner at your place in February” or “Thank you for the soup when I was sick in March.” Three to five sentences is plenty for most people. The front of the card is a poster, not a letter, so save the long news for a phone call and let the card carry the feeling.
A Card Is a Small Thing, and That Is the Point
I started this guide with a card my mother kept in a drawer for three years. It was not a good card. The tree leaned, the marker bled, and the paper was thin. But it was made by hand, by someone who loved her, and that was enough. It was more than enough.
That is what these 22 christmas card ideas are really about. Not the paint or the paper or the stamps. They are about sitting down for twenty minutes and thinking about one person. In a season that moves fast and asks a lot of us, that is a rare and generous thing to do. So pick a design, clear the kitchen table, and make a few cards this weekend. Someone you love is going to open an envelope in December, find a card you made with your own hands, and put it on their mantel. And it will stay there all season.
Merry Christmas, from my table to yours.
Neuman