Too Long; Didn’t Read
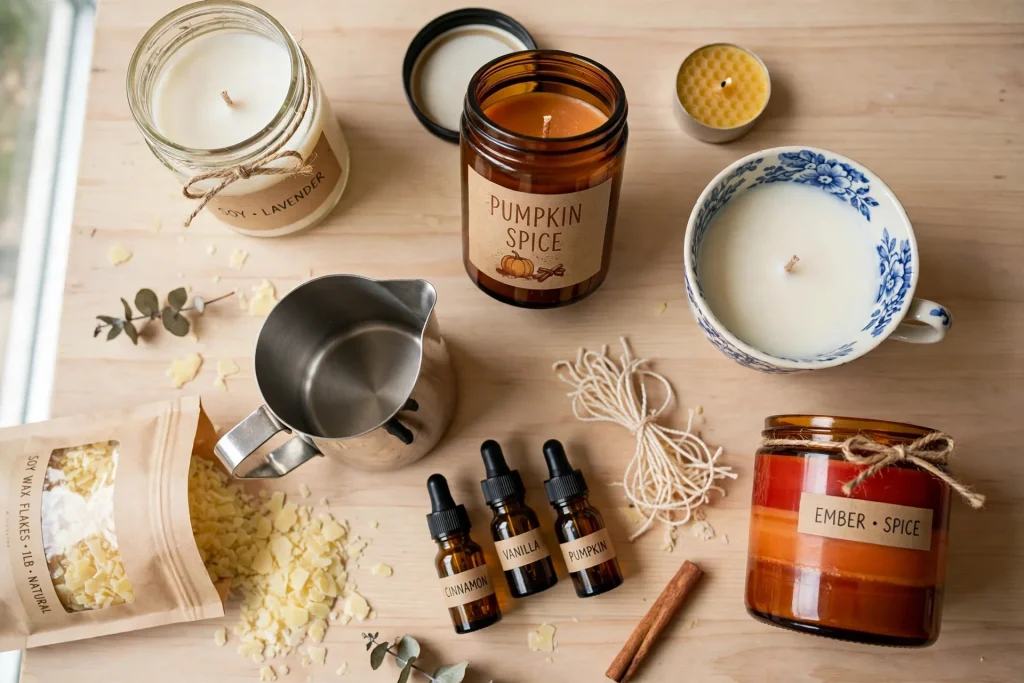
You do not need a kit, a class, or a craft room to make candles at home. Pick one wax, one wick, and one scent, and you can pour your first candle in an afternoon. This guide has 22 diy candles projects, from a plain soy jar candle to a pumpkin shaped candle poured in a real pumpkin shell, and every one lists the wax, the wick, the scent, and how long it takes. One honest note before you start: the fall specific searches for candles peak in September and October and fall away by mid November, while general candle making searches peak in November and December. So this is not a trending fall fad. It is a beginner candle making guide with fall projects in it, and it is at its best right now, in the November and December candle season, when a lit candle does more for a room than any decoration.
What's Inside This Guide
ToggleThe Candle That Sank in the Middle
The first candle I ever poured was a mess. I had bought a bag of soy wax, a pack of wicks, and a bottle of cinnamon fragrance oil, and I was sure it would take twenty minutes. It took an hour. The wax took forever to melt, the wick would not stay straight, and when the candle finally set, the top had sunk into a crater in the middle, like a small moon with a wick sticking out of it. I lit it anyway. It burned unevenly, the flame leaned to one side, and the cinnamon smell was faint, but it was my candle. It sat on my kitchen table all week, and every time I lit it, the room smelled faintly of baking. That was enough to make me try again.
The second one was better. The third one was good enough to give away. What I learned, slowly and mostly by getting it wrong, is that fall candle making is not a talent. It is a short list of small decisions, and once you know them, every candle after the first one turns out fine. Use a wax you trust. Use the right wick for the size of your jar. Pour at the right temperature. Let the candle cure before you burn it. That is almost the whole craft. The rest is scent and decoration, and that part is the fun.
This list is the result of years of pouring candles at my kitchen table, mostly in autumn, when the light goes early and a lit candle makes the whole house feel warmer. Every project here is one I have poured myself or watched someone pour with their own hands. Nothing needs a professional setup, nothing needs an expensive kit, and most of them cost less than five dollars a candle. Some take twenty minutes. The longest takes about an hour of hands on work, plus drying and curing time. Pick the ones that fit your time and your shelf, and start with the easy ones. Your living room will thank you.
A word on safety before we start, because hot wax is not a joke. Never leave melting wax alone on the stove. Melt it in a double boiler or a pouring pitcher set in a pot of water, never straight over a flame. Keep the wick centered while the wax sets, and do not move the candle until the top is firm. Let soy candles cure for at least a week before you burn them, so the scent has time to bind to the wax. Trim the wick to a quarter inch before every burn, and never burn a candle all the way to the bottom of the jar. These are small rules, and they keep a relaxing hobby from turning into a mess.
Table of Contents
- The 3 Things That Make a Homemade Candle Burn Well
- First Pours (Ideas 1 to 5)
- Fall Scents (Ideas 6 to 9)
- Moulds and Containers (Ideas 10 to 13)
- Layered and Decorative (Ideas 14 to 18)
- Gifts and Finishing Touches (Ideas 19 to 22)
- The 1-2-3 Candle Method
- At a Glance
- Do This Not That
- Your Candle Making Weekend
- Take It Further
- Maker’s Cheat Sheet
- Questions People Ask
The 3 Things That Make a Homemade Candle Burn Well
Before you buy a single bag of wax, it helps to know what you are actually aiming for. After years of candles that burned well and candles that tunneled, smoked, or barely smelled at all, I have landed on three things. Every one of the diy candles in this list comes back to these three things. If a candle has all three, it burns well. If it is missing one, no amount of pretty decoration will save it.
One wax you trust
Soy wax is the best wax for beginners, and it is the wax I use for almost every project in this guide. It melts at a low temperature, it holds scent well, it cleans up with soap and water, and it is forgiving when your pour temperature is a little off. Paraffin holds scent a little stronger and sets harder, but it is fussier about temperature and it smokes more. Beeswax smells lovely on its own and burns long, but it is expensive and it can be tricky to pour. Pick soy wax, buy it from a candle supply shop rather than a craft store if you can, and use the same wax for your first five candles. Changing wax every time is the fastest way to never learn what went wrong.
The right wick for the jar
The wick is the engine of the candle, and the most common beginner mistake is using a wick that is too small for the jar. A wick that is too small makes a tiny flame, the wax melts only in the middle, and the candle tunnels down and wastes half the wax. A wick that is too big makes a tall flame, the candle smokes, and the jar gets hot. The fix is simple. Match the wick to the width of your container. A jar about three inches wide usually takes a medium cotton wick, and a jar about four inches wide takes a large one, or two medium wicks set an inch apart. Wick size charts come free from every candle supply shop. Use one. And always do a test burn on your first candle of a new size before you pour a whole batch.
Patience with temperature and curing
Candle making is mostly waiting, and the waiting is where the quality comes from. Melt the wax slowly, stir in the fragrance oil at the right temperature, usually around 185 degrees, and pour at the temperature your wax asks for, usually around 135 degrees for soy. Then leave the candle alone. Do not move it, do not blow on it, do not put it in the fridge to speed it up. A candle cooled too fast gets wet spots and a rough top. Then let it cure. Soy candles need at least a week, and two weeks is better, before the scent fully binds to the wax. A candle burned the day after pouring will smell faint, and you will think you did something wrong. You did not. You just did not wait.
First Pours
If you have never poured a candle before, start here. These five projects are the simplest diy candles in the guide, and they teach you the whole craft: melt, scent, pour, set, cure. Each one uses soy wax, a cotton wick, and a jar you probably already own.
1. Classic Soy Jar Candle
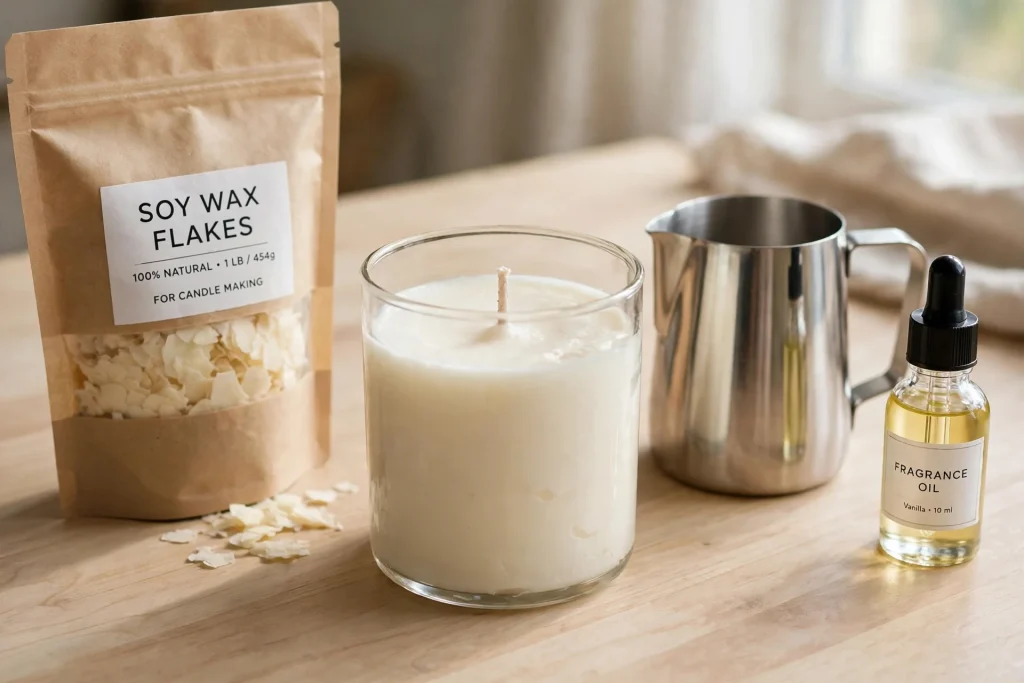
This is the candle to make first, because it teaches you everything and it is almost impossible to ruin. A plain soy wax candle in a glass jar, one wick, one scent, no decoration. It burns clean, it smells good, and it looks like something you would buy in a shop. I still make these every autumn, because a plain jar candle is the one I actually burn.
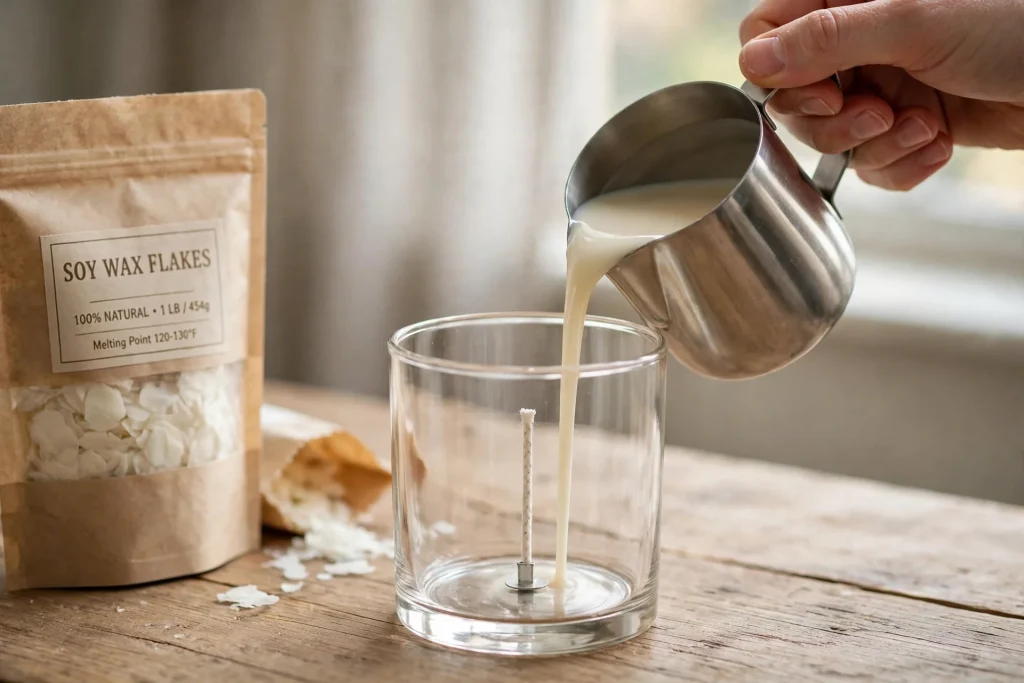
You need soy wax flakes, a cotton wick with a wick sticker or a dab of hot glue, a glass jar about three inches wide, fragrance oil, a pouring pitcher, and a thermometer. Melt one pound of wax in a double boiler until it reaches about 185 degrees. Take it off the heat, stir in one ounce of fragrance oil for two minutes, and let it cool to about 135 degrees. Stick the wick to the center of the jar, pour the wax in slowly, and center the wick with a chopstick or a wick holder. Leave it alone for a full day, then let it cure for a week before you light it. If the top sinks a little, that is normal. A quick pass with a heat gun, or a second thin pour of wax, fixes it.
Best for: your very first candle. Time: about 30 minutes of work, plus a day to set and a week to cure. Cost: about four dollars.
You may also like: 21 Cozy Christmas Living Room Decor Ideas That Make Your Home Feel Magical
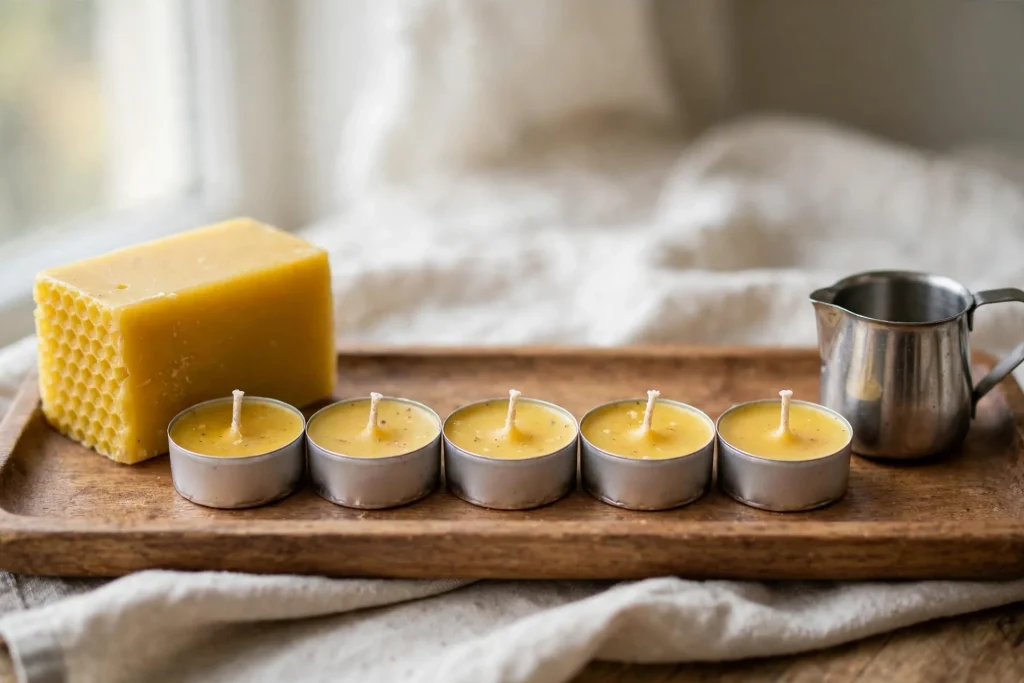
2. Beeswax Tea Lights in a Batch
Beeswax tea lights are the fastest candle making project here, and they are the best way to learn how wax behaves without committing to a big jar. You pour a dozen at once, they set in an hour, and they burn for about four hours each. The honey smell of real beeswax needs no added scent at all, which makes this a good first project for anyone who is nervous about fragrance oil.
You need beeswax, small metal tea light cups, tea light wicks, and a pouring pitcher. Melt the beeswax slowly in a double boiler, because beeswax scorches easily if the heat is too high. Place a wick in each cup, using a wick sticker or a drop of melted wax to hold it. Pour the wax into the cups, leaving a little room at the top, and straighten the wicks while the wax is still warm. Let them set for an hour. Beeswax sets harder than soy, so do not try to move the cups until the wax is fully firm. A batch of twelve costs a few dollars and fills a whole shelf with warm light.
Best for: learning wax in a small batch, and for gifts. Time: about 20 minutes of work, plus an hour to set. Cost: under three dollars for twelve.
You may also like: Living Room Decor Ideas That Feel Cozy and Clean
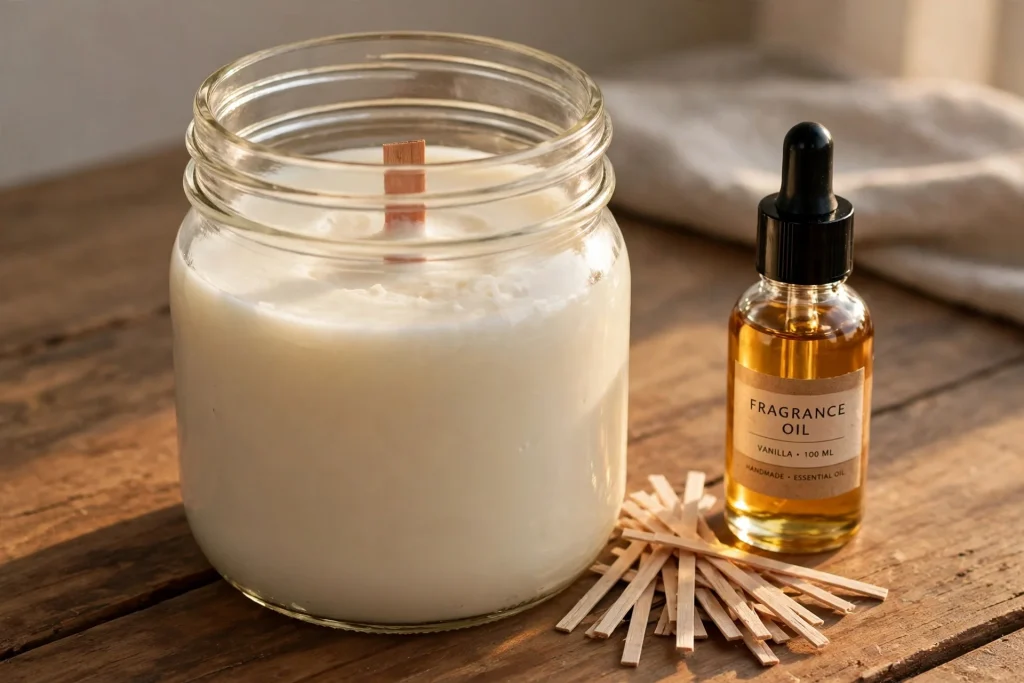
3. Mason Jar Candle with a Wood Wick
A wood wick changes everything about a candle. It crackles softly when it burns, like a tiny fireplace, and it gives a wider melt pool than a cotton wick, so the scent fills the room faster. A mason jar is the perfect home for it, because the wide mouth lets the flame breathe. This is the candle I light when I want the house to feel calm.
You need soy wax, a wood wick with a metal clip base, a wide mouth mason jar, fragrance oil, and a pouring pitcher. Wood wicks need a little more care than cotton ones. Trim the wick to about an eighth of an inch above the wax before the first burn, or it will smoke. Melt the wax, stir in the fragrance oil at 185 degrees, and pour at 135 degrees, just like a normal soy candle. The wood wick goes in the clip base, which sticks to the bottom of the jar. Pour slowly, so you do not knock the wick over. Let it set for a day and cure for a week. The first light is worth the wait, because the crackle is genuinely lovely.
Best for: a cozy evening candle with a crackling wick. Time: about 30 minutes of work, plus a day to set and a week to cure. Cost: about five dollars.
You may also like: Cozy Studio Apartment Ideas That Make Small Spaces Feel Bigger and Warmer
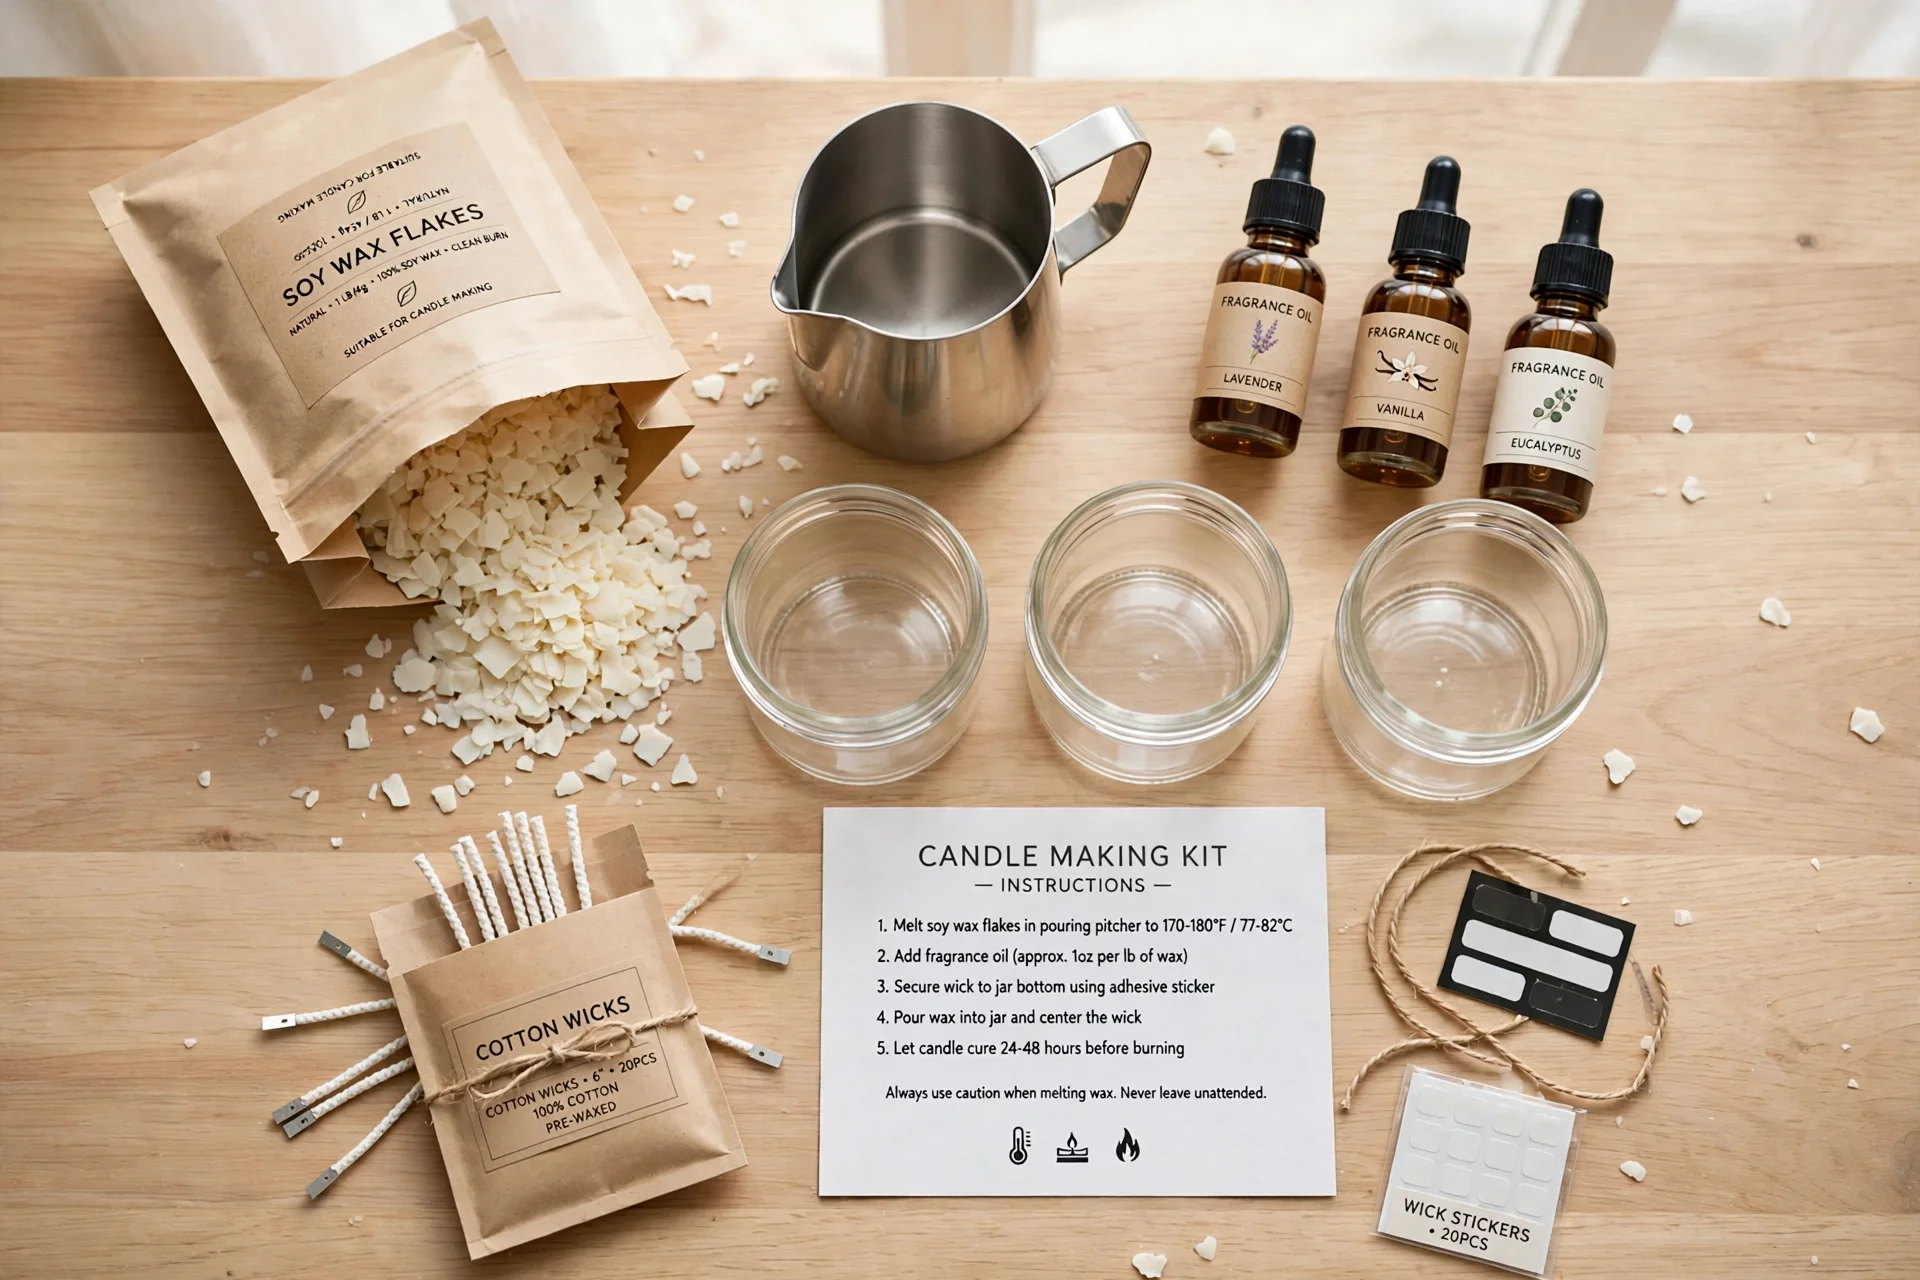
4. Candle Making Kit First Pour
If you do not want to buy wax, wicks, jars, and fragrance oil separately, start with a candle making kit. A good kit has everything measured out for you: the wax, the wicks, the jars, the fragrance oil, and the instructions. It costs a little more per candle than buying supplies in bulk, but it removes every decision from your first pour, and that is worth a lot when you are learning.
You need one candle making kit, a pot for a double boiler, and a thermometer. Follow the kit instructions exactly the first time, because the wax and the wick sizes are matched to each other. Most kits use soy wax, and the steps are the same as the classic jar candle: melt, scent, pour, set, cure. The only difference is that you did not have to shop for anything. Once you have poured the kit, you will know which supplies you liked and which ones you want to buy on their own next time. Think of the kit as a lesson with candles at the end of it.
Best for: a complete beginner who wants no shopping decisions. Time: about 30 minutes of work, plus a day to set and a week to cure. Cost: about fifteen dollars for the kit, which makes two or three candles.
You may also like: 7 Entryway Ideas That Make Your Home Feel Put Together Instantly
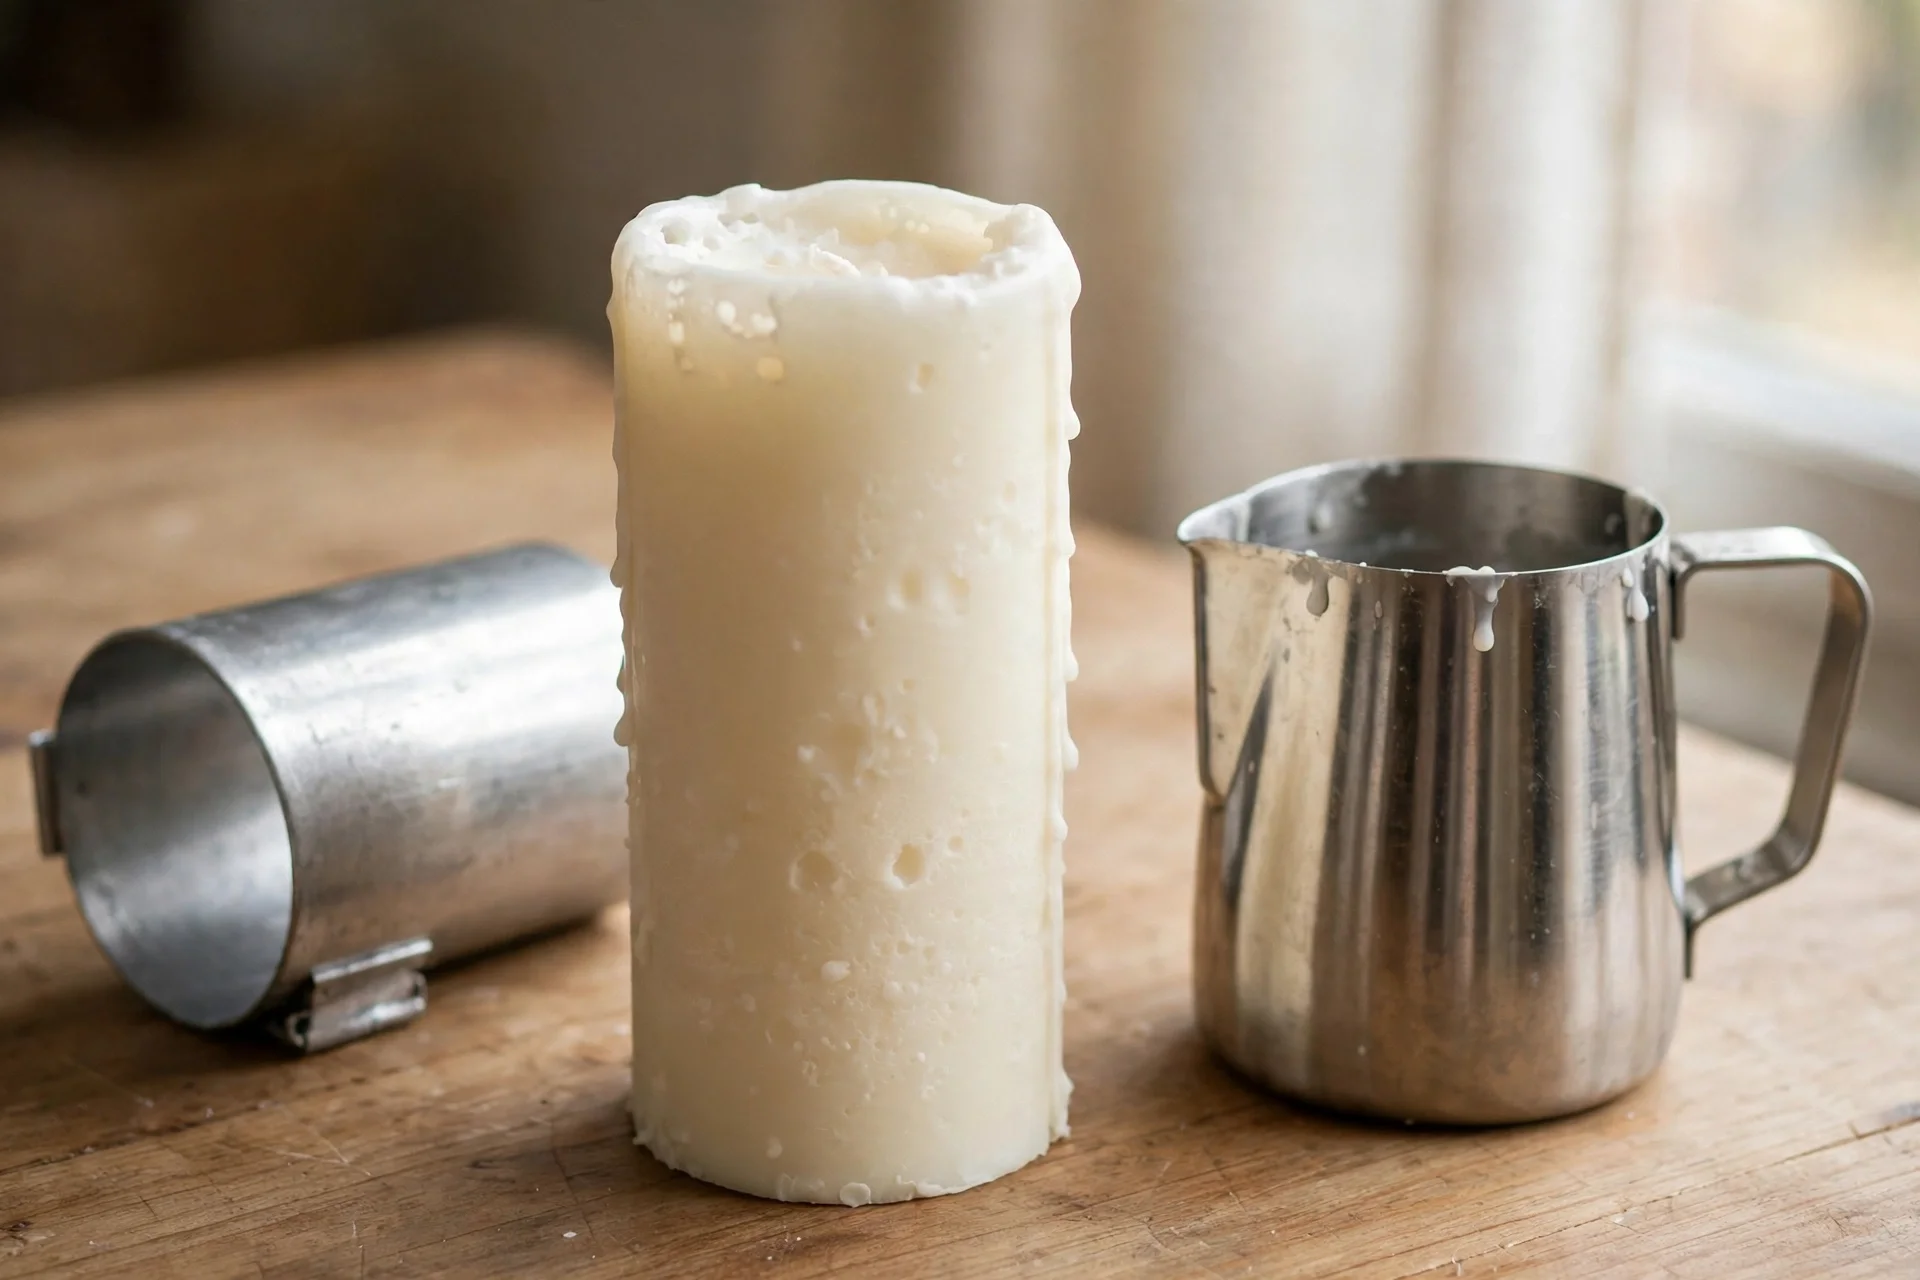
5. Unscented Pillar Candle for Beginners
An unscented pillar candle is the simplest thing you can pour, because there is no fragrance oil to measure and no scent to get wrong. You pour wax into a mould, let it set, pop it out, and you have a candle that burns for hours. Pillars are also the best candle for learning about moulds, because you see exactly how the wax behaves as it cools and shrinks.
You need pillar wax or soy wax, a pillar mould, a wick, mould release spray, and a pouring pitcher. Spray the mould lightly with release spray and thread the wick through the hole at the bottom, sealing it with a wick plug or a dab of putty. Melt the wax, pour it into the mould slowly, and leave a little room at the top. As the wax cools it will sink in the middle, so poke a few small relief holes around the wick with a skewer and do a second pour to fill them. This is called a repour, and it is the single most useful trick in candle making. Let the pillar set overnight, then slide it out of the mould. Trim the wick, and it is ready to burn after a few days of curing.
Best for: learning moulds and repours. Time: about 40 minutes of work, plus a day to set. Cost: about four dollars.
You may also like: How to Style a Boho Apartment: A Complete Guide to a Warm and Relaxed Space
Fall Scents
The scent is where a candle becomes a fall candle. These four projects are all about fragrance, and they use the fall candle ideas that suit the season best. Pumpkin candles are the ones people ask for first, and the rest of this group covers apple, cinnamon, and spice. If fall candle making for beginners feels like a big step, start with the pumpkin spice candle below, because it is the most forgiving scent in the group. A note on honesty here: fall candles are a September and October story. By mid November, searches for fall candles have already dropped sharply, and the candles people are actually buying and searching for are general scented candles for the November and December season. So think of these four as fall scented candles for your own home, poured now and burned through the winter, not as a trend to chase.
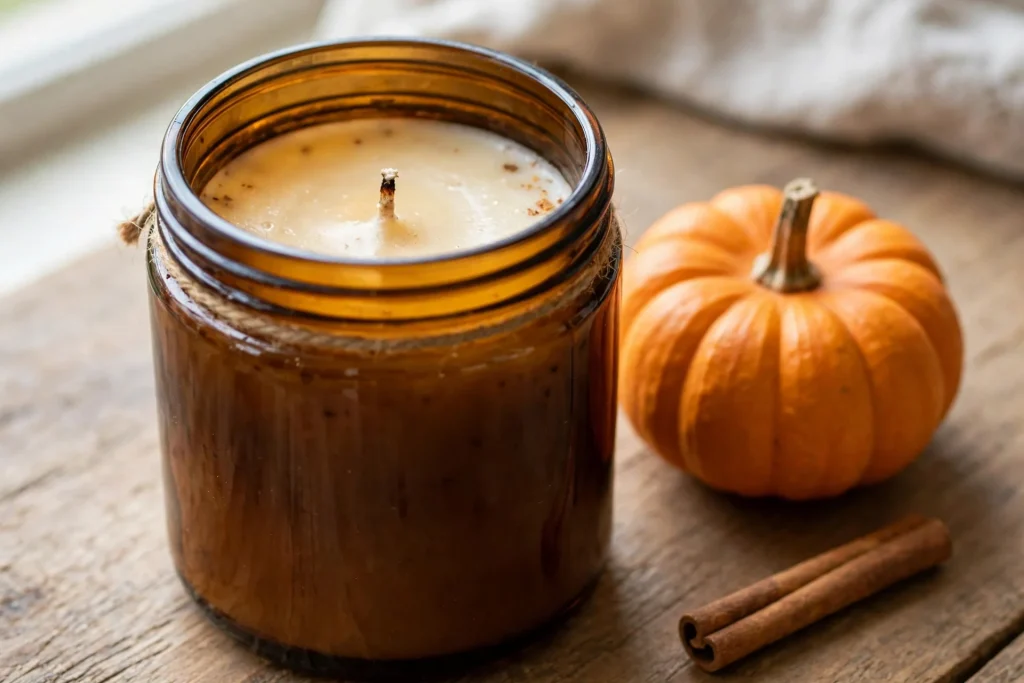
6. Pumpkin Spice Soy Candle
Pumpkin spice is the scent people ask for first, and it is easy to get right. The trick is balance. Too much cinnamon and the candle smells sharp. Too much vanilla and it smells like a bakery. The blend that works is pumpkin, cinnamon, nutmeg, and a little vanilla, and most candle supply shops sell it as a single fragrance oil, which saves you from mixing your own.
You need soy wax, a cotton wick, a glass jar, and pumpkin spice fragrance oil. Melt one pound of wax to 185 degrees, stir in one ounce of fragrance oil for two full minutes, and pour at 135 degrees. The two minutes of stirring matters more than people think. Fragrance oil that is not mixed properly will pool on top of the wax and the candle will smell strong at first and then almost nothing. Stir slowly and steadily, count to 120, and then pour. Let it cure for two weeks if you can, because pumpkin spice is a heavy scent and it needs the full cure to throw properly across a room.
Best for: the classic fall scent, done properly. Time: about 30 minutes of work, plus a day to set and two weeks to cure. Cost: about five dollars.
You may also like: Wall Decor Ideas That Look Clean and Modern
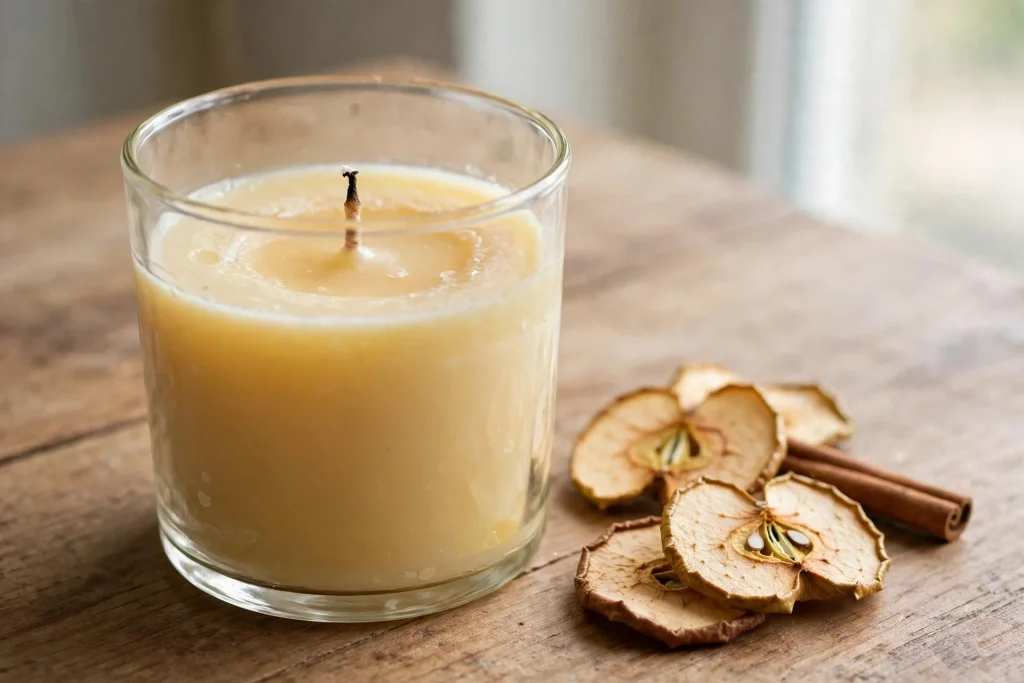
7. Apple Cider and Cinnamon Candle
Apple cider is a lighter fall scent than pumpkin spice, and it suits a kitchen or a dining room better than a bedroom, because it smells like food. The blend is apple, a little cinnamon, and a touch of clove. If you buy a ready made apple cider fragrance oil, check that it is made for candles, not for soap, because soap fragrance oils do not always burn cleanly.
You need soy wax, a cotton wick, a glass jar, and apple cider fragrance oil. Melt the wax, stir in the oil at 185 degrees, pour at 135 degrees, and let it set. The thing to watch with apple scents is that they are lighter than spice scents, so they throw less far. Use the full one ounce of oil per pound of wax, and use a jar no wider than three inches, so the melt pool reaches the edges and the scent releases properly. A wide jar with a small wick will tunnel, and a tunneled apple candle barely smells at all.
Best for: kitchens and dining rooms. Time: about 30 minutes of work, plus a day to set and a week to cure. Cost: about five dollars.
You may also like: Mirror Wall Decor Ideas That Make Your Living Room Feel Bigger and Better
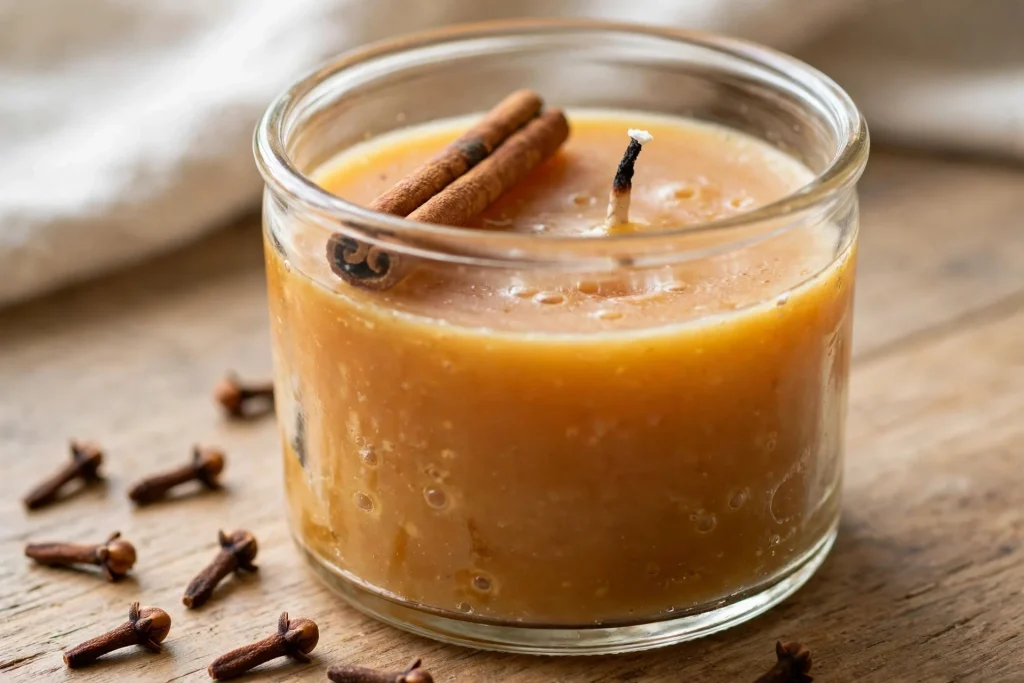
8. Cinnamon Stick and Clove Candle
This one is for people who like a strong scent. Cinnamon and clove are both powerful fragrance oils, and together they fill a room fast. The trick is to use less than you think. Half an ounce of cinnamon oil and half an ounce of clove oil per pound of wax is plenty. More than that and the candle will smell sharp and the wick may smoke.
You need soy wax, a cotton wick, a glass jar, cinnamon fragrance oil, and clove fragrance oil. Melt the wax to 185 degrees, stir in both oils for two minutes, and pour at 135 degrees. Decorate the top with a cinnamon stick laid across the wax after it has started to set but before it is fully firm, about an hour after pouring. The stick will sit on the surface and look lovely, but keep it away from the wick, because anything flammable touching the flame is a fire risk. Trim the wick short before every burn, because cinnamon candles soot more than most.
Best for: a strong, spicy scent for a large room. Time: about 30 minutes of work, plus a day to set and a week to cure. Cost: about five dollars.
You may also like: 7 Easy Desserts Anyone Can Make at Home (No Fancy Skills Needed)
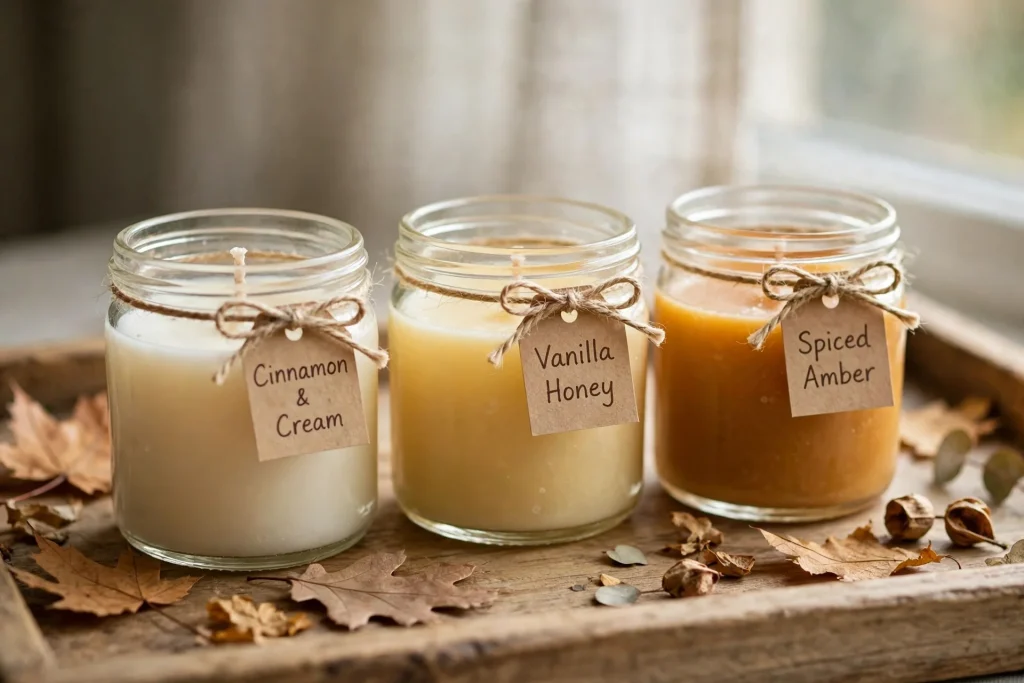
9. Fall Scented Candle Trio
Three small diy fall candles, three scents, one tray. A pumpkin spice, an apple cider, and a cinnamon clove, poured in small four ounce jars and set on a wooden tray. It is the best gift in this guide, because the person who gets it can try all three and pick a favorite, and it is the best way to test which scents you like before you commit to a big batch.
You need soy wax, three cotton wicks, three small glass jars, and three fragrance oils. Melt the wax in three small batches, one per scent, or melt one big batch and split it into three pitchers before you add the oil. Pour each jar, center the wicks, and let them set. Label each jar with a small tag tied on with twine, so you remember which is which after they cure. The whole trio takes about an hour of work, and it cures in a week. Put the three jars on a small tray with a few dried leaves, and it looks like something from a shop.
Best for: gifts, and for testing scents before a big batch. Time: about an hour of work, plus a day to set and a week to cure. Cost: about ten dollars for three.
You may also like: 22 Christmas Card Ideas That Feel Handmade and Truly Special
Moulds and Containers
Once you can pour a jar candle, the next step is the container itself. A candle poured in a pumpkin shell, a walnut shell, or a teacup looks like a different object entirely, and it costs almost nothing extra. These four projects use the moulds and containers that suit fall best, including the pumpkin candle making and walnut shell candles from the competitor’s list.
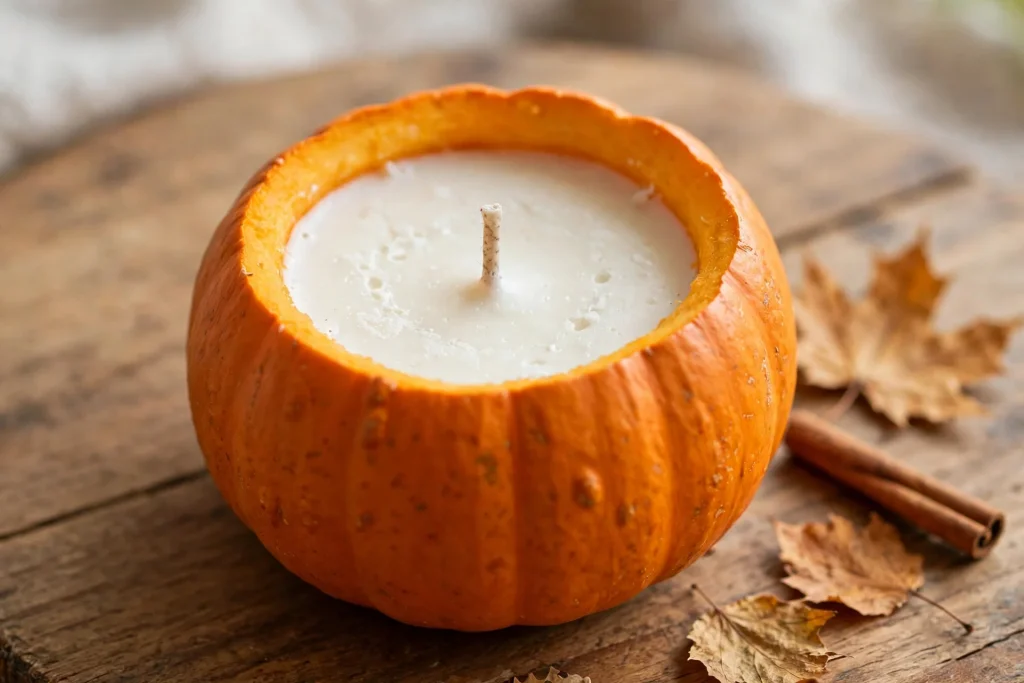
10. Pumpkin Shell Candle
A candle poured in a hollowed out mini pumpkin is the most fall thing in this guide, and it is easier than it looks. The pumpkin is the container and the decoration at the same time. It burns for a few evenings, and then the pumpkin starts to soften, so this is a short lived candle, not a keepsake. Make it for a dinner party, not for a shelf.
You need soy wax, a cotton wick, a mini pumpkin, and pumpkin spice or cinnamon fragrance oil. Cut the top off the pumpkin, scoop out the seeds and flesh, and let the inside dry for a few hours. Line the inside with a thin layer of melted wax first, so the wet pumpkin flesh does not seep into the candle. Then stick the wick to the bottom, pour the scented wax in, and let it set. The pumpkin will feel warm when the candle burns, which is normal, but never leave it burning alone, and stop using it when the shell starts to feel soft. One mini pumpkin makes one candle, and the whole project takes about an hour.
Best for: a dinner party centerpiece. Time: about an hour of work, plus a day to set. Cost: about four dollars.
You may also like: 21 Cozy Christmas Living Room Decor Ideas That Make Your Home Feel Magical
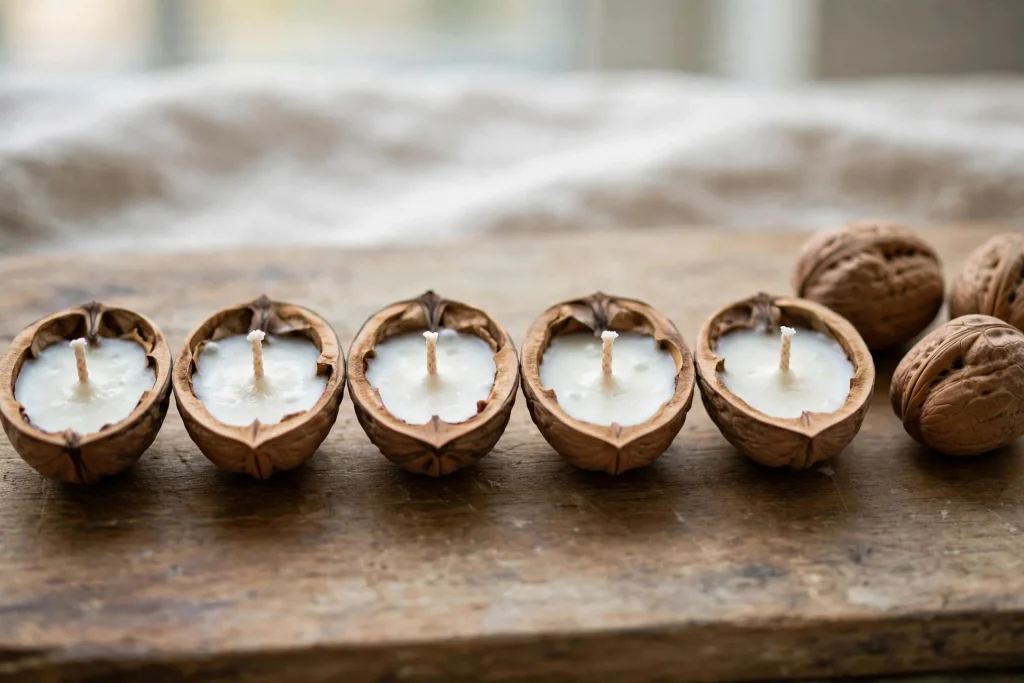
11. Walnut Shell Candles
Walnut shell candles are tiny, and that is the point. You pour a spoonful of wax into each half shell, add a short wick, and you have a candle that floats in a bowl of water or sits in a row along a mantel. They burn for about twenty minutes each, which makes them perfect for a table setting where you want a flicker of light rather than a full candle.
You need soy wax, short wicks, and walnut shells. Crack the walnuts cleanly in half and scoop out the meat. A nutcracker and a small spoon do the job, and you can eat the walnuts after, which is a nice bonus. Set each shell half upright in a small cup or an egg carton so it does not tip over while you pour. Melt the wax, add a drop of fragrance oil if you like, and pour a spoonful into each shell. Push the wick in while the wax is still warm and hold it straight for a few seconds. Let them set for an hour. They are small, they are fiddly, and they are completely charming on a table.
Best for: a table setting or a bowl of floating candles. Time: about 30 minutes of work, plus an hour to set. Cost: about two dollars for a dozen.
You may also like: Living Room Decor Ideas That Feel Cozy and Clean
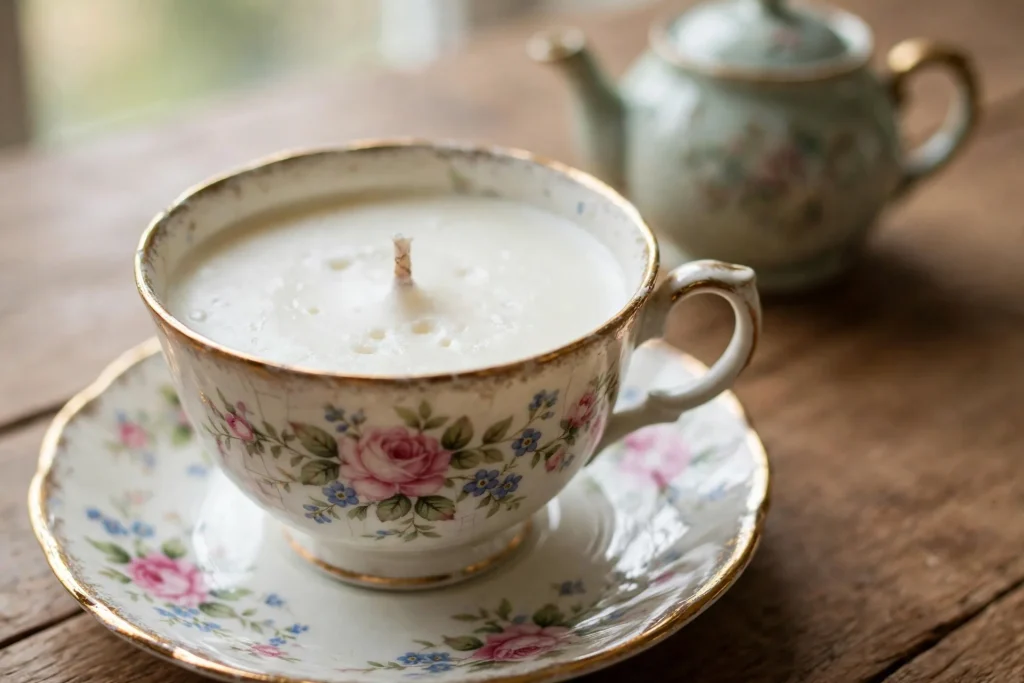
12. Vintage Teacup Candle
A teacup candle is the prettiest way to reuse a chipped cup. Charity shops sell single teacups for a dollar or two, and a candle poured into one turns it into a gift. The wide shape means the wax melts evenly, and the handle makes it easy to carry from room to room. I have a shelf of these, and they are the candles guests ask about most.
You need soy wax, a cotton wick, a teacup with a saucer, and fragrance oil. Check the cup for cracks first, because hot wax will find a crack and leak through it. Stick the wick to the bottom of the cup, pour the wax in slowly, and center the wick. The cup is wider than a jar, so the wax will take longer to set, about a full day. Do not move it while it sets, or the surface will wrinkle. A teacup candle burns for about fifteen hours, and when it is finished, the cup washes clean with hot soapy water and can be used again.
Best for: gifts, and for reusing pretty cups. Time: about 30 minutes of work, plus a day to set and a week to cure. Cost: about five dollars.
You may also like: 7 Entryway Ideas That Make Your Home Feel Put Together Instantly
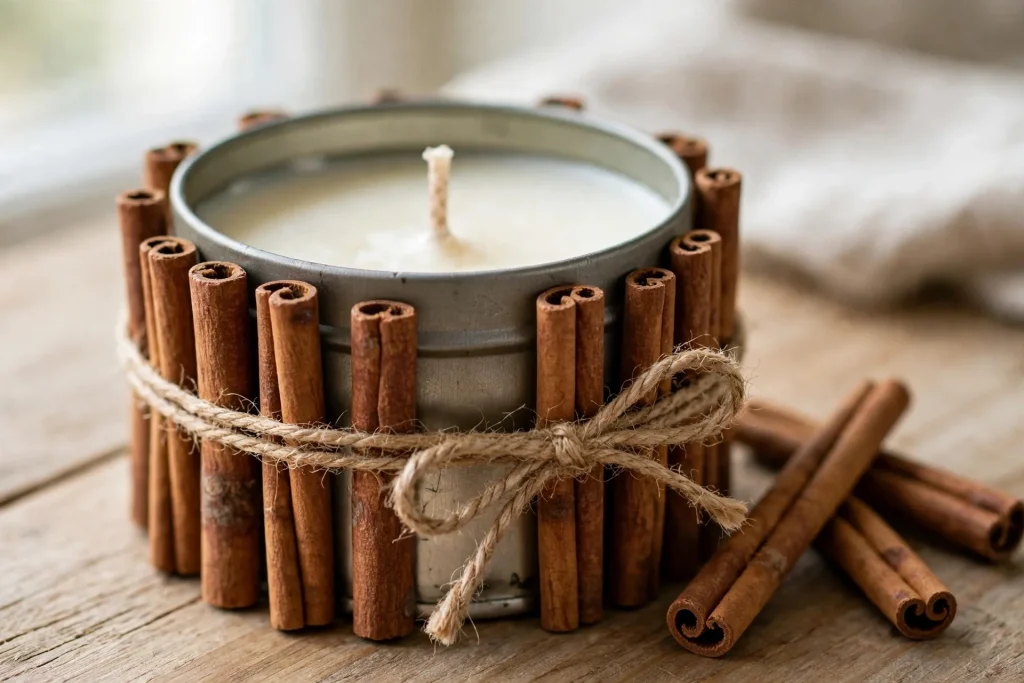
13. Cinnamon Stick Tin Candle
A tin candle travels well, which makes it the best candle for a desk, a car, or a gift sent in the post. This one has cinnamon sticks glued around the outside of the tin, so it looks like a little log cabin and smells faintly of spice even before you light it. It is a simple project, and it is the one I make when I need a quick gift.
You need soy wax, a cotton wick, a metal tin with a lid, fragrance oil, cinnamon sticks, and a hot glue gun. Pour the candle in the tin first, the same way as a jar candle, and let it set and cure. Once the wax is firm, glue cinnamon sticks vertically around the outside of the tin, side by side, and tie a piece of twine around the middle to hold them in place while the glue sets. The sticks should sit just below the rim of the tin, so the lid still fits. The lid matters, because a tin with a lid does not spill in a bag, and it keeps the scent in when the candle is not burning.
Best for: a gift that travels, and for desks. Time: about 30 minutes of work, plus a day to set and a week to cure. Cost: about five dollars.
You may also like: How to Style a Boho Apartment: A Complete Guide to a Warm and Relaxed Space
Layered and Decorative
These five projects are where candle making starts to look like art. Layered colors, dried flowers, coffee beans, wood wicks, and marbled wax all take a little more patience, but none of them needs a new skill, just a steady hand and a willingness to wait between layers.
14. Layered Autumn Colors Candle
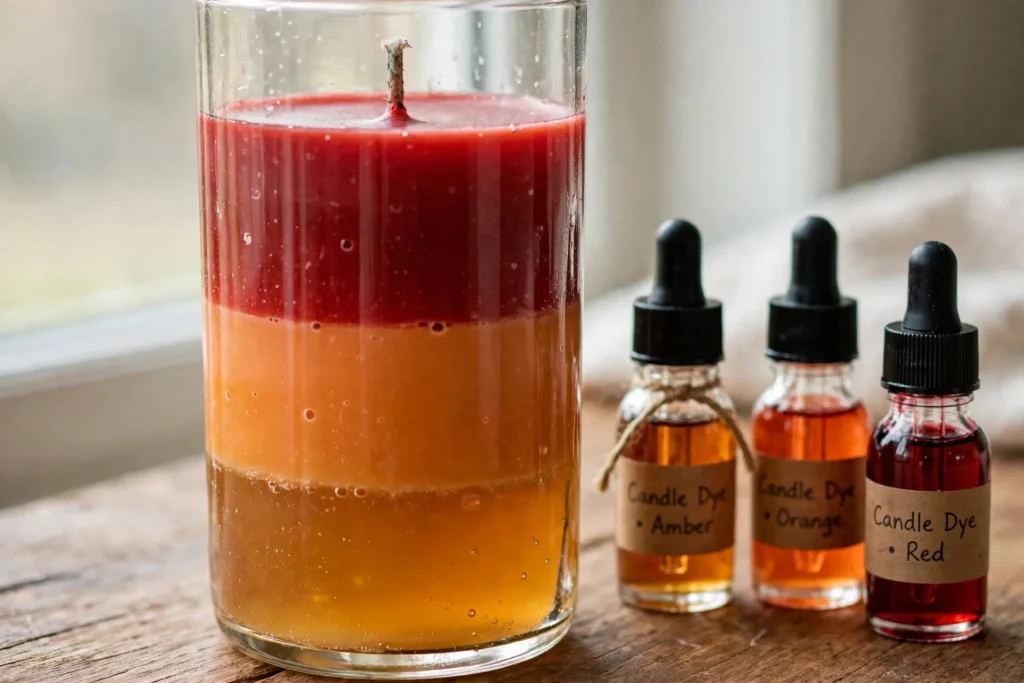
A layered candle is poured in stages, one color at a time, and the result looks like a sunset in a jar. The trick is waiting. Each layer must set before you pour the next, or the colors will bleed into each other. It takes an afternoon, but most of that time is waiting, and the finished candle is the one people photograph.
You need soy wax, a cotton wick, a tall glass jar, and three colors of candle dye, in amber, orange, and deep red. Melt the wax and divide it into three pitchers, one per color. Add a few drops of dye to each, plus fragrance oil if you want the candle scented. Pour the first layer, about a third of the jar, and let it set for two hours. Then pour the second layer, and let it set for two hours. Then pour the third. The layers should be even, so measure by eye against the jar, not by guessing. Let the whole candle set overnight and cure for a week. The colors will look soft through the glass, like light through autumn leaves.
Best for: a showpiece candle for a mantel. Time: about an hour of work spread over an afternoon, plus a day to set and a week to cure. Cost: about seven dollars.
You may also like: Wall Decor Ideas That Look Clean and Modern
15. Dried Flower Soy Candle
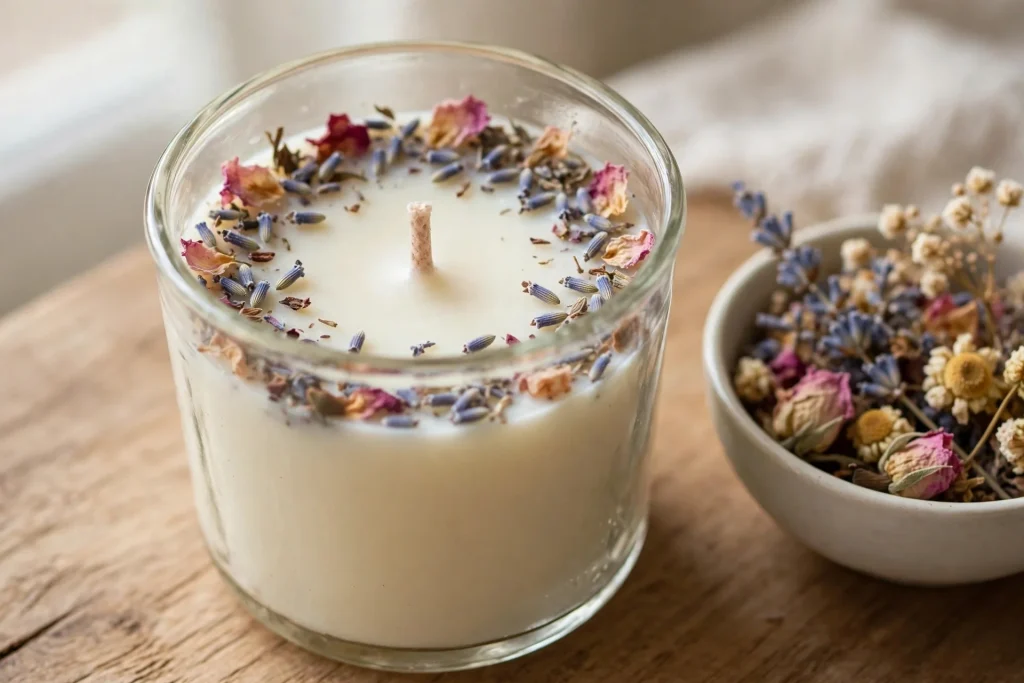
Dried flowers pressed into the top of a candle look beautiful, and they are easy to do badly, so here is the rule: put the flowers on the surface only, never mixed through the wax, and keep them away from the wick. Flowers near the flame will catch fire. Flowers at the edge of the jar are safe and lovely.
You need soy wax, a cotton wick, a glass jar, fragrance oil, and dried flowers, such as lavender buds, small rose petals, or dried orange slices. Pour the candle normally and let it set until the top is firm but still slightly warm, about two hours after pouring. Then press the dried flowers gently into the surface, around the edge, well away from the wick. The warm wax holds them in place. Let the candle set fully, then cure for a week. When you burn it, the flowers at the edge will stay put, and the scent of lavender or rose will mix with the fragrance oil in the wax.
Best for: a pretty candle for a bedroom or a gift. Time: about 30 minutes of work, plus a day to set and a week to cure. Cost: about six dollars.
You may also like: Mirror Wall Decor Ideas That Make Your Living Room Feel Bigger and Better
16. Coffee Bean Candle
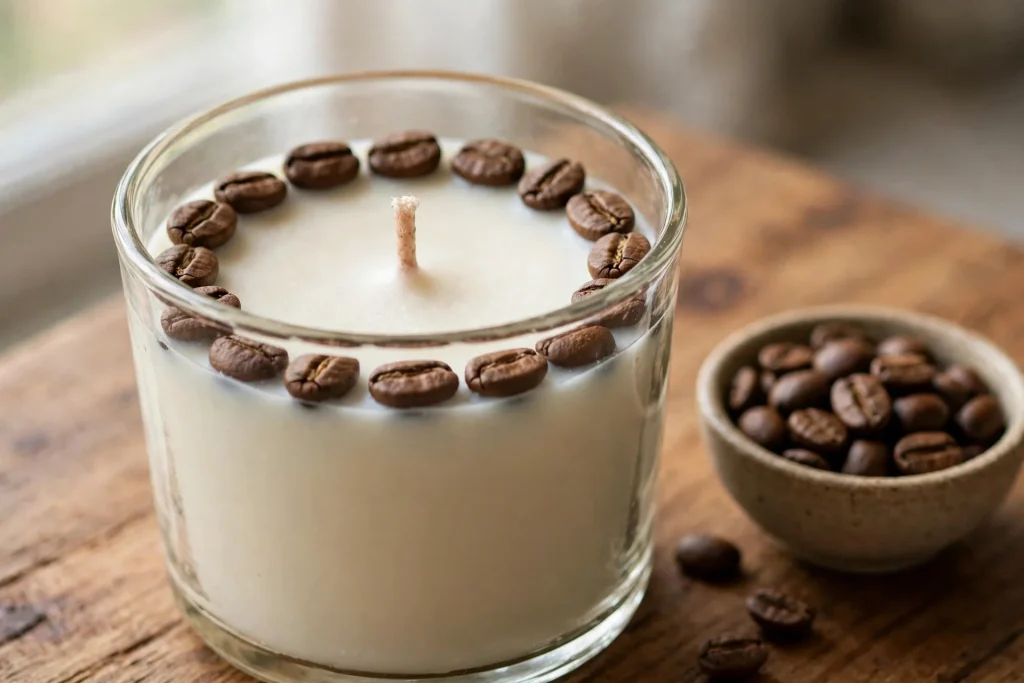
A coffee bean candle is a kitchen candle, and it works because coffee and candle wax are natural friends. The beans sit on top of the wax, they smell faintly of coffee even when the candle is not lit, and they look like they belong there. Use whole beans, not ground coffee, because ground coffee sinks and clogs the wick.
You need soy wax, a cotton wick, a glass jar, coffee fragrance oil or vanilla fragrance oil, and whole coffee beans. Pour the candle normally and let it set until the top is firm but still warm, about two hours after pouring. Then press whole coffee beans into the surface in a ring around the edge, keeping them away from the wick. The beans will sit half in the wax and half out, which is exactly what you want. Let it set fully and cure for a week. The candle smells of coffee and vanilla when it burns, and the beans give it a texture that no other candle in this list has.
Best for: kitchens and coffee lovers. Time: about 30 minutes of work, plus a day to set and a week to cure. Cost: about five dollars.
You may also like: 7 Easy Desserts Anyone Can Make at Home (No Fancy Skills Needed)
17. Wood Wick Candle with a Crackle
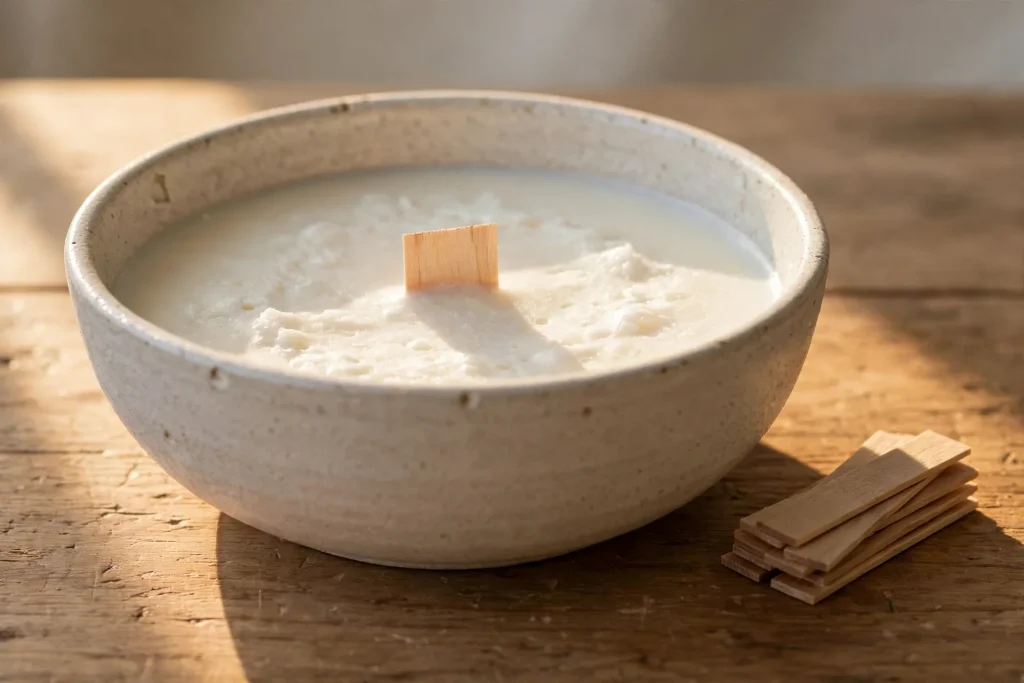
This is a second wood wick project, and it is here because the crackle deserves its own candle. The first wood wick candle in this guide used a mason jar. This one uses a wide, shallow bowl, which gives the flame a bigger melt pool and a louder crackle. It is the candle for a quiet evening, and it is the one I light when I want the room to feel like a cabin.
You need soy wax, a wide wood wick, a shallow ceramic bowl, and fragrance oil. Wide wood wicks need a wide container, or the flame will not spread and the wax will tunnel. A bowl about five inches across is right. Melt the wax, stir in the fragrance oil at 185 degrees, and pour at 135 degrees. The wood wick goes in a clip base stuck to the bottom of the bowl. Trim it to an eighth of an inch before the first burn. The crackle is quiet, more of a soft ticking than a fire, and it is the reason this candle exists. Let it cure for two weeks for the best scent throw, because a wide melt pool needs a fully cured candle to carry the scent.
Best for: a quiet evening and a wide melt pool. Time: about 30 minutes of work, plus a day to set and two weeks to cure. Cost: about six dollars.
You may also like: 22 Christmas Card Ideas That Feel Handmade and Truly Special
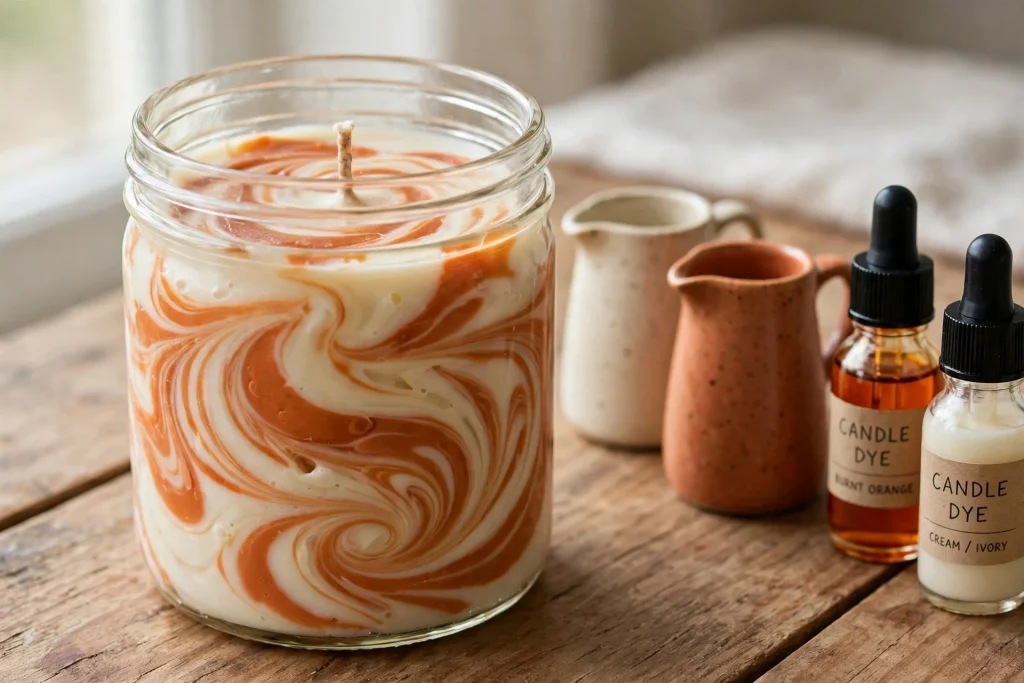
18. Marbled Wax Candle
A marbled candle is made by pouring two colors of wax at once and letting them swirl together, and it is the most forgiving decorative technique in this guide, because there is no wrong result. Every marble pattern is different, and every one looks good. The trick is pouring both colors at the same time, slowly, from two pitchers, so they fold into each other instead of mixing into one color.
You need soy wax, a cotton wick, a glass jar, and two colors of candle dye, such as cream and deep brown, or cream and burnt orange. Melt the wax and split it into two pitchers. Add dye to each, plus fragrance oil. Pour both pitchers into the jar at the same time, in thin streams, moving the pitchers slowly so the colors swirl. Do not stir. Stirring mixes the colors into one muddy shade, and the whole point is the swirl. Let it set for a day and cure for a week. The marble pattern will show through the glass, and no two candles will ever match.
Best for: a one of a kind decorative candle. Time: about 40 minutes of work, plus a day to set and a week to cure. Cost: about six dollars.
You may also like: 21 Cozy Christmas Living Room Decor Ideas That Make Your Home Feel Magical
Gifts and Finishing Touches
The last four projects are not about pouring a new kind of candle. They are about what you do after the pour: the label, the lid, the gift set, and the finishing touches that turn a homemade candle into something you would be proud to give away.
19. Candle Gift Set in a Box
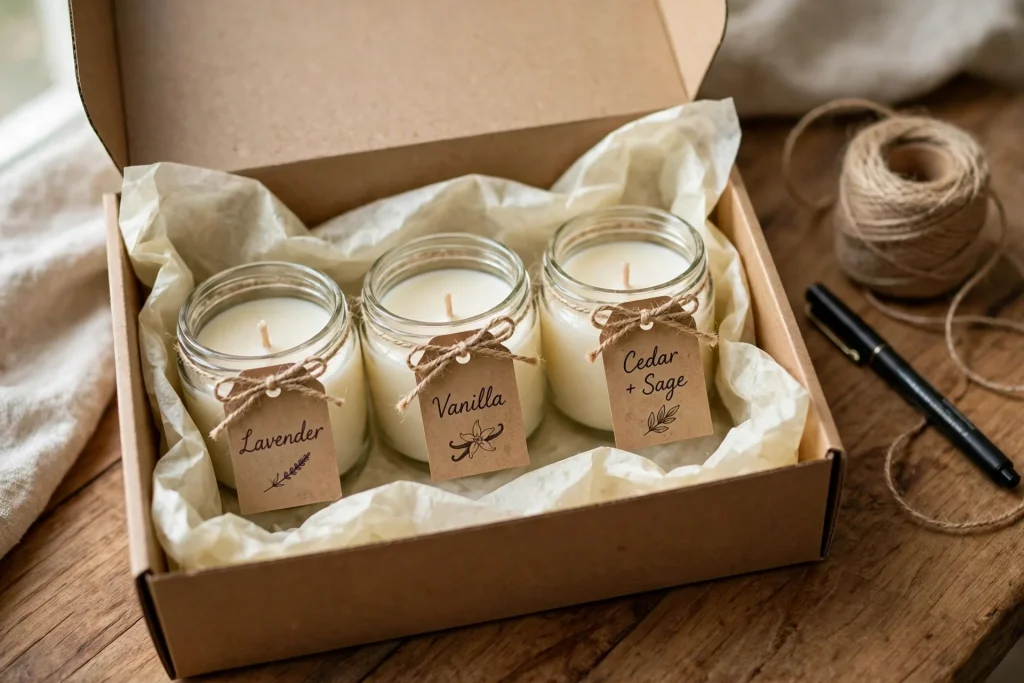
A gift set is three small candles in a box, and it is the best use of a candle making afternoon, because it turns one batch of wax into three gifts. The candles can be three scents, or three colors of the same scent, or three sizes of the same candle. The box is what makes it a gift, so spend a little time on it.
You need soy wax, three cotton wicks, three small glass jars, fragrance oil, and a small gift box with tissue paper. Pour the three candles in one session, one scent or three, and let them set and cure. While they cure, make the box. Line it with tissue paper, add a small tag for each candle with the scent written on it, and tie the box with twine. A hand written tag matters more than a printed one, because it says you made the whole thing yourself. The set takes about an hour of work and a week of curing, and it is the gift I give most often in December.
Best for: Christmas gifts and host gifts. Time: about an hour of work, plus a day to set and a week to cure. Cost: about twelve dollars for three.
You may also like: Living Room Decor Ideas That Feel Cozy and Clean
20. Hand Labeled Jar Candle
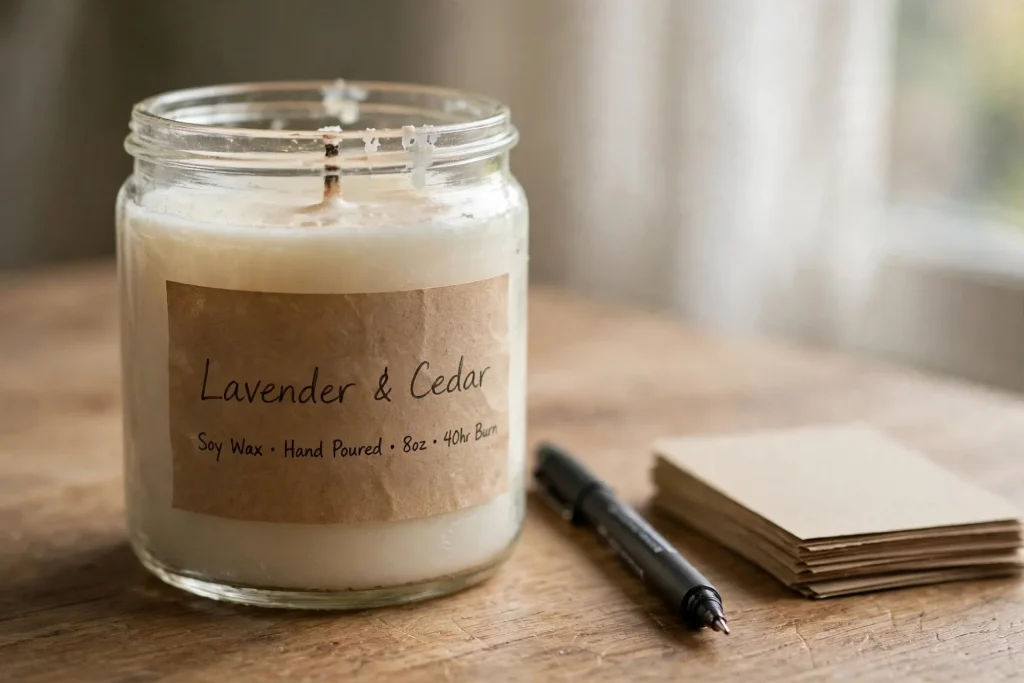
A label is the cheapest way to make a homemade candle look like a shop candle, and it takes ten minutes. A plain kraft label, a pen, and the name of the scent, written by hand. The label should say three things: the scent, the wax, and the burn time. Nothing else. A label that says too much looks like a warning.
You need a finished jar candle, a kraft paper label, a pen, and a glue stick or double sided tape. Write the scent name in your best handwriting, then underneath it, in smaller letters, the wax and the approximate burn time. “Pumpkin Spice, soy wax, about 40 hours.” Stick the label to the front of the jar, centered, and press it down firmly. If the jar is warm from curing, wait until it is fully cool, or the glue will not hold. A hand written label is better than a printed one for a homemade candle, because the whole point of the candle is that a person made it, and the label should show that too.
Best for: making a homemade candle look finished. Time: about 10 minutes. Cost: under a dollar.
You may also like: Cozy Studio Apartment Ideas That Make Small Spaces Feel Bigger and Warmer
21. Candle with a Wooden Lid
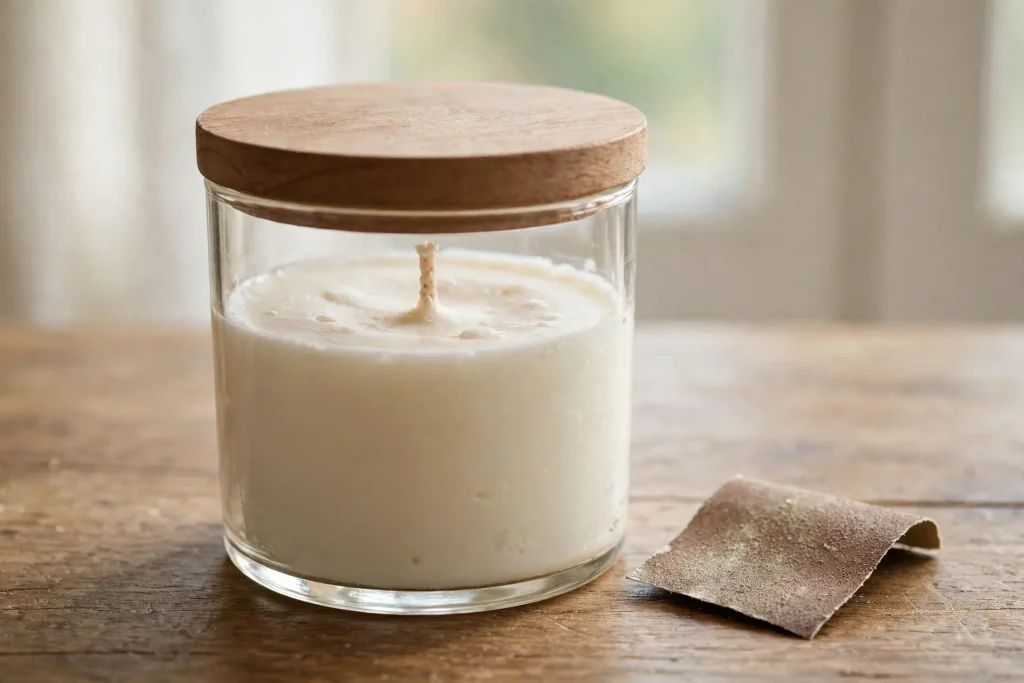
A wooden lid does two things for a candle. It keeps the dust off when the candle is not burning, and it keeps the scent in, so the candle still smells good a month after you poured it. It also makes the candle look finished, like something you would find in a shop. You can buy wooden lids to fit standard jars, or cut your own from a thin slice of wood, but buying them is easier and they cost very little.
You need a finished jar candle, a wooden lid that fits the jar, and a small piece of sandpaper. Sand the lid lightly so it sits flat, and check that it fits snugly without pressing down on the wax. If the lid is too tight, sand the inside edge a little more. Do not put the lid on until the candle has cured for a week, because a fresh candle still gives off moisture as it cures, and a sealed lid will trap it. Once the candle is cured, the lid goes on, and the candle is ready to give away or to keep on a shelf until you want it.
Best for: storing candles and keeping the scent in. Time: about 10 minutes. Cost: about two dollars for the lid.
You may also like: 7 Entryway Ideas That Make Your Home Feel Put Together Instantly
22. Refill a Finished Candle Jar
The last project is not a new candle at all. It is a refill. When a candle has burned down to the last half inch of wax, do not throw the jar away. Clean it out, pour new wax in, and you have a new candle in a jar you already love. Refilling is the cheapest candle in this guide, and it is the most sustainable one too, because the jar gets used again and again.
You need a finished candle jar, soy wax, a new cotton wick, and fragrance oil. Put the jar in the freezer for a few hours, and the leftover wax will shrink and pop out in one piece. Wash the jar with hot soapy water and dry it completely. Stick a new wick to the bottom, melt fresh wax, stir in the fragrance oil, and pour it in. You can use the same scent as before, or try a new one, which is half the fun of a refill. Let it set for a day and cure for a week. A jar can be refilled three or four times before the glass starts to look tired, and by then you will have a shelf of jars you love.
Best for: saving money and reusing jars you love. Time: about 30 minutes of work, plus a day to set and a week to cure. Cost: about three dollars.
You may also like: 7 Entryway Ideas That Make Your Home Feel Put Together Instantly
The 1-2-3 Candle Method
If you take nothing else from this guide, take this. Every candle that turns out well follows the same three steps, and they work for any of the diy candles above. It works for soy candles and beeswax candles, for jars and tins and teacups, because the method is about the candle, not the container.
1 wax, 1 wick, 1 scent. One wax you know, one wick matched to your jar, and one scent. That is the whole method. When a candle goes wrong, it is almost always because one of these three got crowded. Two waxes mixed together. A wick that is too small for the jar. Three fragrance oils competing with each other. One of each, done properly, is all a good candle needs.
Here is how it works in practice. Before you start, choose your wax and stick with it for your first five candles. Soy wax is the right choice for candle making for beginners, because it is forgiving and it cleans up easily, and diy soy candles are the easiest first project in the whole guide. Then choose your wick from a size chart, based on the width of your jar, and test it once before you pour a batch. Then choose one scent and use the full amount, one ounce of oil per pound of wax, stirred for two minutes. That is the candle. Everything else in this guide, the moulds, the layers, the decorations, is just detail around those three steps.
The before and after is easy to see. Before, my candles had three scents, a wick I guessed at, and wax I bought because it was cheap. They tunneled, they smoked, and they barely smelled. After, my candles have one wax, one wick, and one scent, and they burn clean all the way down. The method is the difference.
At a Glance
| Candle project | Time per candle | Difficulty |
|---|---|---|
| 1. Classic Soy Jar Candle | 30 min | Easy |
| 2. Beeswax Tea Lights in a Batch | 20 min | Easy |
| 3. Mason Jar Candle with a Wood Wick | 30 min | Easy |
| 4. Candle Making Kit First Pour | 30 min | Very easy |
| 5. Unscented Pillar Candle for Beginners | 40 min | Easy |
| 6. Pumpkin Spice Soy Candle | 30 min | Easy |
| 7. Apple Cider and Cinnamon Candle | 30 min | Easy |
| 8. Cinnamon Stick and Clove Candle | 30 min | Easy |
| 9. Fall Scented Candle Trio | 1 hour | Easy |
| 10. Pumpkin Shell Candle | 1 hour | Medium |
| 11. Walnut Shell Candles | 30 min | Easy |
| 12. Vintage Teacup Candle | 30 min | Easy |
| 13. Cinnamon Stick Tin Candle | 30 min | Easy |
| 14. Layered Autumn Colors Candle | 1 hour | Medium |
| 15. Dried Flower Soy Candle | 30 min | Easy |
| 16. Coffee Bean Candle | 30 min | Easy |
| 17. Wood Wick Candle with a Crackle | 30 min | Easy |
| 18. Marbled Wax Candle | 40 min | Medium |
| 19. Candle Gift Set in a Box | 1 hour | Easy |
| 20. Hand Labeled Jar Candle | 10 min | Very easy |
| 21. Candle with a Wooden Lid | 10 min | Very easy |
| 22. Refill a Finished Candle Jar | 30 min | Easy |
Do This Not That
| Do this | Not that |
|---|---|
| Use soy wax for your first five candles | Switch wax every time and never learn what went wrong |
| Match the wick to the width of your jar | Guess the wick size and hope for the best |
| Stir fragrance oil for two full minutes at 185 degrees | Dump the oil in and pour right away |
| Pour at the temperature your wax asks for | Pour wax that is still too hot and get a rough top |
| Let the candle set for a full day without moving it | Move it, blow on it, or put it in the fridge to speed it up |
| Cure soy candles for at least a week before burning | Burn a candle the day after pouring and wonder why it barely smells |
| Trim the wick to a quarter inch before every burn | Light a long wick and let the candle smoke |
| Keep flowers and decorations away from the wick | Put dried flowers next to the flame where they can catch fire |
| Never leave melting wax alone on the stove | Walk away from a pot of hot wax |
| Do a test burn on one candle before pouring a batch | Pour twelve candles and find out they all tunnel |
Your Candle Making Weekend
You do not need a whole month. You need one weekend, and a clear plan. Here is the one I use every year for candle making, and it works whether you are pouring three candles or thirty.
Friday evening, about an hour. Decide your list. Write down every candle you want to make, and next to each one, write the wax, the wick, and the scent. Pick two or three projects from this list, not ten. One easy one for the shelf, one pretty one for a gift, and one fun one for yourself. Gather your candle making supplies and put them on the table. Check that you have enough jars, wicks, and wax for the whole batch, because running out halfway through a pour is the worst way to spend a Saturday. Buy one of the candle making kits if you are short on anything, because a kit fills the gaps in one box.
Saturday morning, two to three hours. Pour the candles. Work in a batch. Melt the wax, stir in the fragrance oil, and pour one scent at a time, then move to the next. Center every wick, and leave every candle alone once it is poured. Put on music, make a pot of tea, and treat it like a quiet morning rather than a chore. By lunch, the candles should be poured and setting.
Saturday afternoon, one hour. While the candles set, make the labels and the gift boxes. Write the scent names by hand, tie the twine, and put the tissue paper in the boxes. Do not touch the candles until the tops are firm. If a top has sunk, do a repour now, while the wax is still warm enough to bond. Check every wick is centered before you walk away.
Sunday morning, fifteen minutes. Check every candle once. Is the wax fully set? Is the wick straight? Is the top smooth? Then put them on a shelf to cure, out of the way, and write the pour date on a small sticker on the bottom of each jar. Soy candles need a week, and two weeks is better. The hardest part of candle making is not pouring the candle. It is waiting to light it.
Take It Further
If you liked this guide, these are the next ones to read. They build on the same ideas, room by room, and they will help you get the house ready for the people you love.
- 22 Christmas Card Ideas That Feel Handmade and Truly Special
- 21 Cozy Christmas Living Room Decor Ideas That Make Your Home Feel Magical
- Living Room Decor Ideas That Feel Cozy and Clean
- Cozy Studio Apartment Ideas That Make Small Spaces Feel Bigger and Warmer
- 7 Entryway Ideas That Make Your Home Feel Put Together Instantly
- How to Style a Boho Apartment: A Complete Guide to a Warm and Relaxed Space
- Wall Decor Ideas That Look Clean and Modern
- Mirror Wall Decor Ideas That Make Your Living Room Feel Bigger and Better
Maker’s Cheat Sheet
- One wax, one wick, one scent. The method is the whole craft. Everything else is decoration.
- Soy wax first. Soy wax is the best wax for candle making for beginners, because it melts low, holds scent well, and cleans up with soap and water.
- Wick size matters most. Match the wick to the width of the jar. Too small and the candle tunnels. Too big and it smokes.
- Stir for two minutes. Fragrance oil goes in at 185 degrees, stirred slowly for a full two minutes, or it will pool on top.
- Pour at the right temperature. About 135 degrees for soy wax. Too hot and the top goes rough. Too cool and the wax sets before it levels.
- Cure before you burn. Soy candles need at least a week, and two weeks is better. A candle burned too soon will smell faint.
- Safety is not optional. Never leave melting wax alone. Keep wicks centered. Trim the wick to a quarter inch before every burn. Never burn a candle to the bottom of the jar.
- Fall is a season, not a trend. Fall candles peak in September and October and drop sharply by mid November. General candle terms peak in November and December, which is why this guide is at its best right now, in the November and December candle season.
- Homemade fall candles beat store bought ones. Not because they are better made, but because you chose the scent, the jar, and the person they are for.
- Keep the decorations away from the flame. Dried flowers, cinnamon sticks, and coffee beans belong at the edge of the jar, never next to the wick.
- Repour fixes a sunk top. Poke relief holes around the wick with a skewer and pour a thin layer of wax to fill them.
- Buy supplies in bulk once you know what you like. Wax, wicks, and jars are all cheaper by the case, and candle making supplies take up less room than you think.
- One weekend is enough. A full shelf of diy candles fits into one weekend if you batch the pours and pick two or three projects.
- Start with a kit if you are nervous. Candle making kits remove every shopping decision from your first pour.
- Keep it simple. The candles people burn are the simple ones. The complicated ones sit on a shelf and gather dust.
Questions People Ask
Soy wax is the best wax for beginners. It melts at a low temperature, it holds scent well, it cleans up with soap and water, and it is forgiving when your pour temperature is a little off. Paraffin holds scent a little stronger, and beeswax smells lovely on its own, but both are fussier to work with. Start with soy wax, use the same wax for your first five candles, and only try another wax once you know how soy behaves.
Use about 6 to 10 percent fragrance oil by weight, which works out to roughly one ounce of oil per pound of wax. One ounce per pound is the standard amount for most soy candles, and it gives a good scent throw without making the candle smoke. Stir the oil into the wax at about 185 degrees for two full minutes, so it binds properly. Adding more oil does not make a stronger candle, it makes a smoky one, because the wax can only hold so much oil before it starts to burn badly.
Match the wick to the width of your container. A jar about three inches wide usually takes a medium cotton wick, and a jar about four inches wide takes a large one, or two medium wicks set an inch apart. Wick size charts are free from every candle supply shop, and they are worth using, because a wick that is too small will tunnel and a wick that is too big will smoke. Always do a test burn on one candle of a new size before you pour a batch, and watch the melt pool. It should reach the edges of the jar within two hours of burning.
Soy candles need at least one week to cure, and two weeks is better, because the fragrance oil needs time to bind to the wax. A candle burned the day after pouring will smell faint, and you will think you did something wrong. You did not, you just did not wait. Paraffin candles cure faster, usually in about 48 hours. Beeswax candles need about a week as well. Store curing candles somewhere cool and out of direct sunlight, with the lids off, so the scent can settle into the wax properly.
A Candle Is a Small Thing, and That Is the Point
I started this guide with a candle that sank in the middle. It was not a good candle. The top had a crater, the wick leaned, and the cinnamon smell was faint. But it was my candle, poured by my own hands in my own kitchen, and it lit the table all week. That was enough. It was more than enough.
That is what these 22 diy candles are really about. Not the wax or the wick or the scent. They are about sitting down for an afternoon and making something with your hands that will light a room for weeks. In a season that moves fast and asks a lot of us, that is a rare and generous thing to do. So pick a project, clear the kitchen table, and pour a few candles this weekend. Someone you love is going to light one in December, watch the flame catch, and feel the room get warmer. And it will stay lit all evening.
Happy pouring, from my table to yours.
Neuman