Too Long; Didn’t Read
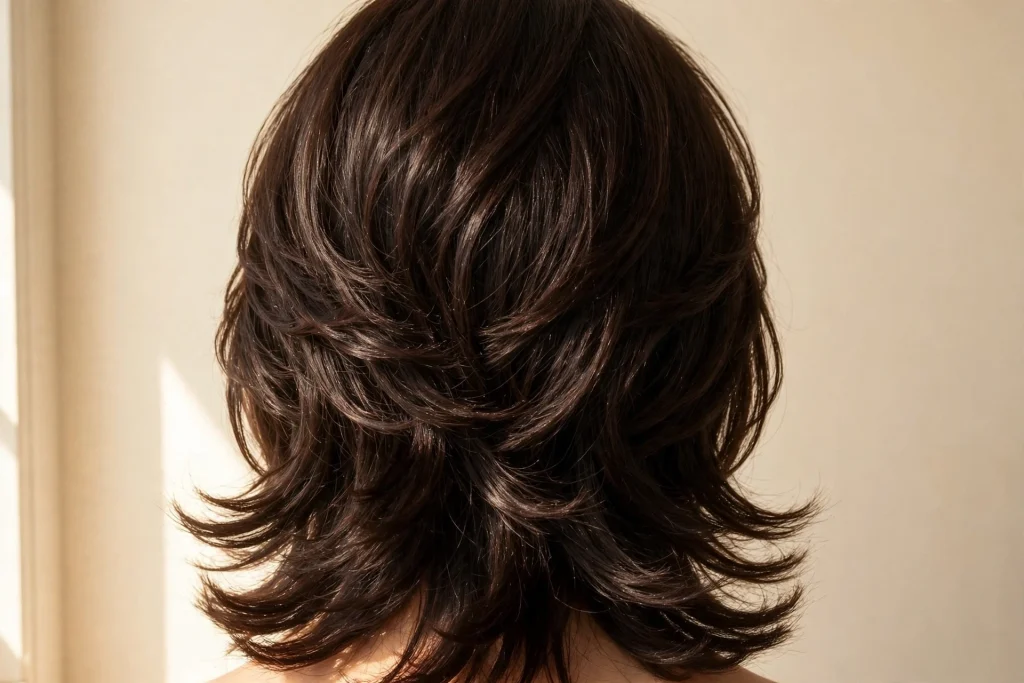
Thick hair is not the problem. The wrong cut is. Medium length, from the collarbone to just past the shoulders, is the sweet spot because it keeps enough weight to stop your hair puffing out but takes off enough length that your neck and your arms get a break. The real fix is weight removal from the inside: long layers, invisible interior layers, or a hidden undercut. Short choppy layers on top make thick hair wider, so skip those. Ask your stylist to take the bulk out of the interior and mid-lengths while keeping the ends strong, and get a trim every 8 to 12 weeks. Below are 22 medium length hairstyles for thick hair that actually do that, grouped so you can find your match fast.
The Morning My Sister Gave Up on Her Hair
My sister has the kind of thick hair people compliment in photos and curse in real life. By 10 in the morning her ponytail felt like it weighed a kilo. By 2 in the afternoon her medium cut had widened into a triangle, flat at the top and wide at the bottom, and the ends felt like they weighed five pounds each. She tried shorter cuts, and they puffed out. She tried longer hair, and her neck hurt by lunchtime. She tried thinning shears at a cheap salon once, and the regrowth stuck out through the top layer for months.
The change came from a stylist who did something simple. She lifted the top layer of my sister’s hair, pointed at the dense mass underneath, and said the weight was sitting in the wrong places. Too much at the sides, too much underneath, not enough shape to guide it. She cut long layers that started below the chin, carved out the interior bulk without touching the surface, and left the ends strong. My sister walked out with the same length she walked in with, and her hair finally moved when she moved. It swung instead of sitting there like a helmet.
That is what this guide is about. These 22 medium length hairstyles for thick hair are not about fighting your hair. They are about which cuts work with heavy, dense hair instead of against it. The layering, the weight removal, and the shape choices matter more here than the general cute haircut ideas you find on most lists. Every style below tells you what to ask for, who it suits, and how to style it at home without a salon blowout every morning.
Most of the medium hairstyles you see online were designed for fine or medium hair, and that is why so many of them fail on thick hair. Shoulder length haircuts for women look simple in a photo, but on dense hair the same cut can widen into a triangle by lunchtime. The medium length haircuts for women and medium length hairstyles for women in this guide were picked the other way around. Each one was chosen because it handles density well, whether your hair is straight, wavy, or curly.
What's Inside This Guide
ToggleWhat’s Inside This Guide
- The 3 Things That Decide Whether a Cut Works on Thick Hair
- The 22 Styles, Grouped So You Can Find Your Match Fast
- Group 1: The Everyday Lobs (Styles 1 to 5)
- Group 2: Layers That Take the Weight Out (Styles 6 to 10)
- Group 3: Shaggy, Textured and Cool (Styles 11 to 15)
- Group 4: Bangs and Face Framing (Styles 16 to 19)
- Group 5: Curls, Waves and Special Textures (Styles 20 to 22)
- The 1-2-3 Thick Hair Method
- At a Glance
- Do This Not That
- Your Salon Weekend Plan
- Take It Further
- Stylist’s Cheat Sheet
- Questions People Ask
The 3 Things That Decide Whether a Cut Works on Thick Hair
Before you pick a style, these three things decide almost everything.
1. Where the weight comes out. Thick hair goes wrong when the bulk sits at the sides and underneath. The fix is removing weight from the interior and the mid-lengths, not from the surface. Long interior layers, hidden undercuts, and point-cut ends take the weight out while the outside still looks full. If a stylist only thins the surface, you get frizz and spiky regrowth.
2. Where the layers start. Long layers that start below the chin remove weight gradually and keep the shape calm. Short layers stacked on top do the opposite on thick hair. Each short piece adds width, so the head gets wider and the triangle comes back. The rule is simple: layers that stay inside the shape slim it down, layers chopped into the surface puff it up.
3. How much length you keep. Medium length is the honest sweet spot for thick hair. Collarbone length or just past the shoulders gives you enough weight to keep the hair settled without the heaviness of very long hair. Hair that sits exactly on the shoulders flips outward and needs daily taming. Very long thick hair gets heavy and hard to dry. Medium gives you length you can still tie up, curl, or braid, without the weight that makes thick hair unmanageable.
Keep those three in mind and every style below will make sense.
One more thing worth saying plainly. The thick hair hairstyles that work best are rarely the most dramatic ones. Medium haircuts, medium layered haircuts, and medium length layered haircuts all do the same quiet job: they take weight out of the inside so the outside can move. Shoulder length hairstyles do it better than any other length, because the hair is short enough to stay light and long enough to style. That is the whole idea behind the 22 styles below.
Group 1: The Everyday Lobs
These five are the safest starting points. A lob, a long bob that hits the collarbone, is the shape stylists reach for first on thick hair, because it keeps enough weight to stop the hair puffing out while sitting short enough to style in minutes.
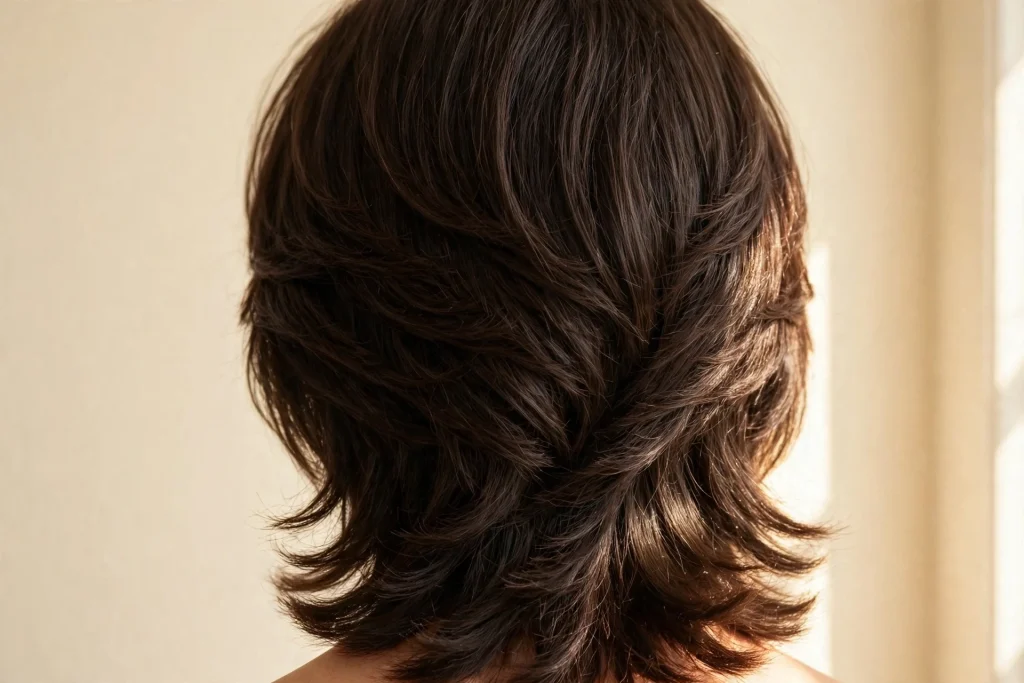
1. The Layered Lob
This is the classic for a reason. The hair sits at the collarbone, and long layers run through the back and sides to take weight out of the bottom two-thirds. It flatters almost every face shape, and it is the easiest medium length hairstyle for thick hair to live with day to day. Ask for the shortest layer to start below the chin, never higher, so the layers remove weight gradually instead of all at once. It suits straight, wavy, and lightly curly hair, and it grows out gracefully because the layers are long.
Styling tip: Rough dry your hair upside down until it is about 80 percent dry, then flip it back and smooth the ends with a round brush. A pea-sized drop of lightweight leave-in on the mid-lengths keeps the layers moving without weighing them down.
You may also like: Style 6, Long Layers That Start Below the Chin, if you want to keep more length than a lob.
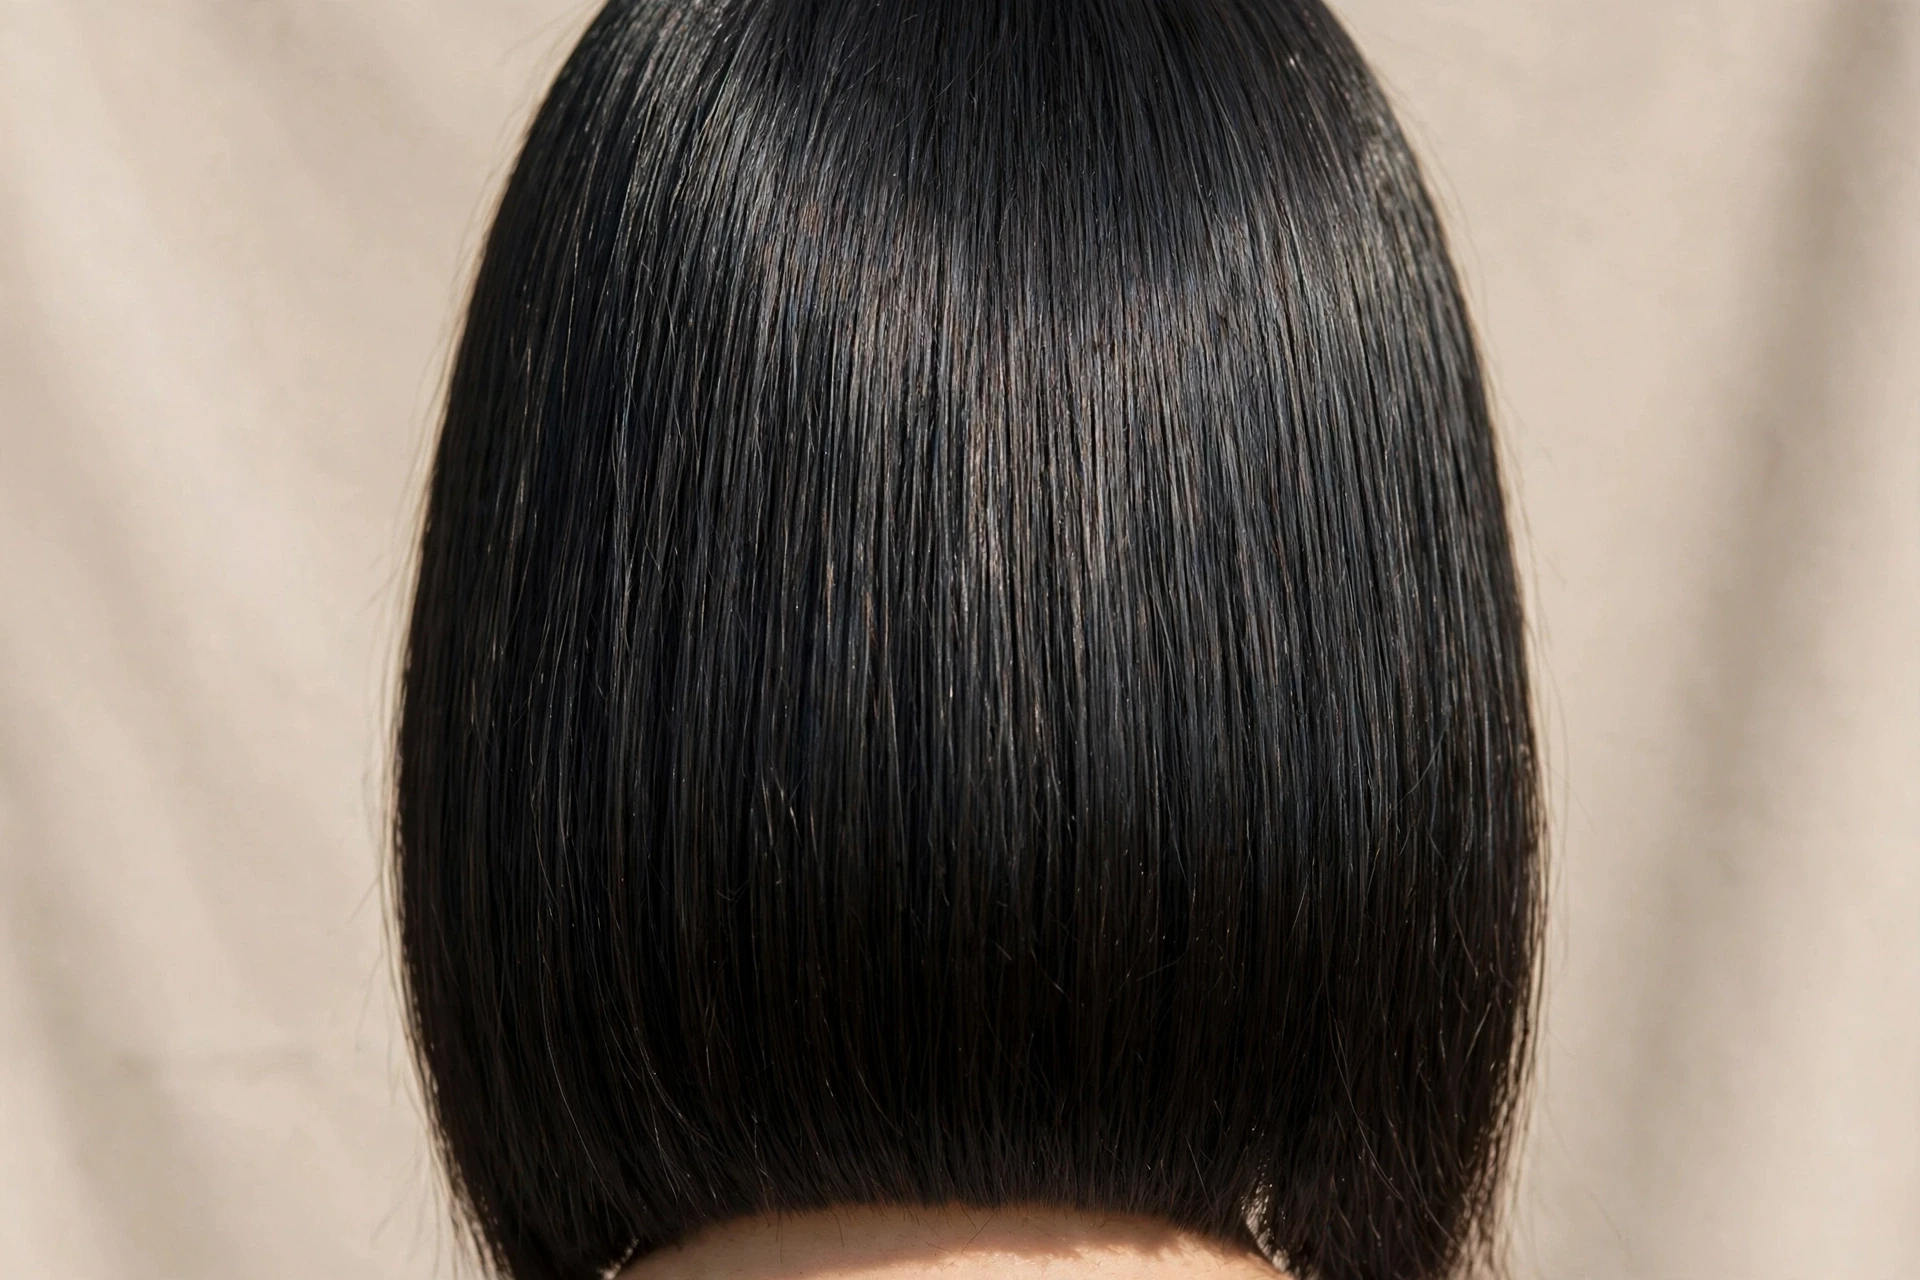
2. The Blunt Lob With Hidden Layers
This one looks blunt from the outside and feels light on the inside. The perimeter is cut straight at or just above the collarbone, which gives thick straight hair a polished, expensive edge. Underneath, the stylist cuts hidden interior layers that remove bulk without any visible steps. It is the best of both worlds for thick hair that looks great blunt but feels too heavy. It suits straight and slightly wavy hair best, and it works beautifully on round and oval faces because the strong line balances softness.
Styling tip: Use a flat iron on the ends only, one slow pass, and bend the iron slightly inward at the very bottom so the blunt edge tucks under instead of flipping out. Skip heavy oils, which make a blunt cut look greasy by midday.
You may also like: Style 3, The Collarbone Cut With Invisible Layers, for the same clean look with even less visible layering.
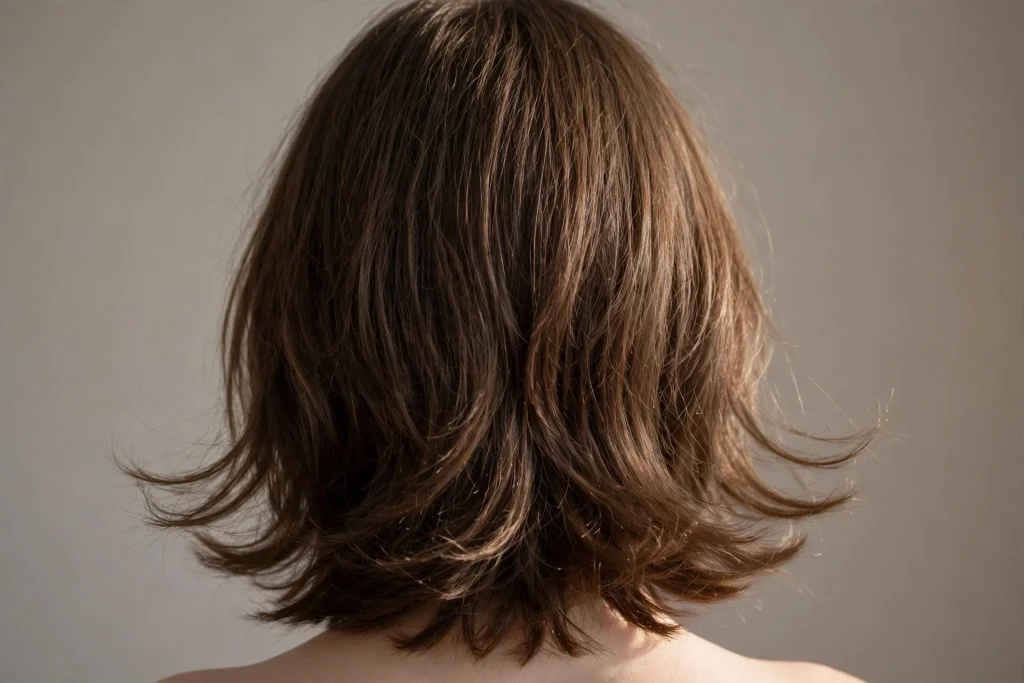
3. The Collarbone Cut With Invisible Layers
Invisible layers are cut into the interior of the hair so the surface stays smooth while the inside loses bulk. There are no visible steps and no choppy lines, which makes this the safest all-rounder for very thick hair. The length sits right at the collarbone, and the cut looks almost one-length from the front, but it moves like layered hair. Ask your stylist for interior layering or channel cutting, and make clear you do not want the surface touched. It suits every texture, and it is the cut to pick if you have been burned by bad layers before.
Styling tip: This cut air dries better than most. Scrunch a lightweight mousse into damp hair, let it dry naturally, and you get soft movement with almost no effort. If your hair is straight, a quick pass with a large-barrel curling iron on the bottom third adds bend without bulk.
You may also like: Style 2, The Blunt Lob With Hidden Layers, if you want a sharper edge on the same idea.
4. The A-Line Lob
The A-line lob is slightly shorter at the back and longer at the front, which gives thick hair a shape that pulls forward and frames the face. The angle stops the back from looking boxy, and the longer front pieces keep the style feeling feminine. It suits straight and wavy hair, and it is a great pick for square and round faces because the diagonal line draws the eye down. Ask for a gentle angle, not a dramatic one, or the front can look disconnected from the back on very dense hair.
Styling tip: Part your hair slightly off centre to show off the angle. A round brush on the front sections, pulled forward and down, keeps the longer pieces sitting neatly instead of flipping outward.
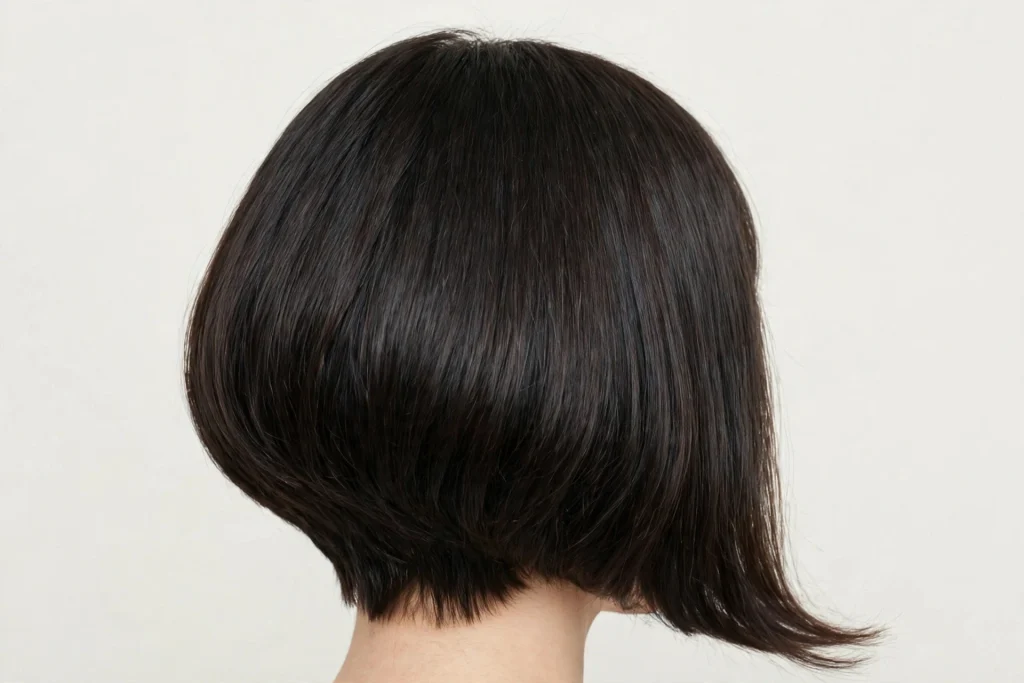
You may also like: Style 5, The One-Length Lob With a Deep Side Part, for a simpler version of the same length.
5. The One-Length Lob With a Deep Side Part
Sometimes the simplest answer is the right one. A one-length lob at the collarbone with a deep side part works on thick hair because the weight of the hair holds the shape without layers to control the bulk. The deep part breaks up the solid curtain and adds volume at the crown where you want it. It suits thick straight hair best, and it is the lowest maintenance cut in this whole list. The one warning: on very dense hair, ask the stylist to remove a little interior weight at the nape, or the back can feel heavy as it grows out.
Styling tip: Tuck the shorter side behind your ear and let the longer side fall forward. A dab of texturizing spray at the roots on the fuller side keeps the part from collapsing by afternoon.
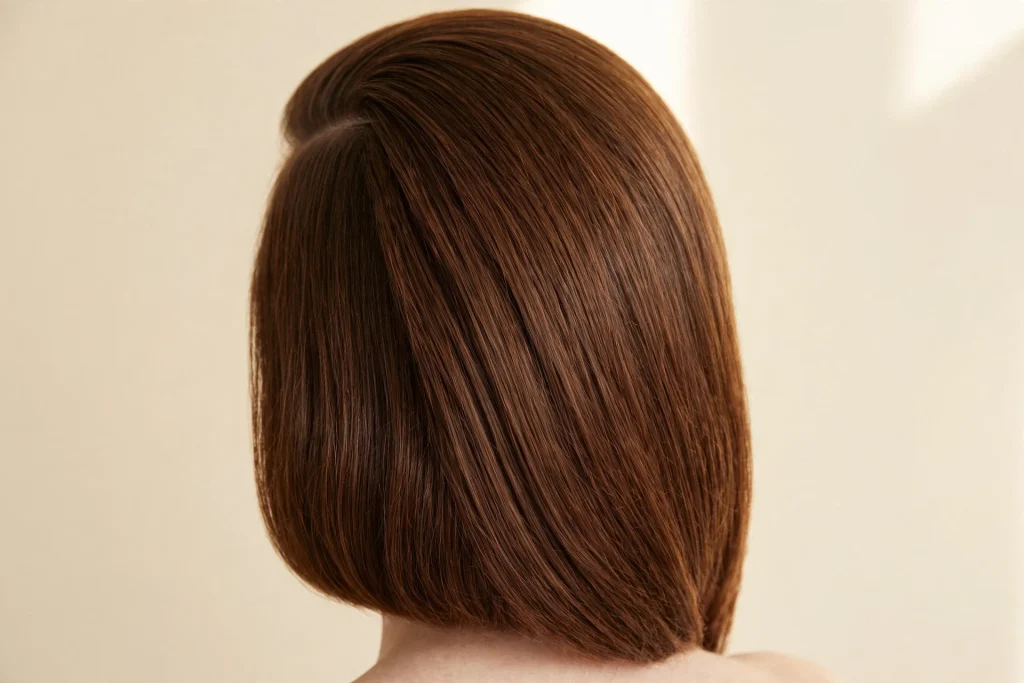
You may also like: Style 4, The A-Line Lob, if you want the same length with more shape at the front.
Group 2: Layers That Take the Weight Out
This group is all about layering done right. These cuts remove weight strategically, so your hair feels lighter without looking thinner.
6. Long Layers That Start Below the Chin
Long layers are the single best tool for thick hair, as long as they stay long. The layers start below the chin and cascade down, so the ends move instead of hanging like a curtain. This cut keeps your length, takes weight off the bottom third, and gives the front some lift without a fringe to maintain. It suits straight, wavy, and curly hair, and it is the cut stylists recommend first when someone says their hair feels too heavy. It is also why medium layered haircuts are the first thing most stylists suggest for thick hair, and why medium length layered haircuts show up in nearly every best-of list. Ask for the shortest layer at the cheekbone at the very highest, and longer layers through the back.
Styling tip: Layers shorten blow-dry time and help your hair hold its style. Dry your hair in sections, starting underneath, and use a lightweight leave-in on soaking wet hair, then a heat protectant, then a light mousse. Never use heavy creams or butters, they weigh down the mid-lengths.
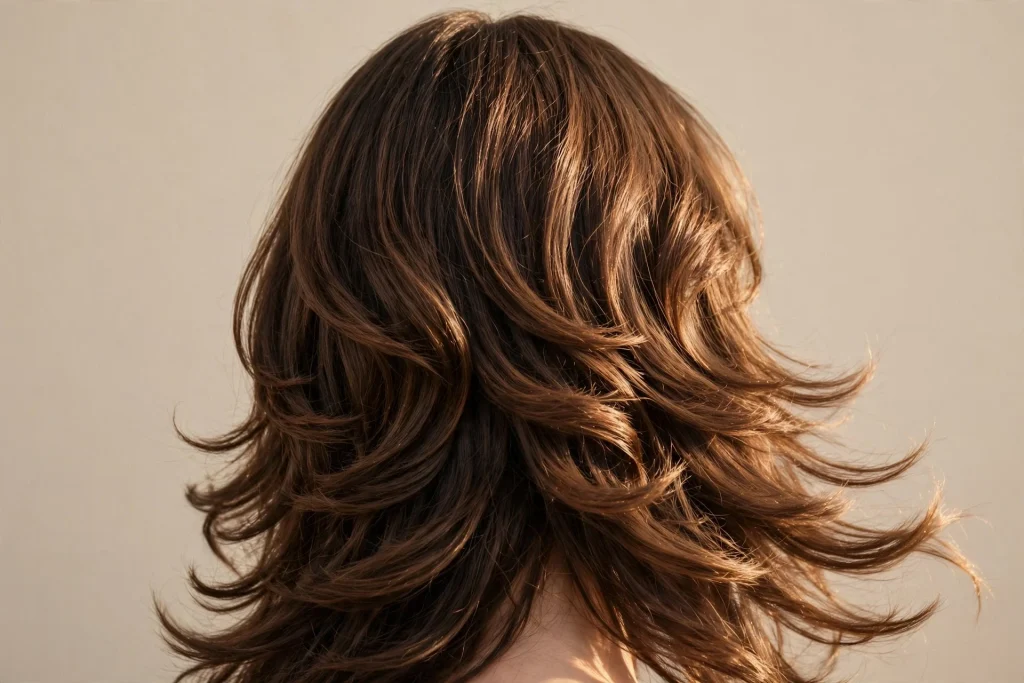
You may also like: Style 1, The Layered Lob, if you want these layers at a shorter length.
7. Face-Framing Layers on a Medium Cut
Face-framing layers start at the cheekbones and angle down, breaking up the solid curtain around your face without touching the fullness at the back. When thick hair sits wide, the front is usually the culprit, and these layers fix it. They suit every face shape, and they are the easiest way to make a medium cut feel fresh without changing the length. Ask for face-framing that begins below the chin on very dense hair. Higher layers can pouf outward instead of lying flat.
Styling tip: Blow dry the face-framing pieces forward with a round brush, then flick them back. That bend keeps them off your cheeks and stops them from falling into your eyes by lunchtime.
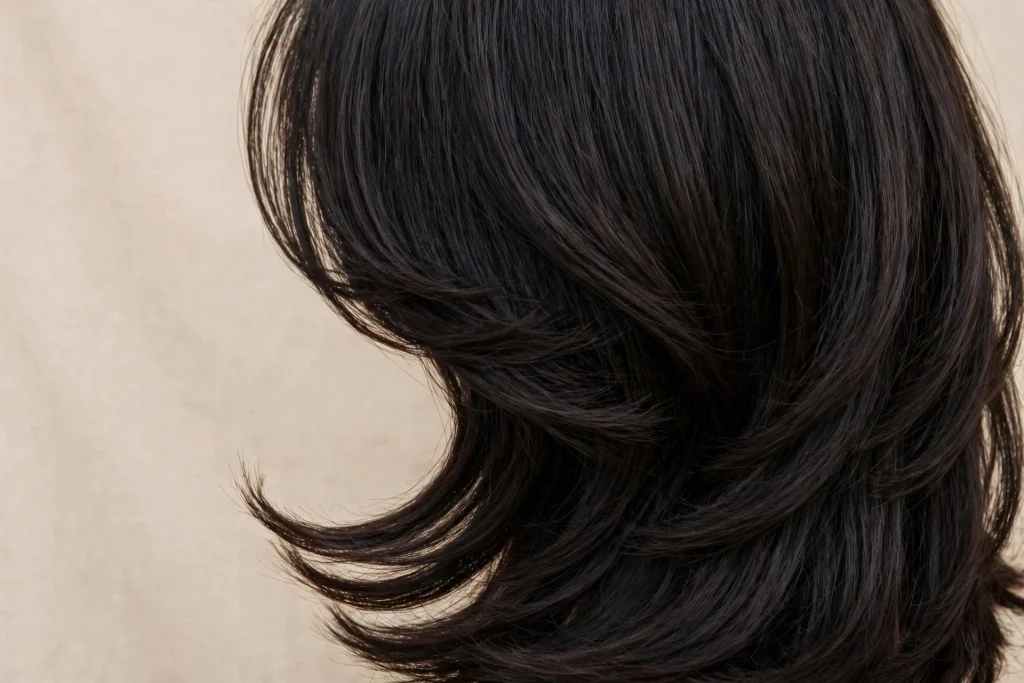
You may also like: Style 16, Curtain Bangs With Medium Layers, for face-framing that goes further into a fringe.
8. The Butterfly Cut
The butterfly cut is heavily layered and face-framing, with a high-volume look, and it actually started as a style that works well on thick hair. This is one of the few viral cuts where the trend genuinely suits dense hair rather than needing heavy adaptation. The top layers are short and airy, the bottom layers stay long, and the whole shape moves like wings when you turn your head. It suits wavy and straight hair, and it is a great pick if you want volume and drama without the triangle. Ask your stylist to adapt it for your density, with the shortest layer no higher than the chin.
Styling tip: This cut loves a bouncy blowout. Use a large round brush and roll each section up and away from your face. A light volumizing spray at the roots gives the crown lift without the crunch of heavy product.
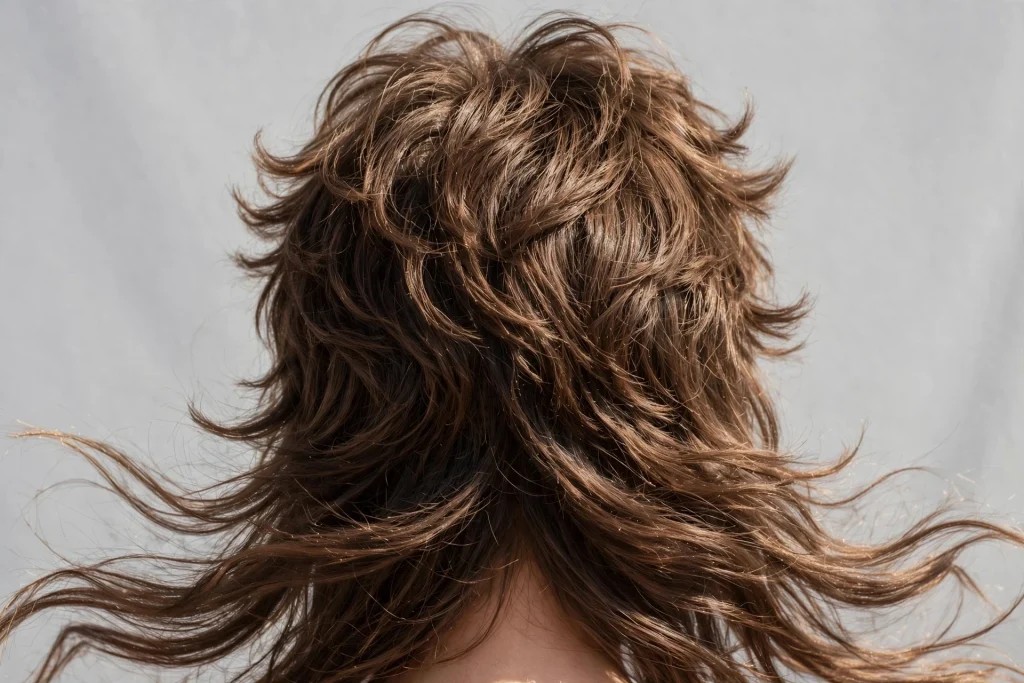
You may also like: Style 11, The Modern Shag, for a similar layered shape with a cooler, messier edge.
9. The U-Cut With Long Layers
A U-cut shapes the perimeter into a soft curve, shorter at the sides and longer in the middle at the back, which stops thick hair from sitting in one heavy horizontal line. Paired with long layers, it is one of the most flattering medium length haircuts for women with thick hair, because the curved edge moves when you do and the layers keep the weight down. It suits straight and wavy hair, and it grows out better than a V-cut because the curve is forgiving. Ask for a soft U, not a deep one, or the sides can look too short on dense hair.
Styling tip: The U shape shows best when your hair is straight or loosely waved. A flat iron through the bottom third, following the curve, keeps the edge looking intentional instead of ragged.
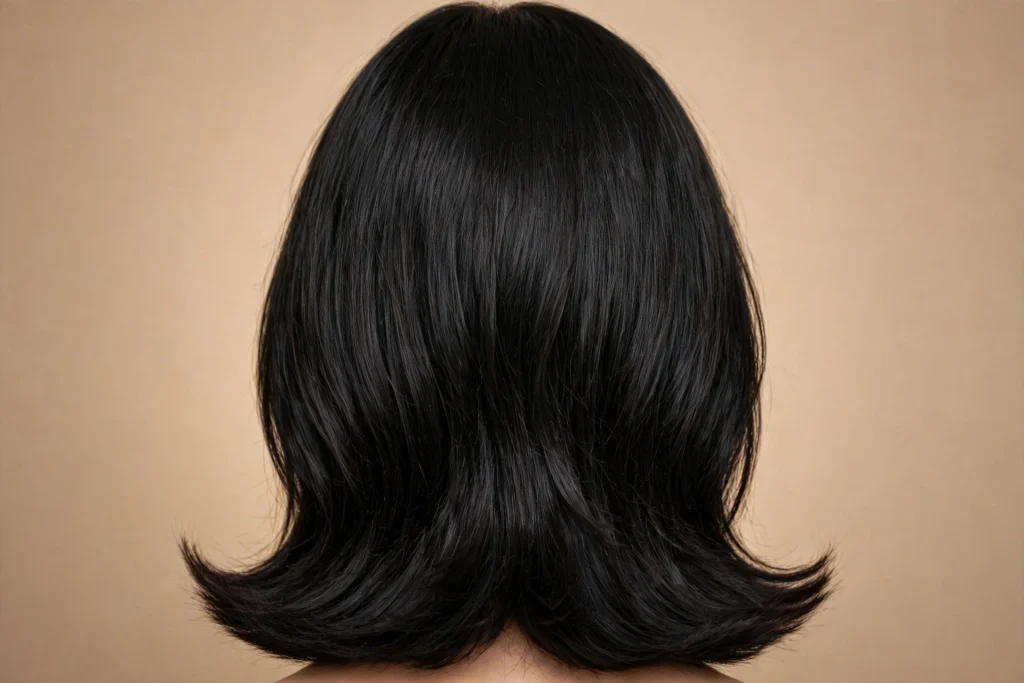
You may also like: Style 10, The V-Cut With Choppy Ends, for a sharper version of a shaped perimeter.
10. The V-Cut With Choppy Ends
The V-cut shapes the back into a gentle point, and choppy ends break up the heavy line so the hair does not sit like a block. It suits thick straight hair that needs movement at the ends, and it looks great from behind, which matters if you wear your hair down most days. The point should be soft, not sharp, or it can look dated on medium length. Ask the stylist to point cut the ends vertically, which softens a heavy line without shortening it.
Styling tip: Choppy ends love a little texture. Work a pea-sized amount of styling cream through the bottom two inches only, and scrunch gently. Keep product off the roots or the top goes flat while the ends go wild.
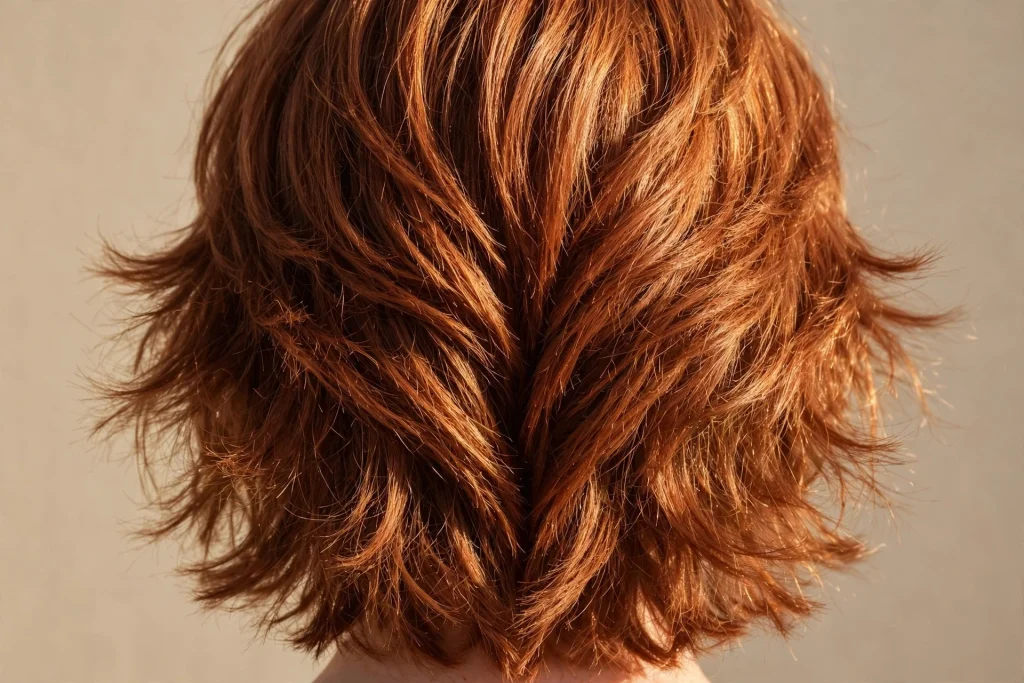
You may also like: Style 9, The U-Cut With Long Layers, for a softer curved edge instead of a point.
Group 3: Shaggy, Textured and Cool
These five lean into texture. A shag is a debulking machine, because its layered structure is designed to break up density, and these cuts use that on purpose.
11. The Modern Shag
The shag is having a major revival, and thick hair is the ideal canvas for it. Heavy layering runs through the whole head, with a curtain fringe at the front and feathered layers at the ends. For thick hair, this cut does serious work in removing bulk and creating that effortlessly cool, rock-and-roll texture. This version keeps it soft, with airy layers and a light fringe, not a harsh chop, so it stays wearable for work and weekends. It suits wavy and straight hair, and it is the best pick if you want your hair to look styled with almost no effort.
Styling tip: Let it air dry with a little salt spray scrunched through the mid-lengths. The shag looks better slightly messy, so do not over-brush it. A wide-tooth comb is all you need.
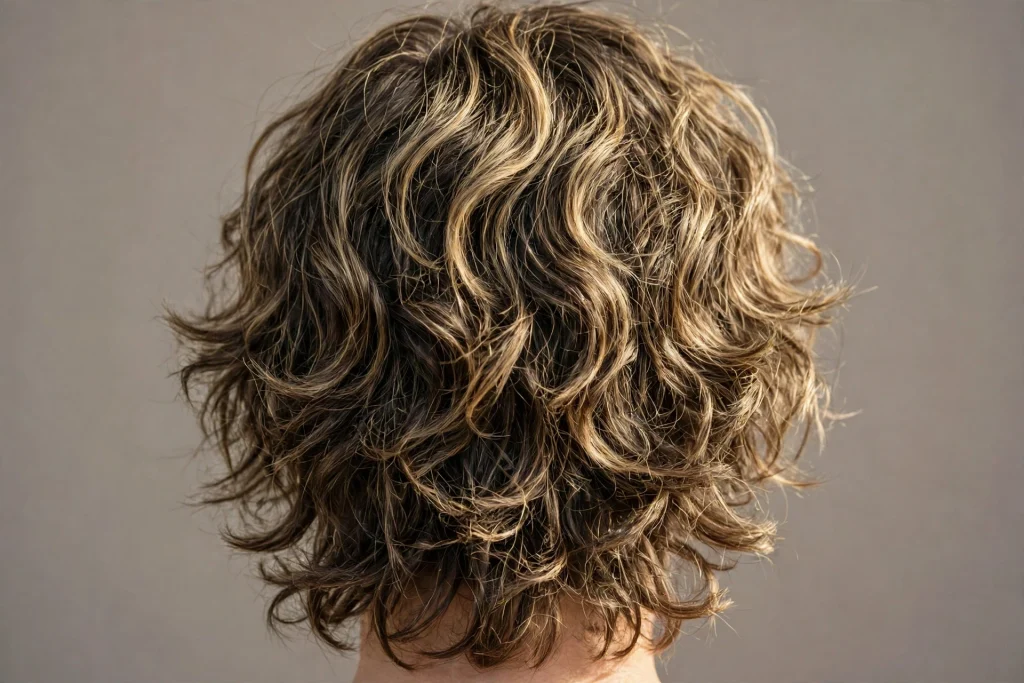
You may also like: Style 12, The Shoulder-Length Wolf Cut, for a bolder version of the same idea.
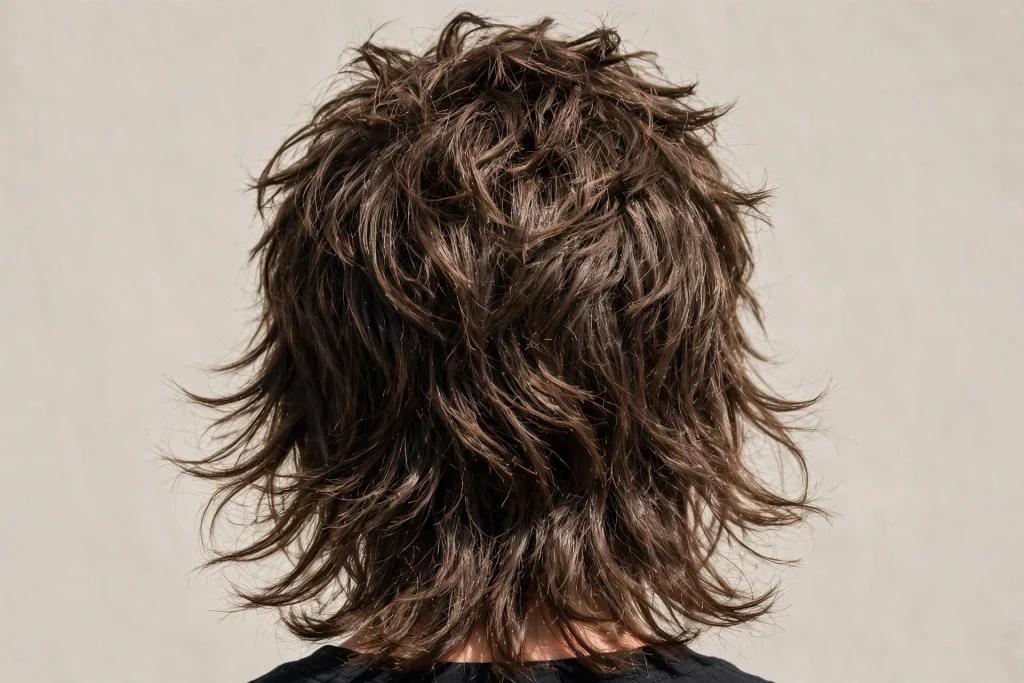
12. The Shoulder-Length Wolf Cut
The wolf cut combines a shag’s heavy interior layering with a mullet’s shorter crown pieces. On thick hair, it removes a lot of bulk at the top while leaving movement through the ends, which suits people who want texture without going short. The shoulder-length version is more wearable than the short one, and it keeps enough length to tie back. It suits wavy and curly hair best, and it is a strong pick if you like an edgy, lived-in look. Ask your stylist to keep the crown pieces blended, not disconnected, or the grow-out gets awkward fast.
Styling tip: This cut needs almost no heat. A curl cream on damp hair, scrunched and left to dry, gives you the shape. If your hair is straight, a quick pass with a waver on the top layers adds the texture the cut is built for.
You may also like: Style 11, The Modern Shag, for a softer take on heavy layering.
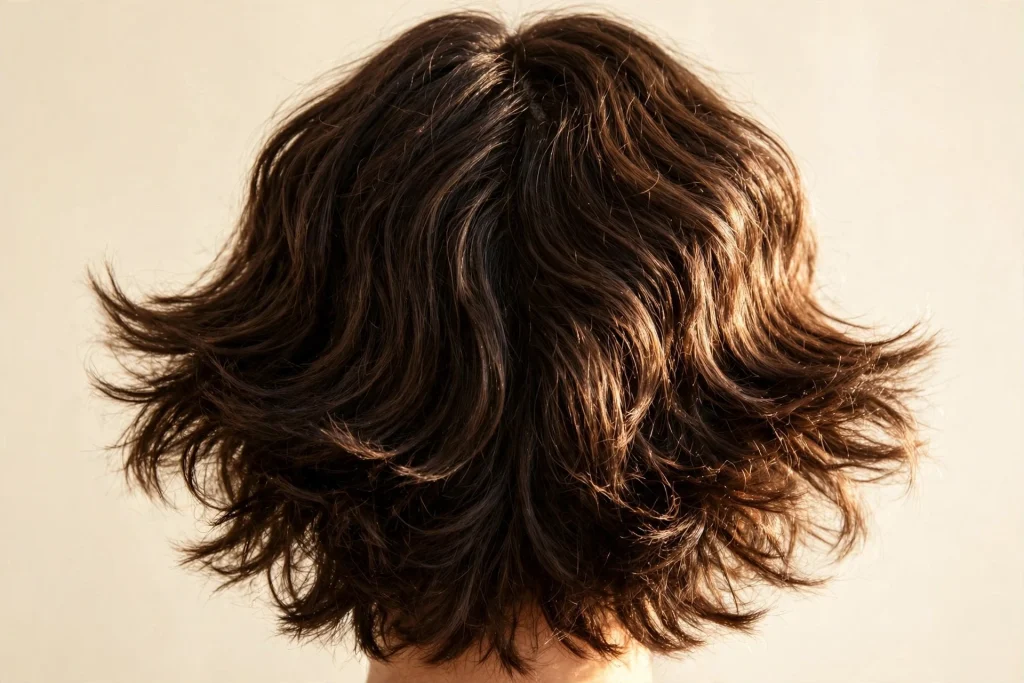
13. The Textured Lob With Curtain Bangs
This is the lob with a twist: textured ends plus curtain bangs that part in the middle and dissolve into the layers. Curtain bangs are thick hair’s safest fringe, because they part in the middle and turn density into softness instead of bulk. The textured ends stop the lob from looking boxy, and the whole cut frames the face without a heavy fringe to maintain. It suits straight and wavy hair, and it works on round, oval, and heart-shaped faces. Ask for the bangs cut slightly heavier than standard, so they do not go wispy and separate on dense hair.
Styling tip: Blow dry the curtain bangs with a round brush, rolling them away from your face on each side. A tiny bit of dry shampoo at the roots on day two keeps them from sticking together.
You may also like: Style 16, Curtain Bangs With Medium Layers, for curtain bangs at a slightly longer length.
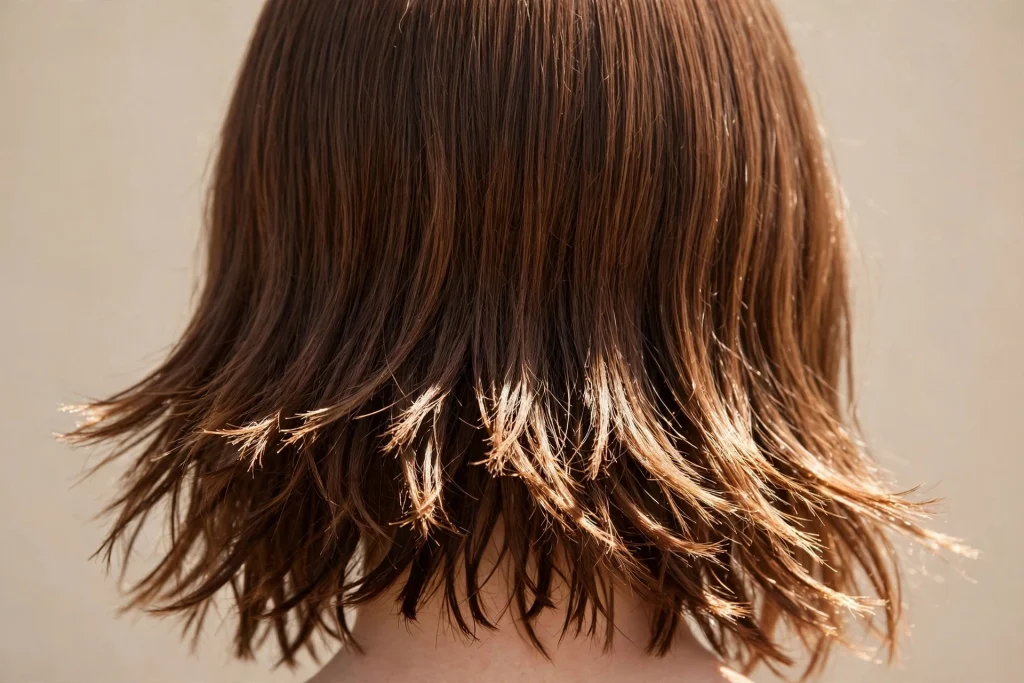
14. The Choppy Piecey-End Cut
This cut keeps the length at the shoulders and breaks up the ends into soft, piecey bits. The interior stays fairly calm, so the shape holds, but the ends move and separate instead of sitting in one solid line. It suits thick straight hair that looks too neat and heavy, and it is a great pick if you want a cut that looks done with almost no styling. The piecey ends also hide grow-out well, so you can stretch a few extra weeks between trims. Ask the stylist to point cut the last inch only, and to keep the top smooth.
Styling tip: A lightweight wax or pomade, warmed between your palms and pressed onto the ends, makes the pieces separate and stay put. Use a tiny amount. Too much and the ends clump together.
You may also like: Style 10, The V-Cut With Choppy Ends, for choppy texture with a shaped back.
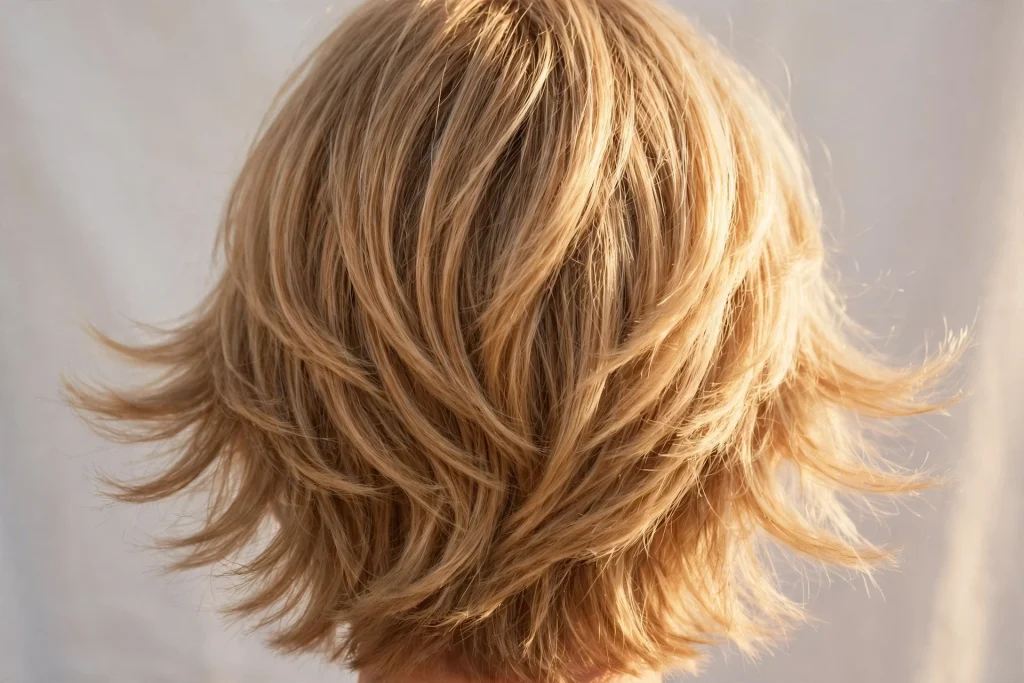
15. The Feathered Mid-Length Cut
Feathered layers are cut at an angle so the ends flick outward softly, like feathers, instead of sitting in a blunt line. On thick hair, feathering removes weight from the ends and adds airy movement that makes the whole cut feel lighter. It suits straight and wavy hair, and it is a lovely pick if you like a soft, feminine finish rather than a sharp one. The feathering should stay in the bottom third, or the top can lose its shape. Ask for slide cutting on the ends, which removes weight gradually instead of in one line.
Styling tip: A round brush is your friend here. Blow dry each section outward at the ends to bring out the feathered flick. A light hairspray holds the shape without making it stiff.
You may also like: Style 6, Long Layers That Start Below the Chin, for layers that stay smoother at the ends.
Group 4: Bangs and Face Framing
Bangs on thick hair scare a lot of people, and honestly, a heavy straight fringe on dense hair is a commitment. These four are the safer ways in.
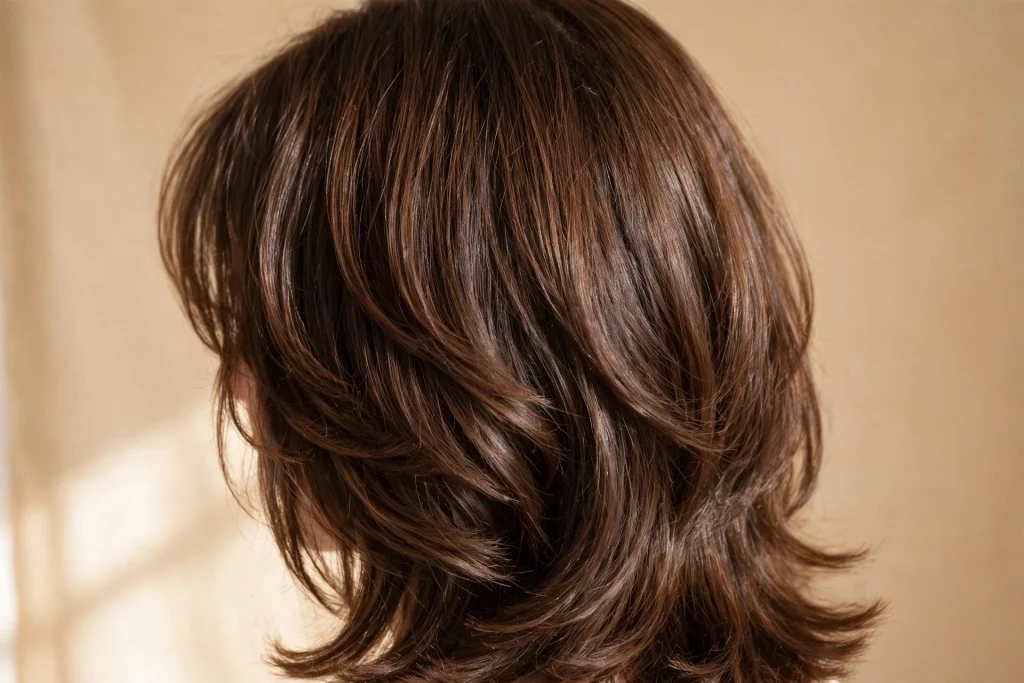
16. Curtain Bangs With Medium Layers
Curtain bangs part in the middle and blend into long layers, so they frame the face without a solid wall of hair across the forehead. On thick hair, they work because the density makes them look full and intentional instead of thin and stringy. The medium layers underneath keep the weight down through the back and sides. This is the fringe to pick if you have never had bangs before. Ask for them cut slightly longer than you think, at cheekbone length to start, because thick bangs shrink up as they dry.
Styling tip: Dry curtain bangs first, before the rest of your hair, while they are still damp. A round brush, rolled away from your face on each side, sets the part. If they misbehave, a flat iron on a low heat for three seconds each side fixes them.
You may also like: Style 13, The Textured Lob With Curtain Bangs, for the same fringe at lob length.
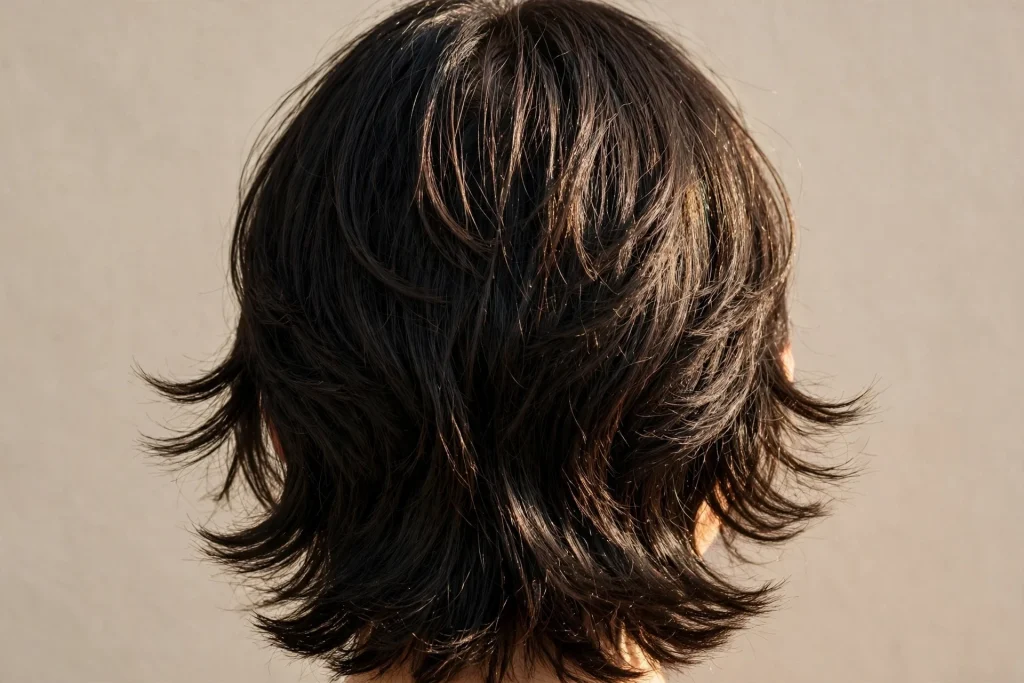
17. Bottleneck Bangs on a Medium Cut
Bottleneck bangs are narrow at the top and wider at the cheekbones, shaped like the neck of a bottle. They are the most forgiving fringe for thick hair, because the shape keeps the centre light and lets the sides blend into the layers. They suit oval, round, and heart-shaped faces, and they grow out better than a blunt fringe, so you are not at the salon every four weeks. Ask your stylist to keep the centre short and wispy and the sides longer, so the shape stays soft on dense hair.
Styling tip: Bottleneck bangs air dry well if you comb them into place while damp and leave them alone. If they separate, a spritz of water and a quick finger comb resets them in seconds.
You may also like: Style 18, Side-Swept Bangs With a Layered Lob, for a fringe that sweeps to one side instead.
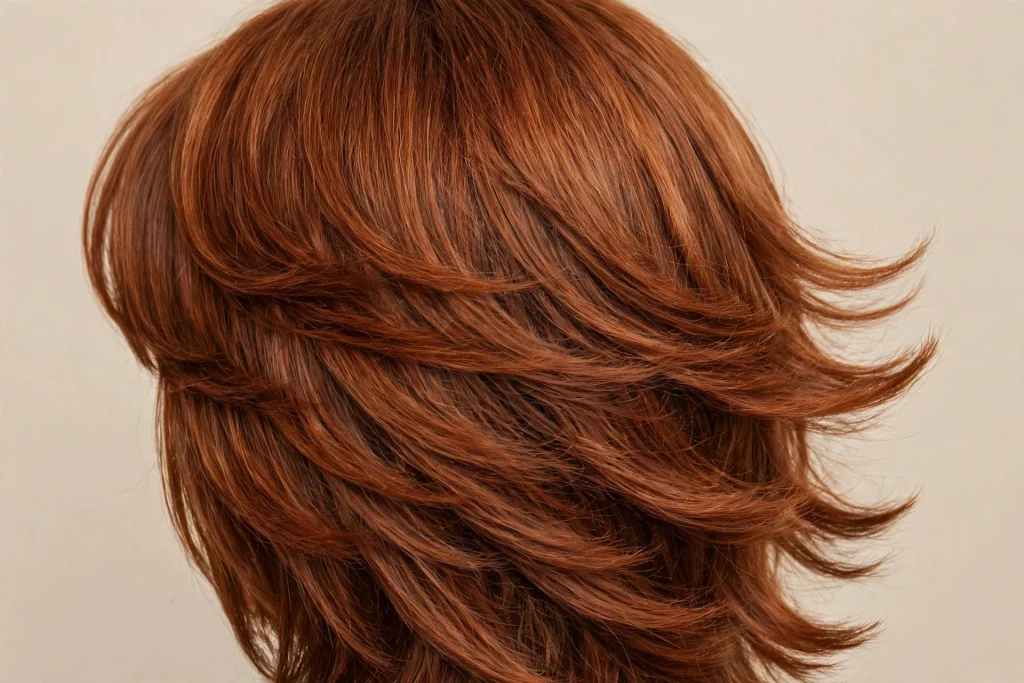
18. Side-Swept Bangs With a Layered Lob
Side-swept bangs are the lowest commitment fringe for thick hair. They sweep across the forehead to one side and melt into the layers of a lob, so there is no harsh line and no daily battle to keep them straight. They suit every face shape, and they are the best pick if you want the softness of a fringe without the upkeep of a blunt cut. Ask for the bangs to start at the cheekbone on the short side and angle down to the jaw, so they blend instead of sitting apart from the rest of the cut.
Styling tip: Part your hair on the opposite side from where the bangs fall, which gives them lift at the root. A round brush pulled across the forehead sets the sweep, and a bobby pin on the heavy side keeps them in place on windy days.
You may also like: Style 17, Bottleneck Bangs on a Medium Cut, for a centre-parted fringe instead of a side sweep.
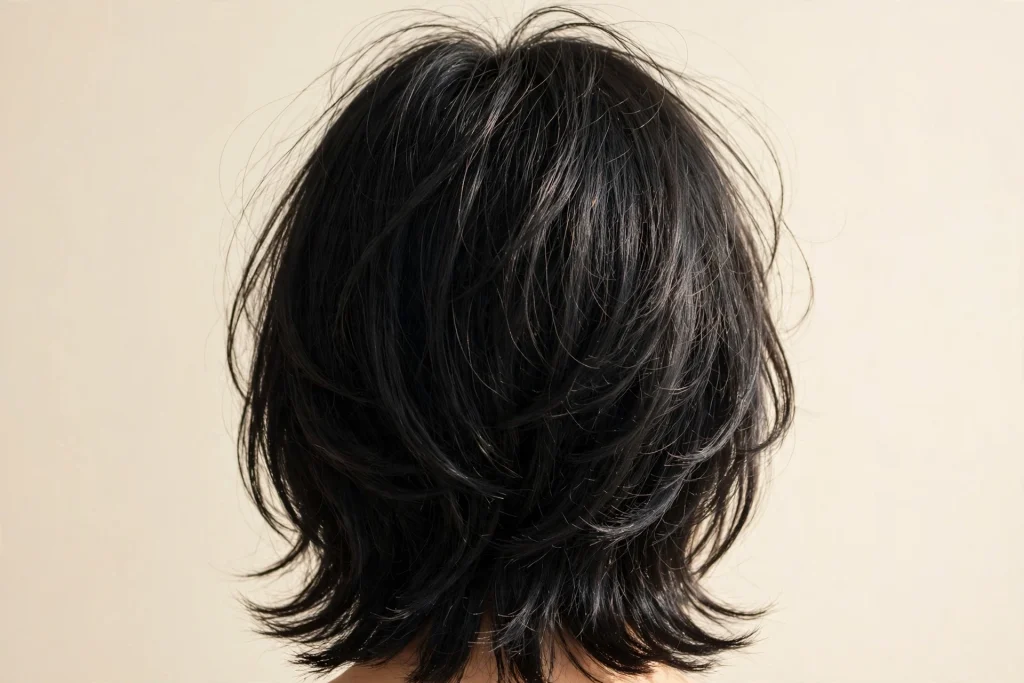
19. A Wispy Fringe With a Shoulder Cut
A wispy fringe is light, airy, and see-through in places, which sounds wrong for thick hair but works because the stylist thins the fringe itself. The result is softness across the forehead without a heavy block of hair, and it pairs beautifully with a shoulder-length cut that has long layers. It suits straight and wavy hair, and it is a great pick for square and long faces because it shortens the forehead visually. The warning is real: a wispy fringe needs a trim every four to six weeks, or it grows into your eyes fast.
Styling tip: Wash just the fringe on non-wash days. It takes thirty seconds in the sink, and it keeps the lightest part of your cut from going greasy while the rest still looks fine.
You may also like: Style 16, Curtain Bangs With Medium Layers, for a fringe with more coverage and less upkeep.
Group 5: Curls, Waves and Special Textures
Thick hair is rarely just thick. It is thick and wavy, or thick and curly, or thick and straight with a mind of its own. These three are for the texture you actually have.
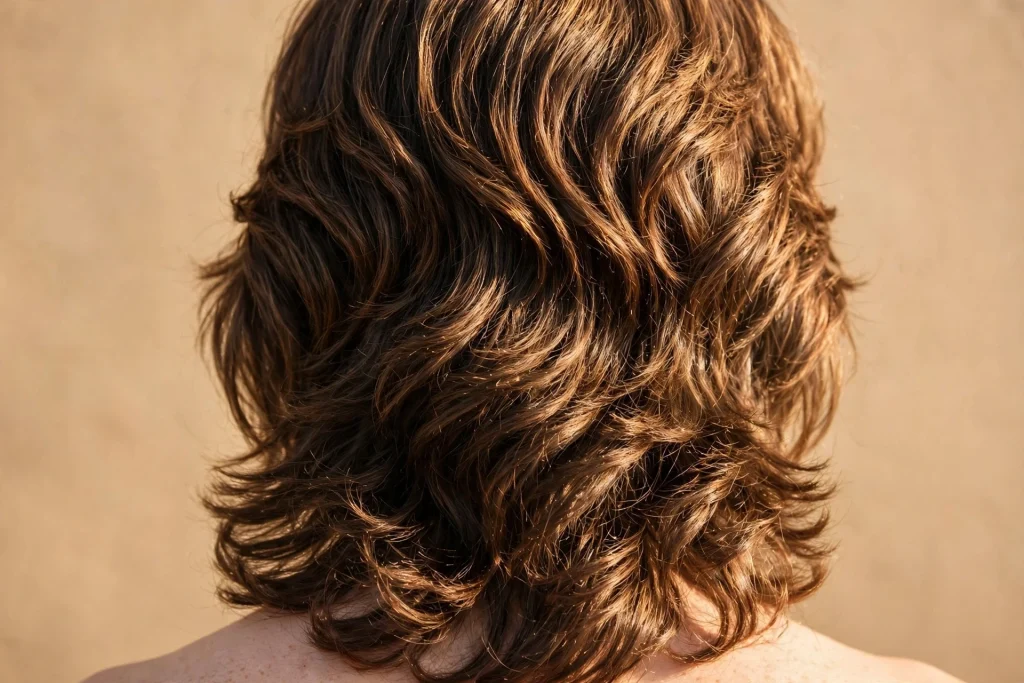
20. The Layered Cut for Thick Wavy Hair
Wavy thick hair needs a cut that follows the wave instead of fighting it. Long layers shaped around the natural wave pattern remove weight from the inside, so the waves form properly instead of expanding outward into a triangle. This cut is shaped dry or on wavy hair, because wet wavy hair springs up as it dries and a wet cut ends up too short. It suits anyone with a natural wave, and it is the easiest wash-and-go cut in this guide. Ask your stylist to cut it dry, or at least to check the shape once it is dry.
Styling tip: Do not brush wavy hair dry. Scrunch a curl cream into soaking wet hair, let it dry untouched, and scrunch out the crunch once it is fully dry. That is the whole routine, and it works.
You may also like: Style 21, The Curly Lob, if your hair is curly rather than wavy.
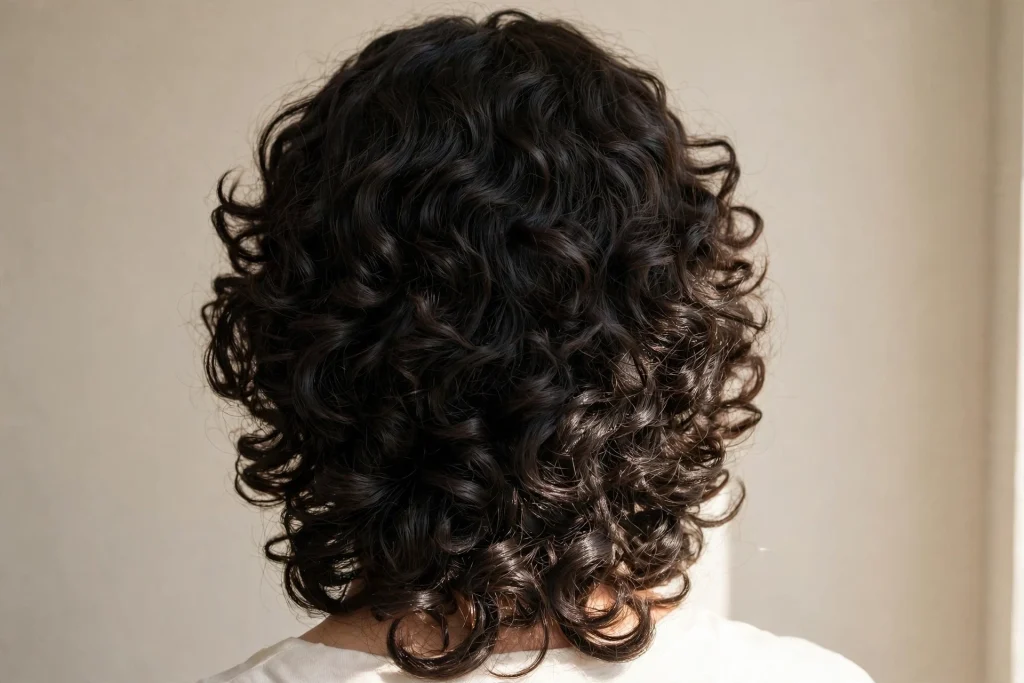
21. The Curly Lob
A curly lob is a long bob cut for thick curly hair, and the trick is cutting the curls dry, one curl at a time, so the shape accounts for shrinkage. The layers are long and rounded, which stops the curls from stacking into a triangle, and the length sits at the collarbone when dry. It suits all curl patterns, from loose curls to tight coils, and it is the cut to pick if your curls have always been cut like straight hair and ended up wrong. Ask for a stylist who cuts curly hair dry. It matters more than the style name.
Styling tip: Wash and condition, then apply leave-in and curl cream to soaking wet hair. Diffuse on low heat or air dry, and do not touch the curls until they are fully dry. The less you fuss with them, the better they sit.
You may also like: Style 20, The Layered Cut for Thick Wavy Hair, for a looser wave pattern.
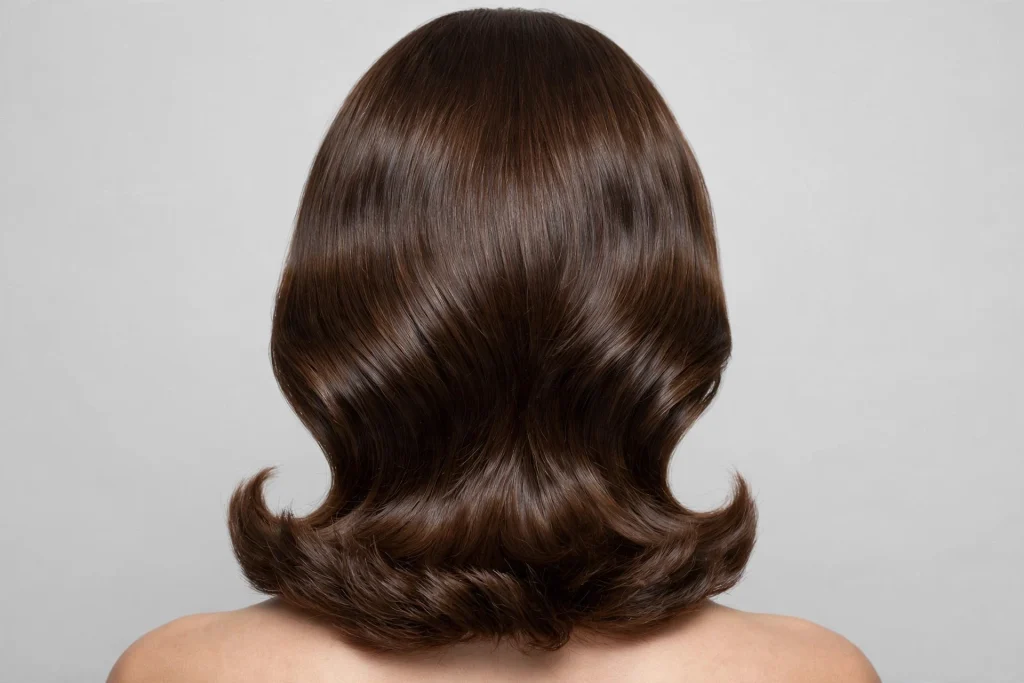
22. The Sleek Blowout Lob
The last one is for the days you want to look polished. The sleek blowout lob is a collarbone cut with smooth, bouncy ends and a glossy finish, and thick hair holds a blowout better than fine hair does, so the style lasts. The cut underneath is simple: long layers with strong ends, so the blowout has something to hold onto. It suits straight and wavy hair, and it is the cut to pick for work events, weddings, and any day you want your hair to look like you tried. Ask your stylist to keep the ends strong and the interior light, so the blowout has volume without weight.
Styling tip: Blow dry in sections with a large round brush, rolling each section up and under. Finish with a cool shot from the dryer to set the shine, and a drop of serum on the ends only. The whole thing takes fifteen minutes once you know the order.
You may also like: Style 1, The Layered Lob, the everyday version of this same shape.
The 1-2-3 Thick Hair Method
Every style in this guide works better if you follow the same simple routine. I call it the 1-2-3 Thick Hair Method, and it takes about fifteen minutes once you know it. It works on every cut in this list, from shoulder length haircuts for women to medium haircuts for women, because the routine is about the hair, not the name of the cut. The same goes for any of the medium length haircuts for women below.
1. Cut the weight out first. No styling routine fixes a cut that keeps all the weight in the wrong places. Before you buy a single product, make sure your cut has interior layers, a hidden undercut, or long layers that start below the chin. One good cut does more than five products.
2. Dry it in two stages. Rough dry your hair upside down until it is about 80 percent dry. That gets the bulk of the water out fast and builds lift at the roots. Then flip it back and smooth only the sections that need it, with a round brush or a flat iron on the ends. Drying the whole head smooth from soaking wet takes twice as long and flattens the shape.
3. Use two products, not five. Thick hair needs a lightweight leave-in on soaking wet hair and one styling product after that, either a mousse for volume or a cream for smoothness. That is it. Heavy creams, butters, and oils weigh down the mid-lengths and make the cut look greasy by afternoon. Two light products beat five heavy ones every time.
At a Glance
Use this table to find your starting point. The best thick hair hairstyles match the problem you actually have, not the cut that looked good on someone else. Medium hairstyles work across every texture in this guide, and shoulder length hairstyles are the easiest place to start if you are unsure, because the length is forgiving while you figure out what your hair wants.
| If your hair is… | Start with | Ask for | Skip |
|---|---|---|---|
| Thick and straight | Style 2, Blunt Lob With Hidden Layers | Interior layers, blunt edge | Short choppy layers on top |
| Thick and wavy | Style 20, Layered Cut for Thick Wavy Hair | Dry cut, long layers | Brushing it dry |
| Thick and curly | Style 21, The Curly Lob | Dry curl-by-curl cut | Thinning shears on the surface |
| Very dense and heavy | Style 3, Collarbone Cut With Invisible Layers | Channel cutting, hidden undercut | A true one-length cut with no interior work |
| You want low maintenance | Style 5, One-Length Lob With Deep Side Part | Deep side part, nape debulk | A fringe that needs a trim every month |
| You want drama and volume | Style 8, The Butterfly Cut | Short top layers, long bottom layers | Heavy creams and butters |
| You have never had bangs | Style 16, Curtain Bangs With Medium Layers | Cheekbone-length start, soft blend | A blunt straight fringe |
Do This Not That
| Do this | Not that |
|---|---|
| Ask for weight removal from the interior and mid-lengths | Asking for thinning all over, which trades bulk for puffy, fuzzy ends |
| Keep layers long, starting below the chin | Short layers stacked on the crown, which add width |
| Keep your ends strong and the perimeter solid | Letting a stylist razor the surface, which causes frizz |
| Use a lightweight leave-in on soaking wet hair | Piling heavy creams on dry hair, which weighs it down |
| Get a trim every 8 to 12 weeks | Stretching past 12 weeks when your cut relies on interior debulking |
| Cut wavy and curly hair dry, or check it dry | Cutting curls wet and hoping the shape survives the spring-up |
| Say the exact words: remove weight inside, keep my ends strong | Saying just “thin it out,” which every stylist hears differently |
Your Salon Weekend Plan
You do not need a whole weekend for this. One Saturday morning does it.
Saturday morning, the appointment. Book the first slot of the day so your stylist is fresh and unhurried. Bring two or three photos of the style you want, all at the same length, and tell your stylist three things: your hair is thick and heavy, you want the weight out of the interior and mid-lengths, and you want the ends to stay strong. If you are still choosing, search for medium haircuts for women with your hair type in mind, and bring the photos that match your texture, not just the ones you like best. Show the photos, then let them feel your hair. A good stylist will lift the top layer and check the density underneath before they pick up the scissors.
Saturday afternoon, the first wash. Wash it yourself the same day if you can. Use a lightweight shampoo and conditioner, and try the two-stage drying method from the 1-2-3 above. This is your test drive. If the cut is right, it should feel lighter and move when you move, without you fighting it.
Sunday, the real test. Wear it down all day and see how it behaves by the afternoon. Does it widen into a triangle? Does it flip out at the shoulders? Does it feel heavy at the nape? If something is off, call the salon on Monday. Most good salons fix a cut for free within a week, and a small tweak to the interior layers is a ten-minute job.
Then every 8 to 12 weeks. Book the next trim before you leave the salon. Thick hair hides grow-out well, which is why it is tempting to stretch it, but the interior bulk comes back as it grows, and by week fourteen the triangle is back. A trim every 8 to 12 weeks keeps the shape, and a fringe needs attention every 4 to 6 weeks.
Take It Further
If you liked this guide, these articles from Supliice pair with it nicely. A fresh cut deserves an outfit that matches it, and the right jewellery finishes the look.
- Summer Work Outfits That Look Clean, Professional, and Easy to Wear
- Summer 2026 Outfit Ideas That Feel Light, Clean, and Easy to Wear
- Spring Brunch Outfit Ideas That Actually Make Getting Ready Easy
- Tulip Picking Outfit Ideas That Look Perfect in Photos and Feel Easy to Wear
- Minimal Jewelry Ideas That Make You Look Put Together Without Trying
- Medium Gold Hoops with Casual Outfits That Always Look Effortless
- Spring Brunch Outfit Ideas That Feel Effortless and Stylish
- Trendy April Nails That Feel Fresh and Clean
Stylist’s Cheat Sheet
Keep this on your phone for your appointment.
- The words to use: “Please remove weight from the interior and mid-lengths, but keep my perimeter and ends strong.”
- The technique to ask for: Point cutting or interior layering. Channel cutting if they offer it. A hidden undercut at the nape if your hair is very dense.
- The technique to refuse: A razor on the surface, and thinning shears used near the roots on the top layer. Both leave spiky regrowth and frizz.
- The length to ask for: Collarbone or just past the shoulders. Not on the shoulders, which flips out, and not very long, which gets heavy.
- The layer rule: The shortest layer starts below the chin. Shorter than that, and thick hair gets wider.
- The trim schedule: Every 8 to 12 weeks for the cut, every 4 to 6 weeks for a fringe.
- The product rule: Two light products. A lightweight leave-in on wet hair, plus one styling product. No heavy creams or butters.
- The drying rule: Rough dry upside down to 80 percent, then smooth only what needs it.
Questions People Ask
A layered lob or collarbone cut with interior, invisible layers is the safest all-rounder. It removes weight without visible steps, keeps enough length to feel feminine, and is easy to style. If your hair is wavy or curly, a shaped cut that follows your natural texture, like a rounded layered cut, stops the dreaded triangle.
It depends entirely on placement. Long, interior layers remove weight and make thick hair sit smaller and smoother. Short, bulky layers stacked on top can add width and make hair look bigger. The rule is simple: layers that stay inside the shape slim it down, and layers chopped into the surface puff it up.
Almost always layered, or at least thinned from the inside. A true one-length cut with zero interior work on very thick hair goes bulky and boxy as it grows out. If you love the blunt look, keep the blunt edge but ask for hidden interior layers underneath, so you get the shape without the weight.
Every 8 to 12 weeks is enough for most medium cuts, since thick hair hides grow-out well. A fringe needs attention every 4 to 6 weeks. If your cut relies on interior debulking, do not stretch past 12 weeks, because the bulk comes back as it grows and the triangle returns with it.
A Last Word
Thick hair is a gift, even on the mornings it does not feel like one. You will never wish for more volume, and you will never need extensions to make a style look full. The trade is that you need a cut built for your hair, not a cut designed for fine hair and forced onto yours. Medium length is where that trade pays off best. It is short enough to feel light and long enough to style, and with the weight taken out of the right places, your hair finally does what you ask it to do. That is why medium length hairstyles for thick hair keep showing up in every best-of list, and why the medium length hairstyles for women in this guide all sit at the collarbone or just past it.
Pick one style from this list, take the cheat sheet to your appointment, and use the exact words in it. Your stylist will know what you mean, and your hair will thank you for it. Then come back and tell me which one you picked. I read every comment, and I love hearing which cut finally fixed the triangle.
Neuman